A clear real estate photo editing workflow is essential for photographers who want to produce bright, clean, and professional property images.
When photographing homes, the camera often captures scenes with challenging lighting conditions. Bright windows, darker interiors, mixed lighting sources, and wide-angle distortion can all affect how the final image looks.
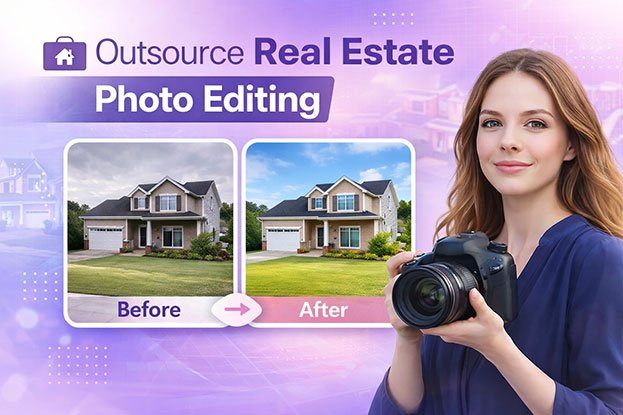
Even well-captured photos usually require editing before they are ready for property listings.
Without a structured editing process, photographers may spend unnecessary time adjusting each image individually. A consistent workflow helps photographers edit faster while maintaining high-quality results.
In this guide, we’ll walk through a step-by-step real estate photo editing workflow used by many professional photographers to prepare images for online listings.
Why Real Estate Photo Editing Is Important
Real estate photography plays a critical role in how buyers perceive a property online.
Most home buyers first discover properties through listing websites, where photos are often the first impression of the home.
Well-edited real estate images can help:
-
make rooms appear brighter and more spacious
-
correct color and lighting problems
-
highlight architectural details
-
create a professional presentation for listings
On the other hand, poorly edited images can make a property appear darker, smaller, or less inviting.
Because of this, post-processing has become a standard part of modern real estate photography.
Quick Overview of the Real Estate Photo Editing Workflow
Before diving into each step, here is a quick overview of the typical workflow many photographers follow when editing real estate images.
| Step | Editing Task |
|---|---|
| 1 | Import and organize photos |
| 2 | Select exposures or merge HDR images |
| 3 | Adjust exposure and white balance |
| 4 | Correct perspective and lens distortion |
| 5 | Perform window pull or exposure blending |
| 6 | Apply color correction and enhancements |
| 7 | Export images for delivery |
Following this process helps photographers maintain consistency and efficiency, especially when editing large numbers of property photos.
Choosing the Right Editing Software
Most photographers use professional editing software to perform these adjustments.
Two of the most commonly used tools are Adobe Lightroom and Adobe Photoshop.
Lightroom is often used for:
-
batch editing
-
exposure adjustments
-
color correction
-
HDR merging
Photoshop is typically used for:
-
advanced exposure blending
-
window pull editing
-
perspective corrections
-
detailed retouching
If you’re deciding which software fits your workflow best, you can also read our comparison of Lightroom vs Photoshop for Real Estate Photo Editing, where we explain how photographers use both tools during editing.
How Shooting Technique Affects Editing
The editing workflow also depends on how the photos were captured during the shoot.
Many photographers use techniques such as HDR bracketing or flambient lighting to capture multiple exposures of the same scene.
These techniques help photographers capture balanced lighting that can later be blended during editing.
If you want to understand how these shooting methods work, you may also find our guide on HDR vs Flambient Real Estate Photography helpful.
Understanding how images are captured makes the editing workflow much easier and more efficient.
Step-by-Step Real Estate Photo Editing Workflow
Once the photos have been captured, the next stage is post-processing. A structured real estate photo editing workflow helps photographers process images efficiently while maintaining consistent quality across all property photos.
Below is the step-by-step process many professional photographers follow.
Step 1: Import and Organize Your Photos
The first step is importing the images into your editing software and organizing them properly.
Photographers typically import their images into software such as Lightroom, where they can quickly review and manage the photos from a shoot.
At this stage, photographers usually:
-
review all captured images
-
remove blurry or unusable photos
-
select the best exposures for editing
-
organize files into folders or collections
Proper organization helps streamline the editing process, especially when working with large real estate shoots containing dozens of photos.
Step 2: Merge HDR Exposures or Select the Best Image
Many real estate photographers shoot bracketed exposures to capture both bright windows and darker interiors.
In these cases, the next step is merging the bracketed photos into a single HDR image.
The typical HDR merging process includes:
-
selecting bracketed exposures
-
merging exposures using HDR tools
-
adjusting alignment if necessary
This process helps balance highlights and shadows so that the room appears bright while still preserving the view outside the windows.
If the images were captured using flash or flambient techniques, photographers may instead select the best exposure and move directly to editing.
Step 3: Adjust Exposure and White Balance
After merging exposures or selecting the main image, photographers begin basic adjustments.
This step ensures the room appears bright, natural, and visually appealing.
Common adjustments include:
-
exposure correction
-
shadow recovery
-
highlight adjustment
-
white balance correction
-
contrast adjustments
Correct white balance is especially important in real estate photography because indoor lights often create yellow or orange color casts.
Proper exposure and color adjustments make the room look more natural and inviting.
Step 4: Correct Perspective and Lens Distortion
Real estate photographers often use wide-angle lenses to capture entire rooms. While this helps show more of the space, it can sometimes cause distortion.
Walls may appear tilted or vertical lines may not look perfectly straight.
Perspective correction is used to fix these issues.
Typical corrections include:
-
straightening vertical lines
-
correcting lens distortion
-
aligning walls and door frames
-
cropping the image for proper framing
These adjustments make the room appear more balanced and professionally photographed.
Step 5: Perform Window Pull or Exposure Blending
One of the most common challenges in real estate photography is capturing the view through windows.
Because outdoor light is much brighter than interior lighting, windows often appear overexposed.
A technique called window pull editing is used to restore the outside view.
This usually involves blending multiple exposures together so that:
-
the interior remains bright
-
the outdoor view becomes visible
-
the transition between indoor and outdoor light looks natural
Window pull editing is typically performed using Photoshop and requires careful masking and blending.
Step 6: Apply Color Correction and Final Adjustments
Once exposure and perspective issues are corrected, photographers focus on refining the overall appearance of the image.
This step may include:
-
correcting color casts
-
enhancing contrast
-
adjusting saturation
-
sharpening important details
-
reducing noise in darker areas
These adjustments help ensure that the final image looks clean, balanced, and visually appealing.
At this stage, the property should appear bright, natural, and ready for listing.
Step 7: Export Images for Delivery
The final step in the real estate photo editing workflow is exporting the images.
Photographers typically prepare images according to listing platform requirements.
Common export settings include:
-
JPEG format
-
optimized image size
-
balanced compression for web use
-
consistent resolution for listing websites
Proper export settings ensure that images load quickly while maintaining high visual quality.
This structured workflow allows photographers to edit property images efficiently while maintaining professional results.
Case Study: Editing a Real Estate Living Room Photo Step by Step
To better understand how a real estate photo editing workflow works in practice, let’s look at a typical editing example from a property shoot.
A real estate photographer was hired to photograph a modern apartment living room. The space had large windows, warm ceiling lights, and reflective surfaces such as polished flooring and glass furniture.
Although the room looked bright in person, the camera image showed several common issues that often appear in real estate photography.
Problems in the Original Photo
The RAW image contained a few typical challenges:
-
the interior appeared slightly dark
-
the window area was overexposed
-
indoor lighting created a yellow color cast
-
vertical lines of the walls looked slightly tilted
These problems are very common when photographing interior spaces.
To prepare the image for a real estate listing, the photographer followed a structured editing workflow.
Step 1: Importing and Reviewing the Photos
After the shoot, the photographer imported all images into Lightroom.
During this stage, the photographer reviewed the images and selected the best exposure for editing.
Some photos were removed because of:
-
slight camera movement
-
duplicate angles
-
minor focus issues
Selecting the best images early helps speed up the editing process.
Step 2: HDR Merge and Exposure Balance
Because the scene included bright windows and darker interior areas, the photographer had captured bracketed exposures.
These exposures were merged using HDR tools to create a balanced base image.
After merging, the room appeared brighter and more detailed, while the window view remained visible.
However, some additional adjustments were still required.
Step 3: Basic Adjustments and Color Correction
Next, the photographer adjusted the overall appearance of the image.
Several basic corrections were applied:
-
exposure increased slightly to brighten the room
-
white balance adjusted to remove yellow tones
-
shadows lifted to reveal details in darker corners
-
highlights reduced to protect bright areas near the window
These adjustments made the room look brighter and more natural.
Step 4: Perspective and Alignment Correction
Because the image was captured with a wide-angle lens, the vertical lines of the walls appeared slightly distorted.
Using perspective correction tools, the photographer straightened the walls and aligned the vertical lines of the windows and door frames.
This step is important because straight lines make a room look more professional and realistic.
Step 5: Window Pull Editing
Although the HDR merge helped balance exposure, the outdoor view through the windows still needed improvement.
To fix this, the photographer performed window pull editing in Photoshop.
This process involved blending a darker exposure of the window area into the main image using masking techniques.
The result restored the outdoor scenery while maintaining a bright interior.
Step 6: Final Enhancements
In the final stage of editing, the photographer made small adjustments to improve the overall image quality.
These included:
-
sharpening details in furniture and textures
-
reducing noise in shadow areas
-
adjusting contrast for better depth
-
applying subtle color enhancements
After these final adjustments, the image looked significantly more polished and professional.
Final Result
The edited image showed major improvements compared to the original photo.
The room now appeared:
-
bright and welcoming
-
balanced in color and lighting
-
clean and professional for listing websites
This example demonstrates how a structured real estate photo editing workflow helps photographers transform raw images into high-quality marketing photos.
Tips for Building an Efficient Real Estate Photo Editing Workflow
As photographers gain experience, they often refine their real estate photo editing workflow to make the process faster and more consistent.
Here are a few practical tips many professionals follow.
Create Editing Presets
Using presets in software like Lightroom can speed up basic adjustments such as exposure, contrast, and color balance. Presets allow photographers to apply the same adjustments to multiple images at once.
Keep a Consistent Editing Style
Consistency is important in real estate photography. Maintaining a similar brightness level, color tone, and contrast across all images helps listings look more professional.
Use Batch Editing When Possible
Batch editing allows photographers to apply adjustments to multiple images simultaneously. This is especially helpful when editing large property shoots.
Focus on Natural Results
Over-editing can make real estate photos look unrealistic. Professional editors usually aim for natural brightness, accurate colors, and balanced contrast.
Why Many Photographers Outsource Real Estate Photo Editing
Editing dozens of property photos can take several hours, especially when using techniques like HDR blending or window pull editing.
Because of this, many photographers choose to outsource their editing workflow to professional editing services.
Outsourcing photo editing allows photographers to:
-
save significant editing time
-
focus more on shooting properties
-
deliver images faster to clients
-
maintain consistent editing quality
Professional editors can handle tasks such as exposure blending, color correction, perspective adjustment, and image enhancement.
Frequently Asked Questions
How long does real estate photo editing take?
The time required depends on the number of images and the complexity of the editing process. A typical property shoot may take between one and three hours to edit when done manually.
What software do photographers use to edit real estate photos?
Many photographers use Adobe Lightroom and Adobe Photoshop for editing property images. These tools allow photographers to perform exposure adjustments, HDR merging, perspective correction, and advanced retouching.
If you’re comparing these tools, you may find our guide on Lightroom vs Photoshop for Real Estate Photo Editing helpful.
Can Lightroom alone edit real estate photos?
Lightroom can handle many tasks such as exposure adjustment, color correction, and HDR merging. However, more advanced techniques like window pull editing or detailed retouching are usually performed in Photoshop.
Why do real estate photos sometimes look dark or yellow?
Interior lighting conditions often create color casts or exposure problems. Proper editing techniques such as white balance correction and exposure blending help fix these issues.
If you’re interested in common lighting techniques used during shooting, you may also want to read our guide on HDR vs Flambient Real Estate Photography.
Final Thoughts
A structured real estate photo editing workflow helps photographers produce consistent, high-quality property images while saving time during the editing process.
From importing and organizing photos to exposure correction, perspective adjustments, and final export, each step plays an important role in preparing images for real estate listings.
By developing a clear workflow and using the right editing tools, photographers can deliver professional images that help properties stand out online.
As photographers grow their business and handle more projects, refining the editing workflow becomes even more important for maintaining efficiency and consistent results.