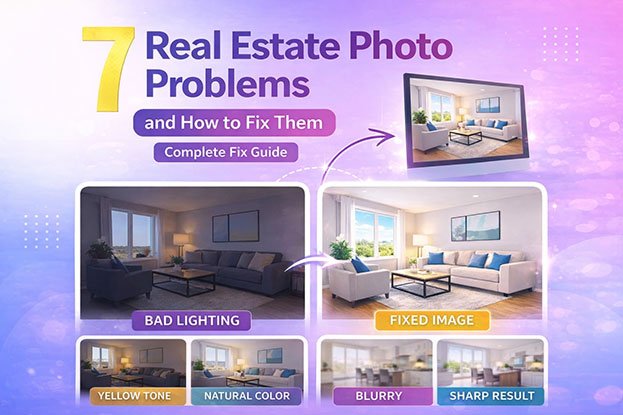
Real estate photography plays a crucial role in attracting buyers and creating strong first impressions online. In most cases, property photos are the first thing potential buyers notice before deciding to visit a home.
However, many real estate photos suffer from common issues that make properties look less appealing. Dark interiors, incorrect colors, blurry images, or distorted lines can quickly reduce the impact of even the most beautiful property.
These issues are not always caused by poor photography skills. In many cases, they result from challenging lighting conditions, camera limitations, or improper editing techniques.
The good news is that most of these problems can be fixed with the right shooting techniques and editing workflow.
In this guide, we’ll break down the most common real estate photo problems and explain how photographers and editors fix them to create bright, natural, and professional-looking images.
Quick Overview of Common Real Estate Photo Problems
Before going into detail, here are the most common issues photographers face when shooting property images.
| Problem | What Happens |
|---|---|
| Dark photos | Rooms appear underexposed and dull |
| Yellow or orange tones | Walls and lighting look unnatural |
| Blurry images | Lack of sharpness and detail |
| Overexposed windows | Outdoor view is completely white |
| Distorted lines | Walls and vertical lines look tilted |
| Flat images | Lack of contrast and depth |
| Color inconsistency | Different rooms have uneven tones |
Each of these problems affects how a property is perceived online and can influence buyer interest.
Why Real Estate Photos Often Have Problems
Real estate photography is different from many other types of photography because it involves complex lighting conditions.
A typical interior scene may include:
- bright sunlight coming through windows
- artificial indoor lighting
- shadows in corners and furniture
- reflective surfaces like glass or floors
Cameras often struggle to balance all of these elements in a single shot.
This is why many photos come out:
- too dark
- too warm (yellow/orange)
- lacking detail
- inconsistent in color
To overcome these challenges, photographers use techniques such as HDR bracketing or flambient lighting and rely heavily on post-processing.
If you want to understand how these techniques work, you can read our guide on HDR vs Flambient Real Estate Photography, where we explain how photographers capture balanced exposures.
The Role of Editing in Fixing Real Estate Photo Problems
Even well-shot photos usually need editing before they are ready for property listings.
Professional editing helps correct:
- exposure issues
- color balance
- perspective distortion
- window exposure
- sharpness and clarity
A structured editing process allows photographers to transform raw images into high-quality marketing visuals.
If you’re interested in how this process works step by step, check out our guide on Real Estate Photo Editing Workflow, which explains the complete editing process used by professionals.
Why Fixing These Problems Matters
High-quality real estate photos are directly linked to better property presentation.
Well-edited images can:
- make rooms appear brighter and more spacious
- create a clean and professional look
- attract more online views
- increase buyer interest
On the other hand, poor-quality images can make a property look less valuable and reduce engagement from potential buyers.
Fixing these common issues is not just about improving images — it’s about improving how the property is perceived.
What You’ll Learn in This Guide
In the next sections, we’ll break down each problem in detail, including:
- why it happens
- how photographers prevent it
- how editors fix it
We’ll also link to detailed guides for each issue so you can explore them further.
For example:
- how to fix dark real estate photos
- how to correct yellow or orange color casts
- how to improve sharpness and clarity
1. Why Real Estate Photos Look Dark (And How to Fix Them)
One of the most common real estate photo problems is dark interiors. Even when a room looks bright in real life, the camera often captures it as underexposed.
This makes the space feel smaller, less inviting, and less attractive to buyers.
Why Photos Look Dark
There are several reasons why real estate photos appear dark:
- strong light coming through windows
- insufficient interior lighting
- incorrect camera exposure settings
- shooting without HDR or flash
Cameras struggle to balance bright windows and darker interiors at the same time. As a result, the camera often prioritizes highlights, making the room look darker.
How Photographers Prevent Dark Photos
Photographers reduce this issue by:
- using HDR bracketing (multiple exposures)
- adjusting camera exposure manually
- using flash or flambient techniques
- shooting at the right time of day
How Editors Fix Dark Real Estate Photos
Editors correct dark photos during post-processing by:
- increasing exposure and brightness
- lifting shadows to reveal details
- balancing highlights and window light
- blending multiple exposures
👉 For a full breakdown, read: Why Real Estate Photos Look Dark
2. Why Real Estate Photos Look Yellow or Orange
Another common issue is incorrect color tones. Many real estate photos appear too warm, with yellow or orange color casts.
This makes walls, ceilings, and furniture look unnatural.
Why Color Problems Happen
Color issues usually occur because of:
- warm indoor lighting (tungsten bulbs)
- mixed lighting (daylight + artificial light)
- incorrect white balance settings
- camera auto settings
When different light sources mix, the camera struggles to produce accurate colors.
How Photographers Prevent Color Issues
Photographers can reduce color problems by:
- setting correct white balance manually
- turning off mixed lighting when possible
- using flash to control color temperature
How Editors Fix Yellow and Orange Tones
Editors fix color issues using:
- white balance correction
- color cast removal
- selective color adjustments
- temperature and tint balancing
👉 Read detailed guides:
Why Real Estate Photos Look Yellow
Why Real Estate Photos Look Orange
3. Why Real Estate Photos Look Blurry
Sharpness is critical in real estate photography. Blurry images can instantly make a listing look unprofessional.
Even slight blur can reduce image quality and affect how buyers perceive a property.
Why Photos Become Blurry
Blur can happen due to:
- camera shake
- slow shutter speed
- incorrect focus
- low lighting conditions
When shooting indoors, cameras often use slower shutter speeds, which increases the risk of blur.
How Photographers Prevent Blur
Photographers avoid blurry images by:
- using a tripod
- increasing shutter speed
- using proper focus settings
- stabilizing the camera
How Editors Improve Sharpness
Editors can enhance image clarity using:
- sharpening tools
- clarity adjustments
- noise reduction
However, heavily blurred images cannot be fully fixed and may need to be reshot.
👉 Learn more: Why Real Estate Photos Look Blurry
Why These Problems Matter Most
Dark images, incorrect colors, and blur are the three most critical issues in real estate photography.
They directly affect:
- brightness
- color accuracy
- image clarity
These are the first things buyers notice when viewing a property online.
Fixing these issues alone can significantly improve the quality of real estate listings.
4. Why Real Estate Photos Have Overexposed Windows
One of the most noticeable real estate photo problems is completely white or blown-out windows.
When this happens, the outdoor view disappears, making the image look unrealistic and poorly captured.
Why Windows Get Overexposed
This happens because of the extreme difference between:
- bright outdoor light
- darker indoor lighting
Cameras cannot properly expose both areas at the same time in a single shot.
As a result, either:
- the interior looks too dark
or - the windows appear completely white
How Photographers Prevent This
Photographers solve this issue by:
- capturing multiple exposures (HDR bracketing)
- using flash to balance lighting
- adjusting exposure settings manually
How Editors Fix Overexposed Windows
Editors use a technique called window pull editing.
This involves:
- blending darker exposures into the window area
- masking window sections
- restoring natural outdoor views
This creates a balanced image where both the room and outside view are visible.
5. Why Walls and Lines Look Distorted
Another common issue in real estate photography is distorted vertical lines.
Walls, doors, and windows may appear tilted or leaning backward, which looks unnatural.
Why Distortion Happens
This usually occurs when:
- the camera is tilted up or down
- wide-angle lenses are used
- the camera is not perfectly level
Wide-angle lenses are essential for real estate photography, but they can introduce perspective distortion.
How Photographers Prevent Distortion
Photographers minimize distortion by:
- keeping the camera level
- positioning the camera at the correct height
- using proper composition techniques
How Editors Fix Perspective Issues
Editors use perspective correction tools to:
- straighten vertical lines
- align walls and windows
- correct lens distortion
👉 Learn more: Real Estate Photo Perspective Correction
6. Why Real Estate Photos Look Flat and Dull
Sometimes photos look technically correct but still feel lifeless. This is often described as “flat” images.
Flat photos lack contrast, depth, and visual impact.
Why Photos Look Flat
Flat images usually result from:
- poor lighting conditions
- lack of contrast
- incorrect exposure balance
- over-editing or under-editing
Even if exposure is correct, the image may still look dull without proper contrast.
How Photographers Improve Depth
Photographers improve depth by:
- using proper lighting angles
- capturing multiple exposures
- adjusting composition
How Editors Enhance Image Quality
Editors improve flat images by:
- increasing contrast
- adjusting highlights and shadows
- enhancing clarity and texture
- applying subtle color grading
These adjustments help create more depth and make the image visually appealing.
7. Why Real Estate Photos Look Inconsistent
Another overlooked issue is inconsistency across images.
Sometimes one room looks warm, another looks cool, and another looks darker.
This makes the entire property presentation feel unprofessional.
Why Inconsistency Happens
This occurs due to:
- different lighting conditions in each room
- mixed light sources
- inconsistent camera settings
- uneven editing
How Photographers Maintain Consistency
Photographers improve consistency by:
- using the same camera settings throughout the shoot
- maintaining consistent lighting conditions
- shooting in RAW format
How Editors Fix Inconsistency
Editors ensure consistency by:
- matching white balance across all images
- applying consistent exposure adjustments
- using presets for uniform editing
- maintaining a consistent color style
👉 Related guide: Consistent Real Estate Photo Editing
Bringing It All Together
At this point, we’ve covered the 7 most common real estate photo problems:
- dark interiors
- yellow/orange color casts
- blurry images
- overexposed windows
- distorted lines
- flat images
- inconsistent tones
These are the exact issues photographers deal with in almost every property shoot.
Case Study: Fixing Multiple Real Estate Photo Problems in One Image
To understand how these issues are solved in real situations, let’s look at a typical example.
A photographer captures a living room with:
- large bright windows
- warm indoor lighting
- reflective surfaces
- wide-angle lens distortion
The original image shows several problems at once:
- the room appears slightly dark
- windows are overexposed
- walls have a yellow color cast
- vertical lines look slightly tilted
This is a very common situation in real estate photography.
Step-by-Step Fix
The image is processed using a structured editing workflow.
Step 1: Exposure Correction
The editor increases brightness and lifts shadows to make the room look more open and inviting.
Step 2: Window Pull Editing
A darker exposure is blended into the window area to restore the outdoor view.
Step 3: Color Correction
White balance is adjusted to remove yellow tones and create natural colors.
Step 4: Perspective Correction
Vertical lines are straightened to make walls and windows look properly aligned.
Step 5: Final Enhancements
Sharpening, contrast adjustments, and clarity improvements are applied to complete the image.
Final Result
After editing, the image becomes:
- bright and balanced
- natural in color
- sharp and detailed
- visually appealing for listings
This example shows how multiple real estate photo problems can be solved through proper editing.
If you want to understand this process in detail, check our full guide on Real Estate Photo Editing Workflow, where each step is explained in depth.
Frequently Asked Questions
Why do real estate photos look dark?
Real estate photos often look dark because cameras cannot balance bright window light and darker interiors in a single exposure.
Why do real estate photos look yellow or orange?
This usually happens due to warm indoor lighting or mixed light sources, which affect white balance.
Can blurry real estate photos be fixed?
Slight blur can be improved using sharpening tools, but heavily blurred images usually need to be reshot.
How do photographers fix real estate photo problems?
Photographers use techniques such as HDR, flambient lighting, and professional editing to correct exposure, color, and perspective.
What software is used to edit real estate photos?
Most photographers use Lightroom and Photoshop to edit real estate images.
You can learn more in our guide on Lightroom vs Photoshop for Real Estate Photo Editing.
Final Thoughts
Real estate photography is more complex than it appears. Lighting conditions, camera limitations, and environmental factors can all create challenges that affect image quality.
However, understanding the most common real estate photo problems makes it much easier to prevent and fix them.
By using the right shooting techniques and a structured editing workflow, photographers can consistently produce bright, natural, and professional property images.
If you’re looking to improve your results further, you can explore:
- HDR vs Flambient Real Estate Photography to improve shooting
- Real Estate Photo Editing Workflow to improve editing
- Lightroom vs Photoshop for Real Estate Photo Editing to choose the right tools
Together, these guides form a complete system for producing high-quality real estate images.