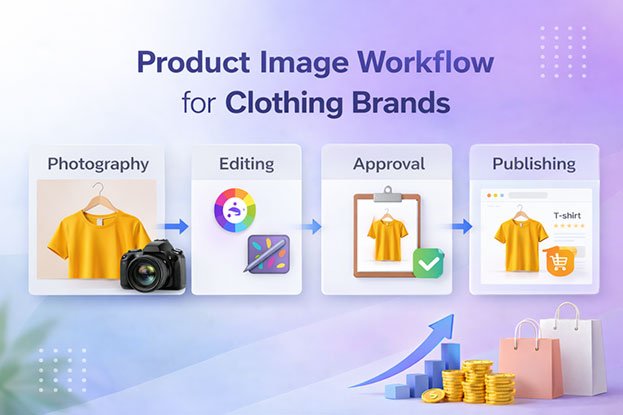
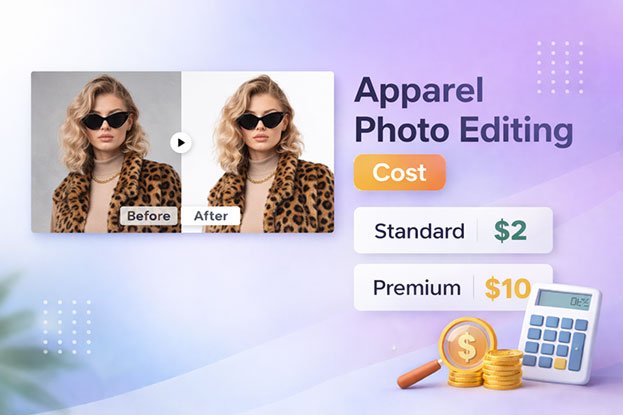
In online shopping, photos are everything. Your clothing images are the first impression a buyer has of your brand. If the photo looks dull, wrinkled, or unclear, customers scroll past no matter how amazing the fabric is. But if your photos look professional, clean, and appealing, you instantly build trust and boost sales.
The good news? You don’t need a studio or expensive gear. With the right setup, techniques, and a little editing, you can create professional clothing photos that sell. If you don’t have time for editing, don’t worry that how to take photos of clothes to sell online, our clothing photo retouching service can turn your raw shots into polished, ready-to-sell images.
Why Clothing Photos Matter for Online Stores
When shopping online, customers can’t touch or try on your product. Photos are the only way they judge quality. That’s why clothing photos are one of the strongest sales tools for fashion eCommerce.
-
Build trust – clean, high-quality images make your store look reliable.
-
Reduce returns – clear photos with multiple angles set accurate expectations.
-
Compete with bigger brands – professional photos make even small sellers look premium.
Must-Have Equipment for Clothing Photography
You don’t need to overspend to get started. A few essentials will help you take sharp and consistent clothing photos:
-
Camera or Smartphone – Most modern smartphones are good enough. A DSLR or mirrorless camera is a bonus, not a must.
-
Tripod – Keeps images steady and consistent.
-
Lighting Setup – Use natural light near a window or invest in a ring light/softbox for even results.
-
Background – White or neutral backgrounds are best. Avoid distracting patterns.
-
Accessories – A mannequin, hanger, or ironing/steaming tools for clothes.
best setup to photograph clothes for selling online
Preparing Clothes Before Shooting
Even the best camera can’t fix wrinkled or messy clothes. Preparation is key:
-
Steam or iron to remove wrinkles.
-
Remove lint and tags for a neat look.
-
Organize outfits if shooting multiple items to save time.
A few extra minutes of prep saves hours of editing later.
Simple Clothing Photography Styles
There are different ways to photograph clothes depending on your brand style and budget. Here are the most effective ones:
1. Flat Lay Photography
Flat lay photography is one of the simplest yet most effective ways to showcase clothes online. By placing your clothing neatly on a flat surface and shooting from above, you can create clean, visually appealing images that immediately grab attention. This style works especially well for t-shirts, jeans, folded outfits, and even smaller items like scarves or accessories.
Tips to Make Your Flat Lay Photos Stand Out:
-
Use a Clean, Neutral Background – White or light backgrounds help your clothing pop and make the photo look professional. Avoid clutter or patterned surfaces that distract from the product.
-
Arrange Neatly – Lay clothes flat with smooth surfaces, carefully align seams, and make sure sleeves and hems are properly positioned. Wrinkles or uneven folds can make even expensive clothing look cheap.
-
Add Lifestyle Props – Include simple props like shoes, handbags, or accessories to create a story and inspire your customers. Subtle props give context without stealing focus from the clothing.
-
Focus on Details – Highlight fabric texture, stitching, or unique features by adjusting your angle slightly or adding a close-up inset.
Flat lay photography is not just about aesthetics — it builds trust with your customers by showing the clothing clearly and professionally. Even a single, well-shot flat lay image can increase buyer confidence and boost sales.
2. Hanging Clothes Photography
Hanging clothes photography is a quick, versatile, and professional way to showcase garments online. By using a hanger or clothing rack against a clean background, you give your products structure and shape while keeping the focus entirely on the item. This method works especially well for dresses, coats, shirts, and jackets.
Tips for Stunning Hanging Clothes Photos:
-
Choose a Clean, Neutral Background – White, light gray, or pastel backgrounds make the clothing pop and give your store a professional look. Avoid distracting elements behind the clothes.
-
Use a High-Quality Hanger – A simple, sleek hanger keeps the garment straight and ensures the neckline and shoulders look perfect.
-
Ensure Proper Fit and Alignment – Make sure sleeves hang naturally, collars are straight, and the garment is wrinkle-free. A little attention here goes a long way in making clothes appear premium.
-
Consider Lighting Carefully – Use soft, even lighting to avoid shadows. Natural daylight works best, but softbox or ring lights give consistent results indoors.
-
Highlight Details – Capture additional shots of buttons, pockets, hems, or any unique features to give buyers confidence in their purchase.
Hanging photography is simple, elegant, and highly effective for online sales. When paired with professional editing, your photos can look polished, consistent, and visually appealing across your entire product catalog.
3. Mannequin or Ghost Mannequin Photography
Using mannequins is a game-changer for clothing photography, especially for online stores. Unlike flat lays or hangers, mannequins give your garments shape, dimension, and structure, showing customers exactly how the clothing will fit and fall when worn.
For eCommerce, the real magic happens with ghost mannequin editing. This technique removes the mannequin digitally, leaving a seamless, 3D representation of the clothing. The result? Your products look professional, polished, and premium, without any distractions.
Why Ghost Mannequin Photography Works:
-
Showcases True Fit – Customers can see the natural shape of your clothing, which reduces uncertainty and increases confidence in buying.
-
Highlights Details – Necklines, sleeves, hems, and textures stand out more clearly.
-
Professional, Clean Look – A ghost mannequin image gives your store a consistent, high-end appearance across all product listings.
-
Boosts Sales and Engagement – Studies show products with professional, 3D-looking photos convert better than flat or static images.
Even if you don’t have the tools or time to do this yourself, professional ghost mannequin editing can transform your photos instantly.
4. Model Photography
If your budget allows, model photography is one of the most powerful ways to showcase your clothing online. Seeing clothes worn by real people gives customers a clear sense of fit, movement, and style something flat lay or mannequin shots simply can’t convey.
Here’s why model photography works so well:
-
Lifestyle Appeal – Customers can imagine themselves wearing the outfit, which increases the likelihood of purchase.
-
Highlight Fit and Flow – Models help demonstrate how fabric drapes, stretches, or moves, giving buyers a realistic expectation.
-
Show Styling Options – Outfit combinations, accessories, and layering ideas inspire shoppers and boost your brand’s perceived value.
-
Premium Brand Perception – Professionally-shot model images make even small online stores look high-end and trustworthy.
While hiring models and photographers might seem like a big investment, the increase in engagement and conversions often outweighs the cost. And if you want your model shots to look flawless and ready for marketplaces, professional editing is key — from color correction to removing distractions or retouching clothing details.
Lighting & Camera Settings
Lighting and camera setup are the most critical factors in clothing photography. Even the best clothes can look dull and unappealing if the lighting is off or the camera settings aren’t optimized. With the right approach, you can make your products look bright, vibrant, and professional, increasing buyer confidence and sales.
Tips for Perfect Lighting:
-
Use Natural Light Whenever Possible – Shooting near a large window during the day gives soft, even light that highlights colors and textures naturally. Avoid harsh direct sunlight that creates unwanted shadows.
-
Softbox or Ring Lights for Indoor Shots – If natural light isn’t available, invest in affordable softboxes or ring lights. They provide consistent illumination and eliminate shadows, giving your images a professional look.
-
Reflectors to Reduce Shadows – Simple white boards or reflectors bounce light back onto your clothing, softening shadows and highlighting details.
Camera Settings for Sharp, Professional Shots:
-
ISO – Keep ISO low (100–400) to avoid grainy photos.
-
White Balance – Adjust white balance to ensure true-to-life colors that match your clothing.
-
Focus & Stability – Use a tripod to avoid shaky shots and maintain consistent framing across all products.
-
Angles & Shots – Capture multiple perspectives: front, back, close-ups of details like buttons, stitching, and fabric texture. This helps customers see exactly what they’re buying.
Pro Tip: Consistency is Key
Use the same lighting setup, background, and camera settings for all your product photos. Consistency creates a professional, cohesive look across your online store, boosting credibility and making your brand look premium.
Editing Your Photos
Even the best clothing photos need a professional touch to truly stand out and drive sales. Editing transforms good shots into scroll-stopping images that inspire trust, highlight details, and make buyers confident to purchase.
Here’s how we make your clothes look perfect online:
-
Background Removal – A clean, distraction-free background instantly makes your product the star. This is essential for marketplaces like Amazon, eBay, and Shopify, where professionalism impacts click-through rates.
-
Color Correction – Colors often look different on camera than in real life. We ensure the fabric color is accurate and vibrant, so your customers get exactly what they expect.
-
Cropping & Resizing – Properly sized images load faster and fit marketplace requirements, improving both user experience and SEO performance.
-
Retouching & Enhancement – Smooth out wrinkles, correct lighting, and emphasize textures to give your clothing a polished, premium look. Every stitch and detail becomes clear and appealing.
While tools like Photoshop or Lightroom are great, editing takes time, skill, and patience. Why struggle when professionals can handle it faster, better, and consistently?
Clipping Area’s Clothing Photo Editing Services save you hours while giving your products a professional edge that attracts buyers. From subtle touch-ups to full background removal and ghost mannequin editing, we make your clothes look irresistible online. Let’s connect with us today and let Clipping Area transform your clothing images into a selling machine!
Common Mistakes to Avoid
Even good products look bad with poor photos. Avoid these mistakes:
-
Wrinkled or unprepared clothes.
-
Busy or colorful backgrounds.
-
Using only one angle.
-
Harsh lighting with shadows.
-
Inconsistent photo sizes across your store.
Conclusion
Selling clothes online is competitive, but high-quality photos can make your products shine. With the right setup, lighting, and editing, even a beginner can create professional-looking images that boost sales.
If you want to save time and get flawless results, our professional photo editing services can transform your clothing photos into scroll-stopping images.
Quick FAQ: Clothing Photography for Online Selling
1. Can I take clothing photos with a smartphone?
Yes! Modern smartphones have excellent cameras. Use natural light and a tripod for best results.
2. Do I need a professional camera?
Not necessarily. A DSLR gives more control, but a phone works if used correctly.
3. What’s the best way to photograph clothes for online selling?
Flat lay, mannequin (with ghost editing), or on-model shots are the most effective.
4. Which background works best?
White or neutral backgrounds are ideal for eCommerce marketplaces.
5. What’s the difference between flat lay and mannequin photography?
Flat lay shows clothes from above, while mannequin (or ghost mannequin) gives a realistic 3D shape.


