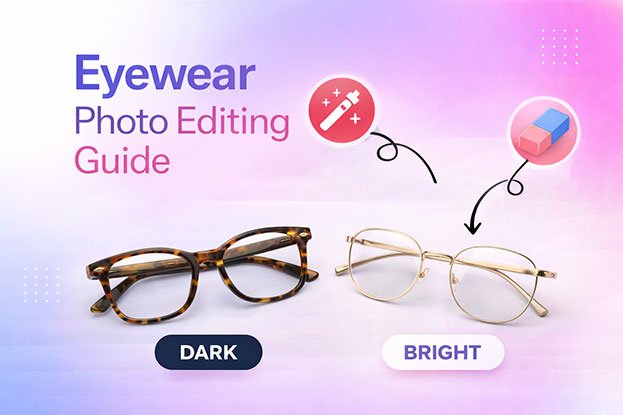
Glasses are one of the hardest products to photograph and one of the easiest to get wrong online. A frame that looks sharp in the hand can look dull, dusty, or strangely colored on a product page. This eyewear photo editing guide explains how eCommerce brands, optical stores, and product photographers can turn raw eyewear shots into clean, accurate, and consistent images that build trust and support sales in 2026.
Eyewear is a purchase shoppers usually want to see in person. They care about shape, thickness, color, finish, and how a pair might sit on their face. When they cannot try the product on, your images carry most of that weight. Good editing does not hide the product. It removes distractions so the real product can be seen clearly.
This guide covers what to edit, how to handle lenses and reflections, how to keep colors honest, which image styles work best, and how to decide between editing in-house and outsourcing.
What Is Eyewear Photo Editing?
Eyewear photo editing is the process of refining product photos of glasses, sunglasses, optical frames, and related accessories so they are ready for online stores, marketplaces, catalogs, and ads.
It usually includes:
- Background removal or background cleanup
- Clipping paths around frames and temples
- Dust, fingerprint, and scratch removal
- Reflection and glare control on lenses
- Color correction for frames and lens tints
- Shadow creation (natural, drop, or reflection shadows)
- Alignment, cropping, and sizing for platform requirements
- Consistency matching across an entire collection
The goal is simple. Every image should show the product accurately, look professional, and match the rest of your catalog.
Why Glasses and Sunglasses Need Professional Editing
Eyewear combines several materials that behave differently under light. A single pair might include polished metal, matte acetate, clear lenses, a tinted gradient, and tiny hinges or logos. Each surface creates its own problems.
Lenses act like mirrors. They reflect the studio, softboxes, the camera, and sometimes the photographer. Even careful lighting leaves some reflection.
Transparent parts are hard to cut out. Clear frames and lenses pick up the background color. A basic background removal tool often deletes the lens entirely or leaves a gray haze.
Small flaws become big flaws. At the zoom level shoppers use on product pages, a speck of dust on a lens or a fingerprint on a metal bridge is very visible.
Colors shift easily. Tortoiseshell, deep navy, and warm gold can drift during capture. If the online color does not match the delivered product, returns go up.
Catalogs need uniformity. When one frame sits higher, another is tilted, and a third has a warmer background, the collection page looks messy and less premium.
Professional editing solves these issues in a controlled way so the final image stays realistic.
What Should Be Edited in Eyewear Product Photos?
Before starting, it helps to know exactly what an edited eyewear image should include. Use this as a working checklist.
| Area | What to fix | Why it matters |
|---|---|---|
| Background | Remove or clean to pure white or brand color | Marketplace compliance and a clean look |
| Frame edges | Precise cutout around rims, temples, and nose pads | Prevents jagged or halo edges |
| Lenses | Control glare, keep transparency or tint accurate | Shows lens quality honestly |
| Surface | Remove dust, lint, fingerprints, small scratches | Protects perceived quality |
| Color | Match frame and lens color to the real product | Reduces returns and complaints |
| Shadows | Add or refine natural shadows | Keeps the product grounded |
| Alignment | Straighten, center, consistent scale | Uniform collection pages |
| Output | Correct size, format, and compression | Fast pages and sharp zoom |
Not every image needs every step, but most eyewear photos need at least five of them.
How to Handle Eyewear Backgrounds
White backgrounds for marketplaces
Amazon and many other marketplaces require a pure white background (RGB 255, 255, 255) for main images. Even if your own store allows more creative backgrounds, a clean white version is useful for listings, feeds, and comparison shopping.
The challenge with eyewear is that the lenses and clear frames should not become pure white too. If the background is removed carelessly, lenses turn into empty holes or bright blank shapes. A skilled editor separates the background from the lens area and keeps a subtle, believable lens tone.
Neutral and branded backgrounds
Light gray, soft beige, or a brand color can make a collection feel more editorial. These work well on your own website, in lookbooks, and in social ads. Keep the background consistent across the full collection so frames can be compared easily.
Keeping transparency realistic
When placing eyewear on a colored background, clear lenses should show that background slightly through them. That tells the shopper the lens is transparent. Tinted lenses should blend with the background according to their tint, not look like flat stickers.
Clipping Paths vs Background Removal: When to Use Each
Both methods separate the product from its background, but they suit different eyewear types.
Clipping paths are hand-drawn vector paths created with the Pen Tool. They give clean, sharp edges and are ideal for:
- Metal frames with thin rims
- Solid acetate frames
- Temples, hinges, and nose pads with defined edges
- Images that need multiple paths (for example, separating the frame from the lens for color work)
Masking and advanced background removal work better for:
- Clear or semi-transparent frames
- Gradient-tinted lenses
- Soft shadows that need to be kept
- Fabric cases or straps with fuzzy edges
In practice, many eyewear images use both. A clipping path defines the outer frame, and a separate mask handles the lens area. AI background removal tools have improved a lot, and they are useful for quick drafts, but they still struggle with thin temples, nose pads, and transparent material. For final catalog images, a human check is still the safer standard.
How to Keep Frame Colors Accurate
Color accuracy is one of the most commercially important parts of eyewear editing. A shopper who orders “matte olive” and receives something closer to brown is likely to return it.
Start with good capture
Editing cannot fully fix poorly captured color. Ask your photographer to:
- Shoot in RAW format
- Use a gray card or color checker at the start of each session
- Keep lighting and white balance fixed for the whole shoot
Correct against the physical product
The editor should compare the image to the real frame or to a reference photo taken under daylight-balanced light. Adjust:
- White balance to remove color casts
- Hue and saturation for specific frame tones
- Brightness and contrast so matte and gloss finishes read correctly
Protect patterns and finishes
Tortoiseshell, marble acetate, and layered colors need careful handling. Over-saturation makes patterns look artificial. Too much contrast makes brown patterns look almost black. Metal finishes (gold, rose gold, gunmetal, silver) should keep their natural warmth or coolness without looking painted.
Build color variants carefully
Some brands create color variants by recoloring one master image. This saves photography time, but it only works when the edited color is checked against the real variant. Recolored images that do not match actual stock create customer trust problems. Use recoloring for pre-launch previews or when the physical sample is checked side by side.
How to Handle Reflections on Lenses
Reflections are the most common complaint in eyewear photography. The aim is not always to remove every reflection. Some reflection tells the viewer that the lens is glass or polycarbonate and has a real surface.
Reduce distracting reflections
Remove reflections that show:
- The camera, tripod, or photographer
- Studio walls, windows, or equipment
- Harsh softbox shapes that dominate the lens
Keep controlled highlights
A soft, clean highlight along the top edge of a lens or across a curve helps the product look three-dimensional. Removing all highlights can make lenses look flat or even missing.
Match reflections across a pair
Both lenses should look balanced. If one lens has a strong glare and the other is clear, the product looks uneven. Editors often even out the highlight shape and intensity so the pair feels symmetrical.
Capture tips that save editing time
- Tilt the frame very slightly to move reflections out of the lens
- Use large diffused light sources instead of small hard ones
- Use polarizing filters where suitable (with care, since they can affect some lens coatings)
- Shoot a “clean plate” of the lens area at a different angle for compositing if needed
Removing Scratches, Dust, Fingerprints, and Unwanted Marks
Eyewear attracts dust and fingerprints quickly, especially under studio lights. Even new stock can arrive with tiny scuffs from packaging.
What to remove
- Dust particles and lint on lenses and frames
- Fingerprints on metal bridges, lenses, and temples
- Minor surface scratches caused by handling
- Adhesive residue from protective stickers or price tags
- Glue marks from display stands or invisible supports
What to keep
- Manufacturer logos and engravings
- Intentional textures (brushed metal, grain acetate)
- Real design details such as rivets, filigree, or decorative screws
How to retouch without damage
Use healing and clone tools at high zoom, but check the result at normal viewing size too. Over-smoothing removes texture and makes frames look plastic or CGI-generated. A good rule is to fix what a customer would think is a defect, and keep what the designer intended.
If a product has a real flaw, it should be replaced before photography, not hidden in editing. Retouching should clean the photo, not misrepresent the item.
Editing Transparent and Tinted Lenses
Clear lenses
Clear optical lenses should look clear. Common problems include:
- Gray haze from the background showing through unevenly
- Lost lens edges that make the frame look empty
- Color casts from nearby props or reflections
The fix is to keep a very subtle lens presence, a faint edge line, and gentle highlights. The viewer should understand that a lens is there without it looking tinted.
Tinted and gradient lenses
Sunglass lenses need accurate tint color and density. A gradient lens should fade smoothly from top to bottom, without banding. Editors often:
- Mask the lens separately from the frame
- Adjust tint color to match the real lens
- Smooth gradients to remove banding caused by compression
Mirrored and polarized lenses
Mirrored lenses reflect everything. Many brands replace the real reflection with a clean, neutral reflection (such as a soft sky gradient) so the mirror effect is visible without showing the studio. This is acceptable as long as the lens color and mirror finish stay true to the product.
Blue-light and photochromic lenses
Blue-light lenses often show a faint blue or purple reflection. Some brands keep a hint of it because customers recognize it as a sign of the coating. Photochromic lenses may need two images, one clear and one darkened, to show how they change.
Keeping Eyewear Images Realistic After Retouching
Over-editing is a real risk. Shoppers are skeptical of images that look too perfect, and platforms are increasingly attentive to misleading product visuals.
To keep images believable:
- Keep texture. Acetate should look like acetate, metal like metal.
- Keep natural shadows. A floating frame with no shadow looks pasted in.
- Keep some highlights. Lenses need a little light to look real.
- Avoid heavy sharpening. Halos around thin rims are a common sign of overprocessing.
- Respect proportions. Never stretch or reshape frames. Frame width and lens shape are purchase decisions.
A helpful test: place the edited image next to the physical product. If someone would say “that’s the same pair, just photographed well,” the editing is right.
Image Styles That Work for eCommerce Eyewear
A strong eyewear product page usually includes several image types. Each needs slightly different editing.
Front view. The main image. Centered, straight, symmetrical, and on a clean background.
Three-quarter angle. Shows depth, temple design, and frame thickness. Keep the angle consistent across the catalog.
Side profile. Shows temple length, hinge style, and branding on the arm.
Folded view. Useful for showing compact design and hinge quality.
Detail shots. Close-ups of logos, engravings, hinges, and nose pads. These need the most careful dust removal.
Top-down or flat lay. Good for editorial pages and social media.
On-model images. Show fit and scale. Editing focuses on skin retouching (natural, light touch), lens reflections, and keeping the frame color accurate against skin tones.
Lifestyle images. Outdoor or styled scenes, used for ads and landing pages. Color grading can be more creative here, but the product itself should stay accurate.
360-degree and 3D views. More brands now use spin sets and 3D renders for virtual try-on tools. Every frame in a spin set needs consistent color, background, and reflection treatment, or the rotation will flicker.
How Editing Differs for Glasses, Sunglasses, and Luxury Eyewear
Optical glasses
The focus is on clarity and honesty. Clear lenses, clean edges, and accurate frame color matter most. Many optical retailers show frames without lenses or with demo lenses, so editors must keep demo lens logos visible or remove them according to brand policy.
Sunglasses
The focus is on lens color, tint density, mirror finish, and style. Sunglasses are often sold as fashion items, so images can be slightly more dramatic, but tint accuracy is still critical. A lens that looks brown online and arrives gray is a common return reason.
Luxury eyewear
The focus is on finish and craftsmanship. Luxury frames often include precious metal details, hand-polished acetate, or fine engravings. Editing should:
- Preserve fine textures and hallmark engravings
- Use subtle, controlled reflections to show polish
- Maintain a calm, premium background (often soft gray or off-white)
- Keep shadows soft and realistic
Luxury brands also tend to demand stricter consistency across collections and seasons, so a documented style guide is essential.
Sports and safety eyewear
These products need clarity around wraparound shapes, ventilation, straps, and lens coatings. Editing often involves more complex masking because of curved lenses and rubber components.
Image Specifications for eCommerce Platforms in 2026
Technical settings affect both appearance and performance. General guidance:
- Resolution: At least 2000 px on the longest side for zoom. Many brands use 2500 to 3000 px.
- Format: JPEG for marketplaces, WebP or AVIF for fast-loading websites, PNG when transparency is required.
- Color profile: sRGB for web use.
- Product fill: For main marketplace images, the product should fill most of the frame (Amazon recommends about 85 percent).
- File size: Compress without visible banding, especially in gradient lenses.
- File naming: Use descriptive names such as
round-acetate-tortoise-front.jpgto support image SEO. - Alt text: Describe the frame shape, color, material, and view angle.
Always check the current requirements of each platform you sell on, since rules change.
Should Eyewear Brands Edit In-House or Outsource?
Both options can work. The right choice depends on volume, skill, and speed.
In-house editing works when:
- You shoot small batches regularly
- You have a trained editor who understands eyewear
- You need very fast same-day changes
- Your product range is simple (mostly solid frames)
Outsourcing works when:
- You launch large collections or seasonal drops
- You sell transparent, mirrored, or luxury frames that need advanced skills
- Your team spends more time editing than creating content or selling
- You need consistent results across hundreds or thousands of SKUs
- You need quick turnaround across time zones
A hybrid approach
Many brands shoot in-house and outsource the editing. Others handle simple edits internally and send complex work (clear frames, mirror lenses, spin sets) to a specialist. This keeps control while freeing your team from repetitive work.
When choosing an editing partner, ask for:
- A free or paid test on your hardest product (usually a clear frame)
- Examples of transparent and tinted lens work
- Clear turnaround times and revision policy
- A process for following your style guide
- Secure file handling
Creating an Eyewear Image Style Guide
A style guide keeps every image consistent, whether edited by your team or an outside partner. Include:
- Background color and exact values
- Product position, margin, and scale
- Standard angles and their order on product pages
- Shadow type (natural, drop, or none)
- Reflection policy (how much highlight to keep)
- Lens treatment for clear, tinted, and mirrored lenses
- Color accuracy process and reference lighting
- Output sizes, formats, and naming rules
Share one approved sample image for each view. Visual references prevent more mistakes than written rules.
What to Check Before Approving Edited Eyewear Images
Before images go live, run a final review.
- Color match. Does the frame and lens color match the real product under neutral light?
- Edges. Are rims, temples, and nose pads cleanly cut, with no halos or missing pieces?
- Lenses. Do clear lenses still look like lenses? Are tints accurate and smooth?
- Reflections. Are distracting reflections gone while natural highlights remain?
- Cleanliness. Zoom to 100 percent. Is there leftover dust, lint, or fingerprints?
- Details. Are logos, engravings, and hinges intact and sharp?
- Shadows. Does the product sit naturally on the background?
- Symmetry and alignment. Is the front view straight and centered?
- Consistency. Does the image match others in the same collection?
- Technical specs. Correct size, format, color profile, and file name?
If an image fails any point, send it back with a clear note and a marked-up screenshot. Specific feedback speeds up revisions.
Common Eyewear Photo Editing Mistakes to Avoid
- Removing lenses completely during background removal
- Making clear lenses gray or cloudy
- Over-saturating tortoiseshell and colored acetate
- Removing all reflections so lenses look flat
- Over-smoothing metal until it looks plastic
- Inconsistent shadows across one collection
- Stretching images to fit a crop
- Compressing gradient lenses until they band
- Using AI tools without a human quality check
Final Thoughts
Eyewear is a detail-driven product, and shoppers judge it by details. Clean edges, honest color, controlled reflections, and consistent presentation tell customers that your brand cares about quality before they ever hold the frame.
Use this eyewear photo editing guide as a practical framework: capture well, edit with restraint, check every image against the real product, and document your standards so every new collection looks like it belongs. Whether you edit in-house, outsource, or combine both, the goal stays the same. Show the product clearly, accurately, and beautifully.
If your team needs help with high-volume or complex eyewear editing, Clipping Area has handled product photo editing for eCommerce and fashion brands since 2014, including clipping paths, background removal, and detailed retouching for glasses and sunglasses.
Frequently Asked Questions
What is the best background for eyewear product photos?
Pure white is best for marketplaces and main product images. Light gray or soft neutral tones work well for brand websites and luxury collections. Keep the background consistent across your whole catalog.
Can AI remove the background from eyewear images?
AI tools can handle simple, solid frames reasonably well. They often fail on transparent frames, thin temples, and tinted lenses. For final catalog images, a manual clipping path or mask with human review gives more reliable results.
Should I remove all reflections from glasses in photos?
No. Remove distracting reflections such as the camera, studio, or photographer, but keep soft highlights. A small, controlled reflection helps lenses look real and three-dimensional.
How do I make sure frame colors look accurate online?
Shoot in RAW with a gray card, keep lighting consistent, and have the editor compare the image to the physical product under neutral light. Export in the sRGB color profile for web use.
How long does eyewear photo editing take?
Simple front-view edits can be completed quickly, while complex images with transparent frames, mirrored lenses, or multiple angles take longer. Professional editing services typically deliver batches within 24 to 48 hours, depending on volume and complexity.
Is it acceptable to recolor eyewear images to create variants?
It can be, as long as the final color is checked against the real product. Recolored images that do not match actual stock lead to returns and loss of trust.
What image size should eyewear product photos be?
At least 2000 px on the longest side is recommended so shoppers can zoom in on details. Many brands use 2500 to 3000 px for premium frames.