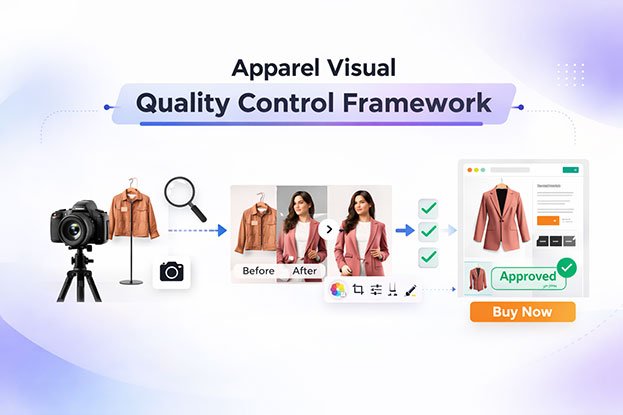
A great clothing photo on set can still fail once it goes live. The navy jacket turns slightly purple on the product page. One dress sits on a pure white background while the next sits on a faint gray. A shirt collar looks crisp in the model shot and collapsed in the ghost mannequin image. Customers notice these problems even when they cannot name them, and they respond with hesitation, returns, and lost trust.
An apparel visual quality control framework solves this by giving photographers, retouchers, and brand teams a shared system for checking every image before it is approved. This guide walks you through that system step by step, with practical checkpoints, checklists, and review questions you can start using on your next shoot.
What Is an Apparel Visual Quality Control Framework?
An apparel visual quality control framework is a structured set of standards, checkpoints, and approval steps used to evaluate clothing product images from capture to publication. It defines what “correct” looks like for your brand and makes sure every image meets that definition before it reaches a customer.
Think of it as quality assurance for visuals. A garment factory would never ship a jacket without checking stitching, sizing, and fabric defects. Your images deserve the same discipline, because for an online shopper, the image is the product until the parcel arrives.
A complete framework usually covers four layers:
- Standards: The written rules for color, lighting, background, cropping, dimensions, and styling.
- Checkpoints: The specific moments in the workflow where images are reviewed.
- Checklists: The exact questions reviewers ask at each checkpoint.
- Approval and feedback: Who signs off, how issues are reported, and how corrections are tracked.
Without these layers, apparel image quality control depends on individual taste. With them, it becomes a repeatable process that works whether you shoot twenty products or two thousand.
Why Apparel Image Quality Control Matters
It reduces returns caused by inaccurate visuals
One of the most common reasons shoppers return clothing is that the item “looked different online.” Color shifts, misleading fabric texture, or an unrealistic fit in the photo all create a gap between expectation and reality. Strong fashion photography quality control narrows that gap.
It protects brand consistency
A collection page is judged as a whole. When images vary in brightness, crop height, shadow style, or background tone, the entire store looks less professional. Consistency signals that a brand is careful, and care signals quality.
It cuts rework and saves money
Every image rejected after publishing costs time twice: once to fix it and once to re-upload and re-check it. Catching problems early, ideally on set, is far cheaper than fixing them in post-production or after a marketplace flags the listing.
It keeps marketplace listings compliant
Amazon, Zalando, and many other platforms have strict image requirements covering background color, product fill ratio, and resolution. A clothing product image quality checklist built around these rules prevents suppressed listings.
It improves communication between teams
When photographers, retouchers, and ecommerce managers work from the same written standards, feedback becomes specific. “Make it pop” turns into “raise exposure by a third of a stop and match the reference swatch.” That clarity alone removes a large share of revision cycles.
The Five Stages of an Apparel Photography Quality Assurance Process
Quality control should not happen only at the end. The most reliable apparel photography quality assurance process checks images at five stages.
Stage 1: Pre-Production Standards
Before anyone picks up a camera, define the rules. Create a short image style guide that answers:
- What background color and tone do we use (pure white RGB 255, off-white, or a brand color)?
- What are the final image dimensions and aspect ratio?
- Where does the garment sit in the frame, and how much margin surrounds it?
- What shot list is required per product (front, back, side, detail, lifestyle)?
- Which presentation style applies: model, ghost mannequin, flat lay, or hanger?
- What shadow style do we use: natural drop shadow, reflection, or none?
- What file formats and color profiles are required for delivery?
Include approved reference images for every product category. A reference image communicates more than a paragraph of instructions.
Garment preparation also belongs here. Steam or press every item, remove tags and stickers, check for loose threads, and confirm the correct size sample is on set. Most “retouching problems” are really preparation problems.
Stage 2: On-Set Capture Checks
This is where the highest-value quality control happens, because fixing an issue by reshooting takes seconds on set and hours later.
Shoot tethered whenever possible so images appear on a calibrated monitor instantly. At the start of every session and after any lighting change, photograph a color reference card (such as an X-Rite ColorChecker) under the same light as the garments.
On-set reviewers should check:
- Exposure and histogram (no clipped highlights on white garments, no crushed blacks on dark ones)
- White balance against the gray card
- Focus and sharpness across the full garment, not just the center
- Garment symmetry and fit on the mannequin or model
- Pinning and clipping hidden from the camera angle
- Camera height and distance locked for consistency across the collection
- Every shot on the shot list captured before the garment leaves the set
Stage 3: Post-Production and Retouching Checks
After capture, images move into apparel image editing. This stage includes color correction, background removal, clipping path work, ghost mannequin compositing, wrinkle cleanup, and final cropping.
Quality control here focuses on whether edits improved the image without distorting the product. Over-retouching is as damaging as under-retouching. A sweater smoothed until it looks like plastic misrepresents the knit just as badly as a wrinkled one looks careless.
Stage 4: Final Inspection and Approval
Before images go live, a reviewer who did not edit them performs a final inspection. Fresh eyes catch what the editor has stopped seeing. This review compares images against the style guide, the reference swatch, and neighboring products in the same collection.
Stage 5: Post-Publishing Audit
Once live, view images in context: on the product page, the category grid, mobile screens, and marketplace listings. Some problems only appear when forty thumbnails sit side by side. Schedule a monthly or per-collection audit to catch drift over time.
The Core Apparel Photo Quality Checklist
Below is the heart of the framework. Use these checkpoints during editing review and final inspection. Each section includes the questions reviewers should ask.
1. Color Accuracy
Color is the most important and most commonly failed checkpoint. Customers buy color first.
How to check color accuracy in clothing photos:
- Compare the image on a calibrated monitor to the physical garment under daylight-balanced (D50 or D65) viewing light.
- Sample key color values and compare them with the reference card shot from the same session.
- Check colorways side by side. If the same style comes in red and burgundy, the difference must be clearly visible and true to life.
- Watch problem fabrics: deep blues, purples, neons, blacks, and anything with synthetic sheen often shift on camera.
Review questions:
- Does this color match the physical sample?
- Would a customer receiving this item feel the photo was honest?
- Is the color consistent across the front, back, and detail images of the same product?
2. Exposure and White Balance
- Whites should read as white, not gray or blue.
- Blacks should hold fabric detail rather than turning into flat shapes.
- Exposure should be consistent across the full collection so thumbnails look even on a category page.
- Check the histogram, not just your eyes, especially late in a long editing session.
3. Lighting Consistency
- Light direction and softness should match across all products in a collection.
- Highlights should reveal fabric texture without creating hot spots on satin, leather, or sequins.
- Shadows under collars, folds, and hems should define shape without hiding details.
4. Background Consistency
- Is the background the exact specified value across every image? A white background of RGB 248 next to one at RGB 255 is visible in a grid.
- Are edges clean, with no halos, leftover fringe, or rough clipping?
- Are floor lines, dust, seams in paper, and stand bases fully removed?
- Is the shadow style (if any) consistent in direction, softness, and opacity?
5. Garment Shape and Fit
This is where apparel differs sharply from other product categories. Clothing has no fixed form, so the photographer and retoucher shape it.
- Is the garment symmetrical where it should be (shoulders, sleeves, hemline)?
- Does it look naturally filled, not flat, stretched, or bloated?
- In ghost mannequin images, is the neck and inner label area cleanly composited with a realistic inner back view?
- Did editing preserve the true silhouette? Retouchers should never slim a garment to look more flattering than it is.
6. Fabric Texture and Details
- Is the weave, knit, or grain visible at full zoom?
- Are stitching, buttons, zippers, embroidery, prints, and logos sharp and accurate?
- Has noise reduction or skin-style smoothing erased texture?
- Is a close-up detail shot included for fabrics where texture drives the purchase?
7. Wrinkles, Lint, and Defects
- Remove temporary wrinkles, creases from packaging, lint, dust, and loose threads.
- Keep natural fabric folds that show drape and movement. Linen should still look like linen.
- Check for pin marks, clamp marks, and tape visible at edges.
8. Composition, Framing, and Cropping
- Does every image follow the same product placement and margin rules?
- For model shots, is crop height consistent (for example, always cropping at the same point on the face or showing full head)?
- Does the product fill the frame to the required ratio for each marketplace?
- Is the garment straight, not tilted, unless the style guide allows it?
9. Model and Skin Retouching
For model photography, fashion photo retouching needs its own checkpoints:
- Skin tones look natural and consistent across the shoot.
- Temporary blemishes are removed, while natural features are respected.
- Flyaway hair is cleaned where it crosses the garment.
- The model’s body has not been reshaped in a way that misrepresents garment fit.
- Garment color is not affected by skin or hair color corrections.
10. Technical Specifications
- Correct dimensions, resolution, and aspect ratio
- Correct color profile (sRGB for web in most cases)
- File size within platform limits
- Correct file naming convention (for example, SKU_color_view.jpg)
- No visible compression artifacts or banding in smooth gradients
A Quick-Reference Apparel Visual Quality Control Checklist
Print this table or add it to your review software.
| Checkpoint | Pass Criteria | Common Failure |
|---|---|---|
| Color | Matches physical sample and reference card | Blue/purple shift, dull reds |
| Exposure | Even across collection, no clipping | Gray whites, flat blacks |
| Background | Exact specified value, clean edges | Uneven white, halos |
| Shape | Symmetrical, naturally filled | Collapsed collar, twisted hem |
| Texture | Visible at 100% zoom | Over-smoothed fabric |
| Defects | No lint, pins, or package creases | Clip marks at edges |
| Composition | Same margins and crop height | Inconsistent product size |
| Shadows | Consistent style and direction | Mixed shadow styles |
| Specs | Correct size, profile, naming | Wrong color profile |
| Set completeness | All required angles delivered | Missing back or detail view |
Common Problems and What Causes Them
Understanding root causes turns quality control from fixing into preventing.
Why do clothing photos look inconsistent?
Usually because conditions changed during production: different lighting setups, different photographers, multi-day shoots, or multiple editors working without a shared style guide. The fix is locked camera and light positions, a reference card at every session, and written editing standards.
Why does fabric color look different between images?
Mixed light sources, auto white balance, uncalibrated monitors, and inconsistent color profiles are the main causes. Some fabrics also show metamerism, meaning they appear to change color under different light. Always shoot a reference card and correct against it rather than by eye alone.
Why do garments lose their shape after editing?
Aggressive liquify work, careless ghost mannequin compositing, or clipping paths drawn loosely around edges can all distort the silhouette. Retouchers should work against the original capture and flag shape problems for reshoot rather than inventing a shape that the garment does not have.
Why do backgrounds look uneven?
Uneven lighting on the backdrop, poor masking, or partial background replacement. A proper clipping path or careful background removal, followed by setting an exact background value, solves most cases.
Why do product photos need repeated revisions?
Vague feedback is the main culprit. Comments like “fix color” or “looks off” force editors to guess. Specific, visual feedback with marked-up screenshots and references can cut revision rounds dramatically.
Roles and Responsibilities in the QC Workflow
A framework works only when everyone knows their part.
- Creative director or brand owner: Sets and signs off the style guide and final visual standards.
- Photographer: Delivers technically correct captures, runs on-set checks, and shoots the reference card.
- Stylist: Prepares garments and controls shape, fit, and styling on set.
- Retoucher or photo editor: Executes clothing photo editing to the written standard and flags capture issues that editing should not hide.
- QC reviewer: Performs the independent final inspection using the checklist.
- Ecommerce manager: Checks images in the live environment and against marketplace rules.
In small teams, one person may hold several roles. That is fine, but the final review should still be done as a separate pass, ideally after a break, so it feels like a fresh inspection.
Building a Feedback System That Actually Works
Good feedback is specific, visual, and traceable. Use these principles:
- Reference the standard. Instead of “too dark,” write “below exposure standard, match image SKU1024_front.”
- Mark up the image. Circle the problem area directly on a screenshot or proof.
- Group feedback per batch. Send one consolidated list rather than scattered messages.
- Categorize issues. Label each as color, shape, background, crop, defect, or spec. Patterns reveal where the process breaks.
- Track revision rounds. If a product needs more than two rounds, investigate the root cause.
- Update the style guide. Every recurring issue should become a written rule, so it never needs explaining twice.
Tools That Support Apparel Image Quality Control
You do not need expensive software to start, but these tools make the framework easier to run:
- Monitor calibration devices to ensure everyone sees accurate color.
- Color reference cards for every shoot session.
- Tethering software such as Capture One or Lightroom for real-time on-set review.
- Proofing and annotation tools for marked-up feedback.
- Shared folders with clear naming conventions to track version status (raw, edited, revision, approved).
- Contact sheets or grid previews to review a whole collection side by side before publishing.
The grid preview deserves special mention. Viewing thirty edited images together exposes inconsistencies in brightness, product size, and background tone that are invisible when reviewing one image at a time.
Scaling Quality Control for Large Collections
When a brand shoots hundreds of SKUs per season, quality control must scale without slowing production.
- Batch by category. Review all tops together, all bottoms together. Similar products make inconsistencies obvious.
- Use sampling for mature workflows. Once a team consistently passes QC, review a percentage of each batch in full detail and the rest by grid check.
- Lock templates. Use cropping templates, action sets, and presets so dimensions and margins are automated rather than manual.
- Create a “golden image” per category. One approved image becomes the benchmark every future image is compared against.
- Set turnaround windows for QC. Quality control should be a scheduled step, not something squeezed in before launch.
When Professional Apparel Photo Editing Makes Sense
Many photographers and brands handle editing in-house, and for small volumes that often works well. However, certain signals suggest it is time to bring in a professional apparel photo editing partner:
- Editing backlogs are delaying product launches.
- Ghost mannequin, complex clipping path, or high-end fashion photo retouching work exceeds the team’s skill or time.
- Color and background consistency drift as volume grows.
- Photographers spend more time editing than shooting.
- Seasonal peaks create more work than the internal team can absorb.
How to outsource without losing visual consistency
Outsourcing succeeds or fails on the quality of your framework. Before handing work to any post-production team:
- Share your full style guide, including background values, crop templates, shadow style, and file specs.
- Provide reference images for each product category.
- Start with a test batch and review it using your standard checklist.
- Ask about their internal QC process. A reliable editing partner runs its own quality checks before delivery, not after your complaint.
- Agree on revision terms and turnaround times up front.
- Keep final approval in-house. Your team should always own the last inspection.
When your standards are written down, an external team can match them. When they live only in someone’s head, no partner can meet them consistently.
A Sample Apparel Visual Quality Control Workflow
Here is how the full framework fits together in a real production cycle:
- Brief: Creative director confirms the style guide and shot list for the collection.
- Prep: Stylist steams garments, removes tags, and checks for defects.
- Capture: Photographer shoots tethered, with a reference card at each session and on-set checks for exposure, focus, and shape.
- Selection: Best frames are chosen and checked against the shot list.
- Editing: Retoucher performs color correction, background removal, ghost mannequin compositing, cleanup, and cropping.
- Self-check: Editor runs the core checklist before submitting.
- Independent QC: Reviewer inspects each image at 100% zoom and the batch in grid view.
- Feedback and revision: Specific, categorized notes go back; revised files return.
- Approval: Final sign-off is recorded, and files move to the approved folder.
- Live audit: Ecommerce team checks images on site, mobile, and marketplaces.
- Improvement: Recurring issues become new rules in the style guide.
Following this sequence turns ecommerce apparel photography from a series of one-off fixes into a production system that improves with every collection.
Frequently Asked Questions
What should I check before publishing clothing product photos?
Check color accuracy against the physical garment, exposure and white balance, background consistency, garment shape, fabric texture, defects, cropping, and technical specifications. Then review the whole collection in a grid to confirm visual consistency.
How do I maintain consistency in apparel photography?
Lock your lighting and camera positions, shoot a color reference card every session, follow a written style guide, use cropping templates, and compare every new image against an approved benchmark image.
How much retouching is too much for apparel images?
Retouching goes too far when it changes how the product actually looks. Removing lint and temporary wrinkles is acceptable. Altering color, erasing texture, or reshaping the silhouette misleads customers and increases returns.
Who should do final image approval?
Ideally, someone who did not edit the images. Fresh eyes catch errors the editor has stopped noticing. In small teams, the same person can do it after a break, as a separate dedicated pass.
Is ghost mannequin or flat lay better for quality control?
Neither is automatically better. Ghost mannequin shows fit and shape more realistically but requires precise compositing. Flat lay is simpler but needs careful styling for symmetry. Choose one per category and apply it consistently.
Conclusion
Beautiful apparel images are not created by talent alone. They are created by a system that catches problems early, communicates standards clearly, and checks every image before a customer sees it. An apparel visual quality control framework gives fashion photographers, retouchers, and clothing brands exactly that system.
Start small. Write a one-page style guide, add a reference card to every shoot, and run the ten-point checklist on your next batch. Review your collection in a grid before publishing. Turn every recurring mistake into a written rule.
Over time, your images will look more consistent, your revision rounds will shrink, and your customers will receive products that look exactly like the photos that convinced them to buy. That is the real goal of quality control: not perfection for its own sake, but trust that shows up in every click, every cart, and every order that stays delivered instead of returned.



