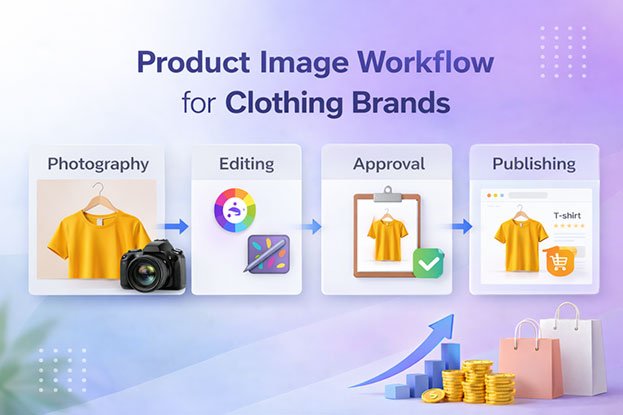
Every clothing brand hits the same wall at some point. You launch with 40 products, shoot them in a weekend, edit them yourself, and upload them by Monday. Then the catalog grows to 400 products. Then 4,000. Suddenly, images are missing, file names make no sense, backgrounds don’t match, and your new collection is stuck in a folder waiting for edits.
The fix is not working harder. It’s building a scalable product image workflow for clothing brands that runs the same way whether you’re processing 50 images or 5,000.
This guide walks you through that process step by step. You’ll learn how to prepare garments, organize shoots, name files, standardize editing, set quality control rules, and publish ecommerce-ready images without chaos. Whether you’re a small Shopify store or a growing fashion label with multiple photographers, you can use this framework to bring order to your image production.
What Is a Scalable Product Image Workflow?
A product image workflow is the full path a product takes from the moment it arrives for photography to the moment its images go live on your store.
A scalable workflow is one that can handle more volume without breaking. When your catalog doubles, your workflow shouldn’t need to be rebuilt. You simply add more capacity (more shoot days, more editors, more reviewers) and the system keeps running.
A scalable workflow usually has five qualities:
- Repeatable: Every product follows the same steps in the same order.
- Documented: Standards are written down, not stored in one person’s head.
- Consistent: Images look the same no matter who shot or edited them.
- Trackable: You always know where each product is in the process.
- Flexible: You can add people, partners, or tools during busy periods.
Think of it like a production line in a garment factory. Each station has a clear job, clear inputs, and clear outputs. Images move forward in a predictable way.
Signs Your Current Image Workflow Won’t Scale
Before building something new, it helps to spot the cracks in what you have. Here are common warning signs:
- Product images take longer to go live than the products take to arrive.
- Different photographers produce noticeably different results.
- Backgrounds range from pure white to light gray to slightly blue.
- Crops are inconsistent, so models or garments sit at different heights on the page.
- Nobody can find the final version of a file.
- The same images get sent back for revisions two or three times.
- Someone has to manually check every image because there are no clear standards.
- Seasonal launches create panic, overtime, and missed dates.
If three or more of these sound familiar, your workflow depends too much on individual effort. The steps below will help you replace that with a system.
Step 1: Create a Product Image Style Guide
Everything starts here. A style guide is a written document that defines exactly what a finished product image should look like. Without one, every photographer and editor makes their own choices, and consistency disappears.
Your style guide should cover:
Image types per product. Decide which angles every product needs. A common apparel set looks like this:
- Front view
- Back view
- Side or three-quarter view
- Detail shot (fabric, stitching, buttons, labels)
- Lifestyle or on-model shot (optional)
Presentation style. Choose between flat lay, ghost mannequin, on-model, or hanging shots. Many brands use ghost mannequin for tops and outerwear because it shows shape and fit without the cost of models. Pick one primary style per product category and stick to it.
Background. Specify the exact color. For most marketplaces, that means pure white (RGB 255, 255, 255). If you use an off-white or colored background for brand reasons, write down the exact values.
Framing and cropping. Define where the garment sits in the frame. For example: “Product fills 85% of the image height, centered horizontally, with equal margins top and bottom.” This one rule alone fixes a huge amount of visual inconsistency on category pages.
Shadows. Decide whether you want no shadow, a natural drop shadow, or a reflection. Be specific.
Color accuracy. State that images must match the physical product. Color mismatch is one of the biggest causes of returns in fashion ecommerce.
Technical specs. List image dimensions, aspect ratio, file format, color profile (usually sRGB for web), and maximum file size.
Include visual examples of approved and rejected images. People follow pictures better than paragraphs.
Step 2: Prepare Products Before the Shoot
Good editing starts with good preparation. Every minute spent prepping a garment saves several minutes in retouching.
Set up a prep station with a steamer, lint rollers, tape, pins, clips, tissue paper for stuffing, and scissors for loose threads.
Build a simple prep checklist for each garment:
- Remove all tags, stickers, and plastic (unless the tag is part of a detail shot).
- Steam or press out creases.
- Remove lint, dust, and pet hair.
- Trim loose threads.
- Check for stains or defects. Flag damaged samples instead of shooting them.
- Button, zip, and align the garment properly.
- Confirm the correct color variant and size.
Track products as they arrive. Use a shoot list, which can be a simple spreadsheet, with columns for SKU, product name, color, category, required angles, and status. This list becomes the backbone of your workflow. If a product isn’t on the list, it doesn’t get shot. If it’s on the list, someone is responsible for it.
A practical tip: group products by presentation style and color before the shoot. Shooting all white tees together, then all dark denim, means fewer lighting adjustments and more consistent results.
Step 3: Standardize Your Photography Setup
If different shoots use different setups, no amount of editing will make images fully consistent. Lock down your setup and document it.
Record your lighting setup. Take a photo of the studio layout and note light positions, power settings, and distances. Anyone should be able to recreate it next week or next year.
Fix your camera settings. Write down aperture, shutter speed, ISO, and white balance. Shoot in RAW format so editors have more room to correct color and exposure.
Use a color reference. Shoot a gray card or color checker at the start of every session and whenever lighting changes. This makes color correction far more accurate.
Mark positions. Use tape on the floor for the camera tripod and mannequin or model position. This keeps framing consistent between sessions.
Tether when possible. Shooting tethered (with the camera connected to a computer) lets you check focus, exposure, and framing on a big screen before moving on.
Capture the shoot list order. Shoot products in the order they appear on your shoot list. It sounds small, but it makes file matching much easier later.
If you work with multiple photographers or studios, give them all the same setup document and style guide. Ask for a short test batch before a full shoot to confirm they’re matching your standards.
Step 4: Build a File Naming and Folder System
Poor file management is one of the quietest workflow killers. A missing image or a wrongly named file can delay a whole product launch.
Use a Clear File Naming Convention
Your file names should tell you exactly what’s in the image without opening it. A reliable format is:
SKU_Color_View_Version.jpg
For example:
TS1045_Black_Front_v1.jpgTS1045_Black_Back_v1.jpgTS1045_Black_Detail01_v1.jpg
A few rules keep this clean:
- Use the SKU as the first part, since it’s unique and matches your product catalog.
- Avoid spaces. Use underscores or hyphens.
- Keep view names consistent (always “Front,” never “front” one day and “FRT” the next).
- Use version numbers until the image is final.
If your ecommerce platform or product information management (PIM) system uses a specific format, match it. That makes bulk uploads much faster.
Organize Folders by Workflow Stage
Structure folders so the status of every file is obvious:
/Season_or_Collection
   /01_RAW
   /02_Selected
   /03_In_Editing
   /04_Edited
   /05_QC_Approved
   /06_Final_Web
   /07_Marketplace_Exports
Files only move forward when a step is complete. If a file is in “04_Edited,” everyone knows it’s waiting for quality control.
Back Up Everything
Keep RAW files and final images in at least two places, such as cloud storage and a local drive. Losing a season’s worth of RAW files means reshooting products you may no longer have.
Step 5: Create a Consistent Image Editing Process
Editing is where most scaling problems show up. It’s time-consuming, it needs skill, and small differences between editors become obvious when images sit side by side on a category page.
Break Editing Into Clear Tasks
Most apparel editing includes some combination of:
- Background removal or clipping path: Separating the product from its background cleanly.
- Ghost mannequin (neck joint): Removing the mannequin and merging an inside shot of the neckline to create a hollow, 3D look.
- Color correction: Matching image colors to the real product.
- Garment retouching: Removing lint, wrinkles, loose threads, and small fabric flaws.
- Shape correction: Fixing uneven sleeves, twisted hems, or asymmetry.
- Model retouching: Light skin cleanup, flyaway hair, and stray fabric on on-model shots.
- Shadow creation: Adding natural or drop shadows.
- Cropping and alignment: Placing the product according to your framing rules.
- Resizing and export: Producing the right sizes and formats.
Write Editing Instructions for Each Category
Tops, pants, dresses, shoes, and accessories each need slightly different handling. Create a short instruction sheet for each category. For example:
Category: Knit sweaters (ghost mannequin)
Remove mannequin and add neck joint. Keep natural knit texture, do not over-smooth. Remove lint and loose fibers. Straighten ribbed hems. Pure white background. Natural soft shadow. Product height 85% of canvas. Export 2000 x 2500 px JPG, sRGB.
Clear instructions reduce guesswork, and less guesswork means fewer revisions.
Use Templates and Actions
Photoshop actions and templates can automate repetitive steps like canvas sizing, cropping guides, and export settings. Automation won’t handle creative retouching, but it removes a lot of manual repetition.
Batch Similar Images Together
Edit products in batches by category and color. An editor working through 60 black t-shirts in a row will be faster and more consistent than one jumping between shirts, jeans, and jackets.
Step 6: Set Up Quality Control Checkpoints
Quality control (QC) is what stops bad images from reaching your store. Without it, errors get caught by customers instead of your team.
Build a QC Checklist
Turn your style guide into a checklist reviewers can use quickly:
- Is the background the correct color with no gray patches or leftover edges?
- Are the clipping edges clean and smooth, with no jagged lines or halos?
- Does the color match the physical product or approved reference?
- Are lint, dust, and wrinkles removed?
- Is the product centered and sized correctly?
- Are all required angles present?
- Is the file named correctly?
- Is the resolution, format, and file size correct?
Check at More Than One Stage
A simple two-level QC process works well:
- Editor self-check: Editors review their own work against the checklist before delivery.
- Final review: A separate reviewer checks a sample or the full batch before approval.
For large volumes, reviewing every image may not be realistic. Instead, check a percentage of each batch (for example, 20%). If errors appear, review the whole batch.
Review Images Side by Side
View images in a grid, the way customers see them on a category page. Inconsistent crops, backgrounds, and colors are much easier to spot this way than one image at a time.
Log Revisions
Keep a record of what was sent back and why. If the same issue keeps appearing, fix it at the source by updating the style guide, the shoot setup, or editor instructions. Revisions should go down over time, not stay flat.
Step 7: Prepare Ecommerce-Ready Image Exports
Different sales channels have different image requirements. Plan exports so you’re not resizing files at the last minute.
Create a simple export table for your channels:
| Channel | Typical Requirements |
|---|---|
| Your website (Shopify, WooCommerce, etc.) | Consistent aspect ratio, high resolution for zoom, compressed for speed |
| Amazon | Pure white background for main image, product filling most of the frame |
| Other marketplaces | Varies by platform, check current guidelines |
| Social media and ads | Square or vertical crops, lifestyle styling |
Always check each platform’s latest guidelines, since requirements change.
A few export best practices:
- Use sRGB color profile so colors display accurately on screens.
- Compress images to keep pages fast without visible quality loss. Page speed affects both conversions and SEO.
- Keep a master file (high-resolution, layered or uncompressed) so you can produce new sizes later without re-editing.
- Use the same aspect ratio across a collection so product grids look clean.
For SEO, add descriptive alt text and keep file names meaningful. A name like womens-black-wool-blazer-front.jpg is more helpful to search engines than IMG_4821.jpg. Your internal SKU-based name can be converted during upload if your platform supports it.
Step 8: Deliver, Upload, and Publish
The final step connects images to live product pages. This is where missing or mismatched images often show up.
Match images to your product data. Use your shoot list or PIM system to confirm every SKU has all its required images before upload.
Use bulk upload tools. Most ecommerce platforms support bulk uploads through CSV files or apps. Consistent file names make this process much faster and more accurate.
Do a final live check. After publishing, review the collection page and a few product pages on both desktop and mobile. Check zoom quality, image order, and loading speed.
Update your tracker. Mark products as “Live” so everyone knows the job is complete.
How to Reduce Workflow Bottlenecks
A bottleneck is any step that slows everything else down. In most clothing brands, the biggest bottlenecks are:
Editing capacity. Photography is often fast. Editing is slow. One photographer can easily produce more images in a day than one editor can finish in a week. This is the most common reason brands fall behind.
Unclear feedback. Comments like “make it look better” lead to endless back-and-forth. Give specific, visual feedback, such as marked-up screenshots showing exactly what needs to change.
Approval delays. If only one person can approve images, everything waits on their calendar. Assign backup approvers and set clear review deadlines.
Missing samples. Products that arrive late delay the whole batch. Shoot what’s ready and add late items in a follow-up batch rather than holding everything.
Manual file handling. Renaming, sorting, and resizing files by hand wastes hours. Use naming templates, batch tools, and automation wherever possible.
A simple way to find your bottleneck is to track how long products spend at each stage. The stage where items pile up is where you need more capacity or a better process.
How to Scale Image Production During Seasonal Launches
Seasonal drops, holiday collections, and big sale events can multiply image volume almost overnight. Planning ahead is the difference between a smooth launch and a stressful one.
Plan backward from launch day. Start with your go-live date and work back. For example:
- Launch day: products live
- 3 to 5 days before: final upload and live checks
- 1 week before: QC approved images
- 2 weeks before: editing complete
- 3 weeks before: photography complete
- 4 weeks before: samples received and prepped
Adjust the timeline to your volume, but always build in a buffer.
Book capacity early. Reserve studio time, photographers, and editing support before the busy period. Freelancers and agencies get booked up fast before major retail seasons.
Prioritize by importance. Not every product needs the same speed. Hero products, bestsellers, and campaign items should go first. Basic replenishment items can follow.
Deliver in rolling batches. Instead of waiting for all 1,500 images at once, send images to editing in batches of 100 to 300 as they’re shot. Edited batches can move into QC while the next batch is still being photographed. This keeps work flowing and prevents a huge pile-up at the end.
Use a flexible editing partner. Hiring full-time editors for a few busy months a year rarely makes sense. An outsourced post-production team lets you scale up for launches and scale back down afterward.
When Should Clothing Brands Outsource Product Image Editing?
In-house editing works well for small catalogs and brands with steady, predictable volume. But there’s usually a point where outsourcing becomes the smarter move.
Consider outsourcing when:
- Your editing backlog keeps growing faster than your team can clear it.
- Your team spends more time retouching than on strategy, merchandising, or marketing.
- Seasonal volume spikes regularly cause delays.
- You need specialized skills like ghost mannequin, advanced retouching, or color matching.
- Image quality varies between editors or freelancers.
- The cost of hiring, training, and equipping in-house editors outweighs the cost of a partner.
The right partner should fit into your workflow, not force you to rebuild it. Look for a team that follows your style guide, handles your naming conventions, offers clear turnaround times, and has a real quality control process.
Before committing to a large volume, send a small test batch. This shows you the partner’s quality, communication, and ability to follow instructions.
How Professional Post-Production Supports a Scalable Workflow
Editing is the stage where most apparel workflows slow down, so having dependable post-production support makes the rest of the system work.
Clipping Area is a post-production photo retouching agency that has worked with ecommerce brands, fashion labels, photographers, and online retailers since 2014. The team handles the editing tasks clothing brands need most, including clipping path, background removal, ghost mannequin, garment retouching, color correction, model retouching, shadow creation, and ecommerce-ready resizing.
Here’s how a partner like Clipping Area fits into the workflow described above:
- Style guide matching: Your standards become the editing brief, so every image follows the same rules.
- Consistent results at volume: A trained team working from the same instructions keeps quality steady whether you send 50 images or several thousand.
- Built-in quality checks: Images are reviewed before delivery, which reduces the number of revisions reaching your team.
- Flexible capacity: You can scale up for seasonal launches without hiring and training new staff.
- Delivery in your format: Files can follow your naming convention, sizes, and folder structure, so they’re ready for upload.
The result is simple. Your team focuses on product, photography, and sales, while editing runs reliably in the background.
Common Product Image Workflow Mistakes to Avoid
Even with a good system, a few mistakes can undo your progress:
- Skipping the style guide and relying on verbal instructions.
- Poor garment prep, which adds hours of retouching work.
- Changing lighting setups between shoots without documenting them.
- Inconsistent file naming, which leads to missing and mismatched images.
- No color reference, causing color mismatches and returns.
- No QC step, letting errors reach the live store.
- Vague revision feedback, which creates repeated back-and-forth.
- Waiting until the last minute to plan seasonal launches.
- Overediting fabric, making textures look fake or plastic.
Most of these come down to the same root issue: relying on memory and habit instead of documented steps.
Frequently Asked Questions
What is a product image workflow for clothing brands?
It’s the step-by-step process a clothing product follows from preparation and photography through editing, quality control, export, and publishing on your ecommerce store.
How many images should each clothing product have?
Most apparel products need four to six images: front, back, side or three-quarter view, one or two detail shots, and optionally a lifestyle or on-model image.
What’s the best file naming format for product images?
A SKU-based format such as SKU_Color_View_Version.jpg works well because it’s unique, readable, and easy to match with your product catalog.
How do I keep product images consistent across different photographers?
Use a written style guide, a documented lighting setup, consistent camera settings, color reference cards, and a single editing standard applied by the same editing team.
Is it cheaper to edit product images in-house or outsource?
It depends on volume. Small, steady catalogs can work in-house. Growing brands with large or seasonal volume often save time and money by outsourcing to a post-production partner.
How long does professional product image editing take?
Turnaround depends on the volume and complexity of edits. Simple background removal is faster than ghost mannequin or detailed retouching. Agree on turnaround times with your editing partner before each project.
Conclusion
A scalable product image workflow isn’t built on talent or hard work alone. It’s built on clear standards, organized files, consistent editing, and reliable quality checks. When every step is documented and repeatable, your team can handle a growing catalog, multiple photographers, and busy seasonal launches without losing quality or missing deadlines.
Start with the foundation: write your style guide, set up a file naming system, and create a simple QC checklist. Then look at where work piles up and fix that stage first. For most clothing brands, that stage is editing.
If editing is slowing your launches down, Clipping Area can help you build a post-production process that keeps up with your growth. Send a test batch, share your style guide, and see how consistent, ecommerce-ready images can move your products from studio to store faster.



