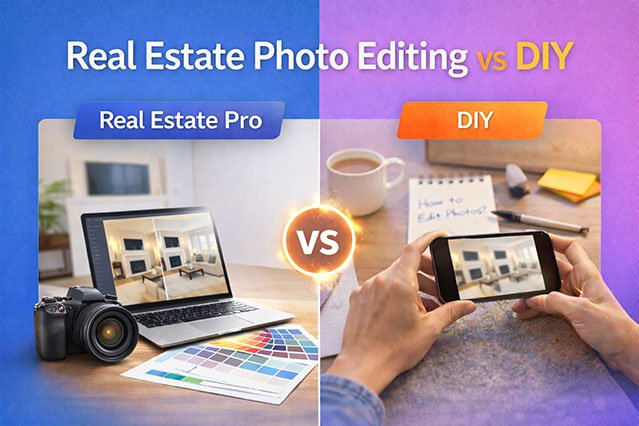
Professional real estate photo editing vs DIY is a common question among agents who want their listings to look better without wasting time or money. In my experience, most real estate agents start with DIY photo editing for one reason:
it feels quick and cheap.
You take photos, open an app, move a few sliders, and think:
“Good enough.”
But here’s the mistake I see all the time:
DIY editing usually fixes one problem and creates three new ones.
Most people don’t realize that real estate photos are different from normal photos.
They’re not for memories.
They’re for marketing.
And marketing photos need to look:
Clean
Natural
Consistent
Trustworthy
DIY tools are not built for that.
What DIY Editing Usually Does
DIY apps and presets usually:
Brighten everything the same way
Add strong contrast
Push colors too much
Sharpen too hard
At first glance, the photo may look “better.”
But after a few seconds, it often looks:
Too bright
Too yellow or too blue
Flat
Artificial
Many DIY edits fail because agents don’t understand why real estate photos look dark and try to fix lighting with filters instead of proper exposure correction.
Why Real Estate Photos Need Special Editing
Here’s something most people don’t think about:
Every room has different light.
A living room with windows
A kitchen with warm bulbs
A bedroom with shade
If you apply one filter to all photos, you get:
One room too bright
One room too dark
One room too yellow
The listing looks messy and unprofessional.
Professional editing treats:
Each room separately
Each light source differently
Each photo as part of a set
That’s why professional galleries look calm and balanced, not chaotic.
How Buyers React to DIY vs Professional Photos
Buyers don’t compare editing methods.
They compare feelings.
DIY-edited photos often feel:
Harsh
Over-processed
Inconsistent
Professionally edited photos feel:
Bright but natural
Clean
Calm
Trustworthy
In my experience, buyers trust what looks natural.
They avoid what looks fake or rushed.
The Hidden Cost of DIY Editing
Here’s the part most people ignore: time.
With DIY editing:
You edit photos yourself
You test filters
You redo mistakes
You still feel unsure
With professional editing:
Photos come back ready
All images match
No second guessing
What feels cheap at first often costs more in time and stress.
How DIY vs Professional Editing Affects Buyer Response and Listing Results
In my experience, the biggest difference between DIY and professional editing shows up in one place:
buyer behavior.
Buyers don’t know how your photos were edited.
They only know how the photos make them feel.
And that feeling decides whether they click, save, or move on.
What Happens When Photos Are DIY Edited
Here’s what I often see with DIY-edited listings:
The first photo looks okay
The second photo looks too bright
The third photo looks yellow
The fourth photo looks flat
The gallery feels uneven.
Buyers may not say, “These photos are inconsistent.”
But they feel something is off.
When that happens, they:
Scroll faster
Spend less time on the listing
Skip saving it
Skip booking a showing
Even if the home is nice, the photos don’t help it.
What Happens When Photos Are Professionally Edited
With professional editing, the photo set usually feels:
Balanced
Calm
Clean
Natural
All rooms look like they belong to the same home.
In my experience, this leads to:
More clicks on the listing
More time spent on photos
More saves and shares
More showing requests
The house hasn’t changed.
Only the way it is presented has.
Why Consistency Matters So Much
Here’s the mistake I see all the time:
people focus on making one photo look great.
But buyers don’t see one photo.
They see a full gallery.
If one image looks warm, one looks cold, and one looks dark, the listing feels messy.
Professional editing makes sure:
All rooms have similar brightness
All colors look natural
No photo looks out of place
That consistency makes the home feel more trustworthy.
Color issues are common when people don’t know why real estate photos look yellow, so they increase brightness instead of fixing white balance.
How Editing Affects Price Perception
Most people think price is about numbers.
But price is also about feeling.
Poorly edited photos make homes feel:
Smaller
Older
Less cared for
Which makes buyers think:
“Maybe this should be cheaper.”
Clean, well-edited photos make homes feel:
Better maintained
Brighter
More valuable
Which makes buyers more comfortable with the asking price.
Why Buyers Trust Professional-Looking Photos
In my experience, buyers trust what looks natural.
They don’t trust photos that look:
Over-processed
Too colorful
Too bright
Strange or uneven
Professional editing keeps photos:
Bright but realistic
Clear but soft
Clean but honest
That balance is hard to achieve with DIY tools.
What Professionals Do Differently From DIY Tools
In my experience, the real difference between DIY editing and professional editing is not the software.
It’s the thinking behind each photo.
DIY tools try to treat every photo the same.
Professionals treat every room differently.
That’s the big difference most people don’t see.
How Professionals Edit Room by Room
Here’s the mistake I see all the time:
people edit the whole set of photos with one filter.
But in real homes:
Living rooms get window light
Kitchens get warm bulbs
Bedrooms get softer light
Bathrooms get mixed light
Professional editors look at each room and ask:
“What does this space need to look natural?”
They then:
Adjust brightness based on the room
Fix color based on the light source
Balance windows and interiors
Keep walls looking clean
Make furniture look real
That’s why professional galleries feel calm and consistent. Most of these issues come from the same common real estate photo editing mistakes agents make when relying on apps and presets.
Why Professionals Avoid the ‘Fake’ Look
Many people worry that professional editing will make photos look fake.
In my experience, it’s usually the opposite.
Bad editing looks fake.
Good editing looks believable.
Professionals avoid:
Over-bright whites
Neon colors
Harsh shadows
Strong filters
Instead, they aim for:
Soft light
Neutral color
Clear detail
Natural contrast
The goal is not to impress with effects.
The goal is to make the home feel comfortable.
What DIY Tools Can’t Control Well
DIY tools are good for:
Quick social media photos
Personal pictures
Simple fixes
But they struggle with:
Mixed lighting
Window brightness
Yellow or blue color casts
Keeping all photos matching
Professional editing handles:
Window and interior balance
Color correction per room
Matching the full gallery
Exporting photos correctly for MLS and websites
This is why professional results look smoother and more stable.
Why This Matters to Buyers
Buyers don’t analyze editing techniques.
They judge how the home feels.
DIY-edited photos often feel:
Harsh
Uneven
Rushed
Professionally edited photos feel:
Clean
Bright
Calm
Trustworthy
In my experience, trust is what makes buyers take the next step.
When DIY Might Be Enough
To be fair, DIY editing can work for:
Personal rental ads
Very small listings
Informal marketing
But for:
MLS listings
Competitive markets
Higher-value homes
Professional agents
DIY usually isn’t enough.
Key Takeaway: Professional editors improve photos room by room, keep colors natural, and create consistent galleries—something DIY tools cannot do reliably.
Case Study: How Switching from DIY to Professional Editing Improved a Listing
Client Profile
A real estate agent marketing a 2-bedroom condo in a competitive city market.
The Problem
The agent edited photos using a mobile app and presets.
Some rooms looked too bright, others looked yellow, and the gallery felt inconsistent.
The listing received views but very few inquiries.
What Was Done
The agent switched to professional real estate photo editing focused on:
Balancing brightness in each room
Correcting yellow and blue color tones
Matching all photos to look consistent
Improving clarity without making photos look fake
No new photos were taken.
Only professional editing was applied.
The Result (Within 2 Weeks)
📈 More listing clicks
❤️ More saves on property platforms
📅 More showing requests
💬 Buyers said the home “looked cleaner and more professional”
DIY tools also struggle with sharpness, especially when users don’t understand why real estate photos look blurry in low light rooms.
Key Lesson:
The property did not change.
Only the editing method changed — and buyer response improved.
Frequently Asked Questions (FAQ)
Is DIY real estate photo editing good enough for listings?
In my experience, DIY editing is often not consistent enough for professional listings. It can work for simple use, but it usually creates uneven results across a full photo gallery.
What is the biggest difference between DIY and professional editing?
DIY tools apply the same filter to every image. Professional editing adjusts each room separately to keep lighting and color natural.
Do professionally edited photos really get more attention?
Yes. Listings with clean, balanced photos usually receive more clicks, more saves, and more showing requests.
Is professional editing allowed on MLS?
Yes. Editing that improves brightness, color, and clarity without changing the structure of the property is fully MLS-compliant.
Why do DIY photos often look fake?
Because filters and presets often push brightness and color too far, making rooms look unnatural.
How do I know if my photos need professional editing?
If your photos look dark, yellow, blurry, or inconsistent from room to room, professional editing can make a clear improvement.
Is professional real estate photo editing expensive?
No. Compared to the value of one showing or one sale, professional editing is affordable and offers strong return on investment.
Can I try professional editing before ordering?
Yes. Many services offer a free trial so you can see the quality before committing.
Free Trial Call-to-Action
See the Difference Before You Decide
Not sure whether DIY editing is enough for your listings?
Try professional editing free and compare the result yourself.
✅ Send us one real estate photo
✅ Get a professionally edited sample
✅ Compare DIY vs professional result
✅ No payment required
Professional editing improves brightness, color, and consistency so your listings look clean and trustworthy. That’s why many agents switch to a professional real estate photo editing service instead of spending hours fixing photos themselves.
👉 Request Your Free Trial Now
and see how professional editing improves your real estate photos.