Real estate photos can make or break a property listing. And after editing thousands of them, I can tell you that most listing photos have at least one serious problem.
We see it every day at our editing desk. A photographer sends over a batch of interior shots and almost every single one has the same issues — dark rooms, windows blown out to pure white, walls tinted yellow from indoor bulbs, or vertical lines leaning like the house is about to tip over.
The interesting thing is that these problems almost never come from a lack of skill. The photographers we work with are good at what they do. The real culprit is the environment itself. Interior spaces are genuinely one of the hardest things to photograph well. In a single room you can have harsh sunlight blasting through a window on one side, warm yellow bulbs on the ceiling, deep shadows behind the sofa, and reflective hardwood floors bouncing light in every direction. No camera in the world captures all of that perfectly in one shot.
That is exactly why editing exists — and why getting it right matters so much.
A poorly edited listing photo does not just look bad. It makes a spacious room feel cramped, a bright home feel gloomy, and a well-maintained property look neglected. Buyers make snap judgments online. If the photos do not impress them in the first few seconds, they move on.
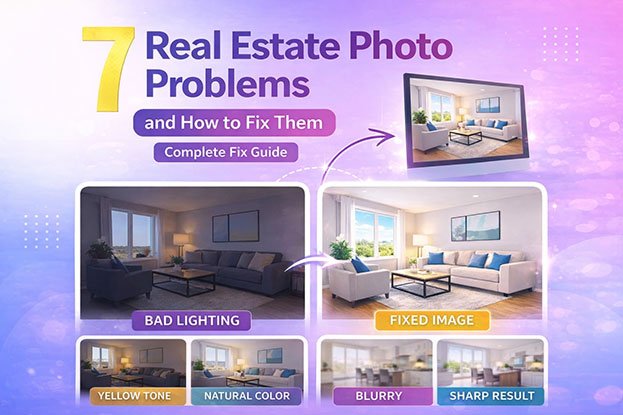
In this guide we are going to walk you through the 7 most common real estate photo problems we see coming through our editing workflow every week. For each one we will explain why it happens, how photographers can prevent it on set, and exactly how we fix it in post-processing.
Here is what we will cover:
- Why real estate photos look dark and how to brighten them
- How to fix yellow and orange color casts
- What causes blurry images and how to sharpen them
- How to recover blown-out windows
- Fixing distorted walls and tilted lines
- Making flat, dull photos look vivid and professional
- Creating consistent color across all rooms in a listing
If you are a photographer trying to level up your shots, or an agent wondering why your listing photos are not generating the engagement you expect, this guide will give you clear and practical answers.
Let’s get into it.
1. Why Real Estate Photos Look Dark (And How to Fix Them)
Dark interiors are the number one problem we see in the batches that come through our editing queue. It is also the issue that frustrates photographers the most because the room looked perfectly bright when they were standing in it. Then they load the photos on their screen and everything looks like it was shot at dusk.
This happens more than most people realize, and it is not the photographer’s fault.
Why It Happens
The core issue is what photographers call exposure conflict. Your camera cannot simultaneously expose correctly for a bright window and a darker interior wall. It has to choose one. In auto mode it usually tries to split the difference, and the result is a room that looks underexposed and dull.
Other contributing factors we regularly see include:
- Insufficient artificial lighting during the shoot
- Shooting in auto mode without manual exposure control
- Not using HDR bracketing or flash to balance the light sources
How Photographers Prevent It
The photographers who send us the cleanest files to work with almost always use HDR bracketing. They shoot the same frame at three to five different exposure levels and send us all of them to blend. Others use a flambient approach, combining flash with ambient light for a more natural result.
When we receive bracketed files, the dark interior problem is almost always solvable. When we receive a single JPEG shot in auto mode, our options become much more limited.
How We Fix It in Editing
When we get a dark interior shot, here is our standard process:
- Raise exposure and brightness to open up the room
- Lift shadows carefully to reveal detail in dark corners without making the image look grey and washed out
- Blend a brighter exposure over the interior when bracketed files are available
- Use dodging tools to selectively brighten specific areas like walls and ceilings
The goal is always a room that looks naturally bright, not artificially pumped up. There is a difference and buyers can feel it even if they cannot explain it.
For a full breakdown read our guide on why real estate photos look dark.
2. Why Real Estate Photos Look Yellow or Orange (And How to Fix Them)
If there is one problem that makes a beautiful property look instantly unappealing, it is a strong yellow or orange color cast. We see it constantly. Walls that are clearly white in real life come through looking cream or mustard yellow. Ceilings look stained. The whole space feels dated and a little dingy.
The good news is that this is one of the most fixable problems in real estate photo editing. The bad news is that it is also one of the most common.
Why It Happens
Almost every home has warm tungsten or warm LED bulbs installed. These produce light in the orange and yellow spectrum. Daylight coming through windows is much cooler and bluer. When both are present in the same room at the same time, the camera’s auto white balance gets confused and produces a color cast that leans warm.
We also see this problem get worse in rooms with:
- No windows or very small windows
- Multiple warm light sources at different angles
- Reflective surfaces like wooden floors that bounce warm light around the room
How Photographers Prevent It
The simplest prevention is setting a custom white balance before shooting. Some photographers we work with also turn off all indoor lights and rely on window light and flash alone, which gives us much cleaner files to work with.
Shooting in RAW also makes a significant difference. RAW files give us full control over white balance in post. JPEG files bake the white balance in and give us far less room to correct.
How We Fix It in Editing
Our color correction process for yellow and orange casts typically involves:
- Adjusting the white balance temperature slider to cool the image down
- Fine-tuning the tint slider to remove any remaining green or magenta shift
- Using the HSL panel to target specific yellow and orange tones in walls and ceilings
- Applying selective color masks when one area needs correction without affecting the whole image
For more detail read our guides on why real estate photos look yellow and why real estate photos look orange.
3. Why Real Estate Photos Look Blurry (And How to Fix Them)
Blurry images instantly make a listing look unprofessional. Even slight softness reduces the perceived quality of a property and can cause buyers to scroll past.
Why It Happens
Blur in real estate photography is most often caused by:
- Camera shake from shooting handheld in low light
- Slow shutter speeds chosen automatically by the camera
- Incorrect focus point selection
- Movement during the exposure
Indoor environments are darker than outdoor spaces, which causes cameras to slow the shutter speed to let in more light. This increases the risk of camera shake.
How Photographers Prevent It
The single most effective tool against blur is a tripod. With the camera fully stabilized, photographers can use slower shutter speeds without any risk of shake. Other prevention methods include:
- Using a remote shutter release to avoid touching the camera
- Enabling mirror lock-up on DSLR cameras
- Manually selecting a focus point on the main subject
How Editors Fix It
Minor blur can be improved in editing using:
- Sharpening tools in Lightroom or Photoshop
- Clarity and texture sliders to enhance fine detail
- High-pass sharpening for more precise control
It is important to note that heavily blurred images cannot be fully recovered in editing. If the blur is significant, the shot needs to be retaken.
For more detail, read our guide on why real estate photos look blurry.
4. Why Real Estate Photos Have Overexposed Windows (And How to Fix Them)
Blown-out windows are one of the most visually obvious problems in real estate photography. When windows appear completely white, the outdoor view disappears and the image looks unnatural and amateurish.
Why It Happens
This is caused by the same exposure challenge as dark interiors. The brightness difference between the outdoor light and the indoor space is too large for a camera to capture in a single shot. When the camera exposes correctly for the interior, the windows become overexposed and lose all detail.
How Photographers Prevent It
Photographers prevent this by capturing multiple exposures of the same scene. One exposure is set correctly for the interior, and another is set correctly for the window view. These are later blended together in editing.
Flash techniques can also help by brightening the interior to reduce the difference in brightness between inside and outside.
How Editors Fix It
The editing technique used to fix overexposed windows is called window pull editing. The process involves:
- Taking a separate darker exposure of the same frame
- Masking out the window area in the brighter interior shot
- Blending the correctly exposed window from the darker frame
- Matching the color and tone so the final image looks natural and seamless
When done correctly, the result is a photo where both the interior and the outdoor view are clearly visible and properly exposed.
5. Why Walls and Lines Look Distorted (And How to Fix Them)
In many real estate photos, walls appear to lean inward, vertical lines look tilted, and the entire room feels geometrically off. This is called perspective distortion, and it is extremely common in interior photography.
Why It Happens
Perspective distortion has two main causes. The first is wide-angle lenses, which are necessary in real estate photography to capture the full width of a room but naturally bend straight lines near the edges of the frame. The second is camera tilt — even a slight upward or downward angle causes vertical lines to converge.
How Photographers Prevent It
Photographers reduce distortion by:
- Keeping the camera at a consistent height (typically around 4 to 5 feet)
- Keeping the camera perfectly level using a bubble level or in-camera level display
- Positioning the camera in the center of the room when possible
How Editors Fix It
Editors use perspective correction tools in Lightroom or Photoshop to:
- Straighten vertical lines along walls, doors, and windows
- Apply lens correction profiles to counteract wide-angle distortion
- Use the transform panel to manually adjust horizontal and vertical perspective
For more detail, read our guide on real estate photo perspective correction.
6. Why Real Estate Photos Look Flat and Dull (And How to Fix Them)
Sometimes a photo is technically correct — the exposure is right, the colors are accurate — but the image still feels lifeless. This is what photographers call a flat image.
Flat photos lack depth, contrast, and visual energy. They do not draw the viewer in and fail to communicate the character of the space.
Why It Happens
Flat images usually result from:
- Overcast or soft lighting with no directional light
- Over-editing that removes contrast and texture
- Shooting in flat lighting conditions without any shadows or highlights to create depth
- Underexposing and then brightening in post, which lifts blacks and reduces contrast
How Photographers Improve Depth
Photographers add depth by positioning lights at angles that create soft shadows and highlights. Using window light as a directional source rather than flooding the room with flat artificial light also helps create a sense of dimension.
How Editors Enhance Flat Images
Editors bring life back to flat images by:
- Increasing contrast using the tone curve
- Separately adjusting highlights and shadows to create a wider tonal range
- Using the clarity and texture sliders to bring out surface detail
- Applying subtle color grading to add warmth or coolness that matches the mood of the space
7. Why Real Estate Photos Look Inconsistent (And How to Fix Them)
When browsing a property listing, buyers look through a series of photos one after another. If one room looks warm and yellow, the next looks cool and blue, and another looks darker than the rest, the overall presentation feels unprofessional and disorganized.
Inconsistency is one of the most overlooked real estate photo problems, but it has a real impact on how buyers perceive the property.
Why It Happens
Inconsistency occurs because:
- Each room has different lighting conditions and color temperatures
- Camera settings may shift between shots
- Editing is done image by image without a consistent baseline
- Different rooms are shot at different times of day
How Photographers Maintain Consistency
Photographers improve consistency by shooting in RAW format, which gives maximum flexibility in editing. Using the same camera settings throughout the shoot and maintaining similar lighting setups in each room also helps.
How Editors Fix Inconsistency
Editors create consistency by:
- Setting a master white balance and applying it to all images from the same shoot
- Using sync settings in Lightroom to apply the same base adjustments across a batch
- Developing and applying a consistent editing preset for each property
- Doing a final review of all images side by side before delivery
For more detail, read our guide on consistent real estate photo editing.
Putting It All Together: A Real Case Study
To show how these problems appear in real situations, here is a typical example.
A photographer shoots a living room with large windows, warm overhead bulbs, reflective hardwood floors, and a wide-angle lens. The original image has multiple problems at once:
- The interior is slightly dark
- The windows are completely blown out
- The walls have a yellow color cast
- The vertical lines lean slightly inward
This is not an unusual situation. It is the standard challenge in almost every interior shoot.
Here is how a professional editor fixes it:
Step 1: Exposure Correction. Brightness is increased and shadows are lifted to open up the room without overexposing the highlights.
Step 2: Window Pull Editing. A darker exposure is blended into the window area to restore the outdoor view while keeping the interior bright.
Step 3: Color Correction. White balance is adjusted to remove the yellow cast and produce natural, neutral tones throughout the room.
Step 4: Perspective Correction. The transform tools are used to straighten vertical lines and align the walls properly.
Step 5: Final Enhancements. Sharpening, contrast, and clarity adjustments are applied to finish the image.
The result is a bright, natural, sharp, and properly composed photo that presents the property at its best.
Frequently Asked Questions
Why do real estate photos look dark even when the room looks bright in person?
This is probably the question we get asked most often, and it always comes from photographers who are genuinely confused because they were standing in a well-lit room when they took the shot.
The answer comes down to how cameras handle exposure. Your eyes constantly adjust to different brightness levels as you move around a room. Your camera cannot do that in a single shot. When there is a bright window in the frame, the camera tries to expose for that light and the rest of the room goes dark. The solution is either HDR bracketing, flash, or a combination of both — and proper exposure blending in editing.
Why do real estate photos look yellow or orange?
Almost always it comes down to the bulbs inside the property. Most homes use warm tungsten or warm LED lighting, which produces orange and yellow tones. When that mixes with the cooler daylight coming through the windows, the camera’s auto white balance cannot find a neutral middle ground.
We fix this in editing through white balance correction and targeted color adjustments. But it is much easier when photographers shoot in RAW and set a manual white balance on location rather than leaving it on auto.
Can blurry real estate photos be fixed in editing?
Honestly, only up to a point. We can use sharpening tools and clarity adjustments to improve mild softness, and in many cases that is enough. But if the blur is caused by significant camera shake or a badly missed focus, no editing tool is going to fully recover it.
This is why we always encourage photographers to use a tripod without exception. It is the single most effective thing you can do to eliminate blur before it becomes an editing problem.
What is window pull editing and do I really need it?
Window pull editing is the process of blending a correctly exposed window from a darker frame into a brighter interior shot. The result is a photo where both the room and the outdoor view are properly exposed at the same time.
Do you need it? In most cases, yes. Blown-out white windows are one of the first things buyers and agents notice in a listing photo. Recovering that view makes the image look significantly more professional and gives the property a much stronger first impression online. It is one of the most requested parts of our editing service for a reason.
How do you fix perspective distortion in real estate photos?
We use a combination of lens correction profiles and manual transform adjustments in Lightroom and Photoshop. The lens correction profile handles the optical distortion introduced by wide-angle lenses, and the transform tools let us manually straighten vertical and horizontal lines.
The cleaner the original shot, the faster and more accurate the correction. Photographers who keep their camera level and shoot from a consistent height give us much more to work with than those who tilt up or shoot from floor level.
Why do some real estate photos look flat and lifeless even when the exposure is correct?
Correct exposure does not automatically mean a compelling image. Flat photos usually lack contrast and tonal depth. This happens either because the lighting on set was very uniform with no shadows or direction, or because the image was over-edited in a way that lifted all the contrast out of it.
We fix this using tone curve adjustments, clarity and texture enhancements, and subtle color grading. The goal is to give the image a sense of depth and dimension so it feels like a real space rather than a flat diagram of one.
How do you keep all the photos from a property shoot looking consistent?
Consistency is something we think about across the entire batch, not just individual images. We start by setting a master white balance based on the most representative room in the shoot, then sync that across all images as a baseline. From there we review every photo side by side and make fine adjustments where individual rooms still feel off.
The photographers who send us the most consistent raw files shoot everything in RAW, use the same camera settings throughout, and try to maintain similar lighting setups from room to room. That foundation makes our job significantly easier and the final gallery much more cohesive.
What software do you use to edit real estate photos?
Our primary tool is Adobe Lightroom for batch processing, white balance correction, exposure adjustments, and color grading. For more complex work like window pulls, sky replacements, and object removal we use Adobe Photoshop.
The combination of both gives us the speed of batch editing in Lightroom and the precision of layer-based editing in Photoshop when a shot needs more detailed work. You can read our full comparison in the guide on Lightroom vs Photoshop for real estate photo editing.
Final Thoughts
Real estate photography is more technical than it looks. Dark rooms, color casts, blown-out windows, and distorted lines are not signs of a bad photographer. They are the natural result of shooting in challenging interior conditions with a camera that has real limitations.
Understanding these 7 common real estate photo problems gives you the knowledge to prevent them on set and fix them efficiently in post-processing.
If you want to go deeper, explore these related guides:
- HDR vs Flambient Real Estate Photography to improve how you shoot
- Real Estate Photo Editing Workflow to build a faster editing process
- Lightroom vs Photoshop for Real Estate Photo Editing to choose the right tools for your workflow