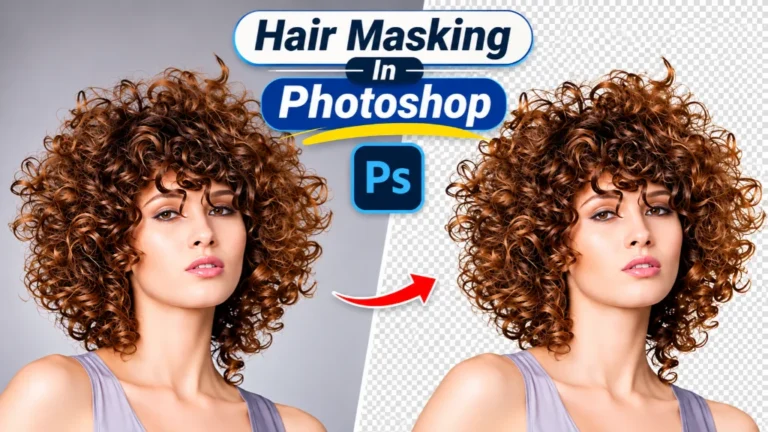
Masking hair in Photoshop is one of those jobs that looks easy until you try it. You cut out a model, drop her onto a new background, and the hair suddenly looks like a helmet. Fine strands vanish. A gray glow hugs the head. The whole image looks fake.
The good news? You don’t need years of practice to fix this. You need the right method for the right photo, plus a few small touch-ups at the end.
This guide shows you how to mask hair in Photoshop step by step. You’ll learn the fast Select and Mask method, the pro-level channel method, and the quick AI option. You’ll also learn how to fix halos, color fringe, and lost strands. Our editing team at Clipping Area has done this work every day since 2014, so every tip here comes from real client projects, not theory.
Quick Answer: How Do You Mask Hair in Photoshop?
To mask hair in Photoshop, open your photo and click Select > Subject. Then go to Select > Select and Mask. Click Refine Hair, and paint over the hair edges with the Refine Edge Brush. Turn on Decontaminate Colors, set Output To New Layer with Layer Mask, and click OK. Finish by cleaning the mask with a soft brush.
If the hair sits on a busy or low-contrast background, use the channel masking method instead. It takes longer but keeps much finer detail.
What Is Hair Masking in Photoshop?
Hair masking is a way to separate hair from its background without cutting off the fine strands. Instead of deleting pixels, you use a layer mask.
A layer mask works in a simple way:
- White areas show the image.
- Black areas hide the image.
- Gray areas show the image partly.
That gray part matters most for hair. A single strand is often thinner than one pixel. So the edge pixel isn’t fully hair or fully background. It’s a blend of both. A good mask keeps that blend, which is why the strands look soft and real.
Hair Masking vs. Clipping Path
People often mix these up. A clipping path uses the Pen Tool to draw a sharp vector line around an object. It’s perfect for shoes, bottles, boxes, and phones. But it fails on hair, fur, and anything fuzzy, because you can’t draw a crisp line around thousands of loose strands.
That’s why pro editors use image masking for hair and fur, and clipping paths for hard-edged products. Many photos need both. For example, a model holding a handbag might need a path for the bag and a mask for the hair.
Key Terms You’ll See in This Guide
- Select and Mask: Photoshop’s workspace for refining selections. It was built for soft edges like hair and fur.
- Refine Hair: A one-click button inside Select and Mask that finds hair and softens its edges.
- Refine Edge Brush: A brush that tells Photoshop where the tricky edges are, so it can work out which pixels are hair.
- Decontaminate Colors: A setting that swaps leftover background color in the edges for nearby hair color.
- Channel: A grayscale version of one color (red, green, or blue) in your photo. Channels are handy because one of them often shows hair against the background with strong contrast.
- Color fringe: A tint of the old background color stuck in the hair edges.
- Halo: A light or dark outline around the hair after you change the background.
Why Is Hair So Hard to Mask?
There are three main reasons.
1. Strands are tiny. Most strands are only a pixel or two wide, even in high-resolution photos. Selection tools struggle to tell a strand from noise.
2. Hair edges are see-through. The background shows through the gaps between strands. So edge pixels carry some background color. This is the real cause of color fringe.
3. Contrast changes from photo to photo. Dark hair on a white wall is easy. Blonde hair on a beige wall is hard. Brown hair against a brown wooden door can beat even Photoshop’s best AI.
Other things make it worse too: motion blur, soft focus, heavy JPEG compression, and low resolution. A small, compressed image gives you blocky edges no matter what tool you use.
So there’s no single click that works every time. The trick is to match your method to your photo.
Before You Start: What You Need
Set yourself up well and the job gets much easier.
- A recent version of Photoshop. Select and Mask has been in Photoshop CC for years. The Refine Hair button arrived later, so if you don’t see it, update Photoshop.
- A good source photo. Look for a sharp, high-resolution image with decent contrast between hair and background. A plain background is best.
- A mouse or a pen tablet. A mouse works fine. A pen tablet gives you pressure control, which helps a lot during clean-up.
- A duplicate layer. Always work on a copy. Press Ctrl + J (Windows) or Cmd + J (Mac) to duplicate the layer before you start.
One more tip: never use the Eraser tool for hair. Erasing deletes pixels forever. A layer mask lets you undo and fix mistakes at any time.
Method 1: How to Mask Hair with Select and Mask (Best for Most Photos)
This is the method our editors reach for first. It handles most portraits, fashion shots, and model photos on simple or medium backgrounds.
Step 1: Open the Image and Duplicate the Layer
Open your photo in Photoshop. Press Ctrl + J (or Cmd + J) to duplicate the background layer. Hide the original by clicking its eye icon. Now you have a safe backup.
Step 2: Make a Rough Selection
Go to Select > Subject. Photoshop uses AI to find the main person or object. You can also use the Object Selection Tool or the Quick Selection Tool if you want more control.
Don’t worry if the hair edge looks rough or blocky. This first selection is just a starting point.
Step 3: Open Select and Mask
Go to Select > Select and Mask. You can also press Alt + Ctrl + R (Windows) or Option + Cmd + R (Mac). Or click the Select and Mask button in the options bar while a selection tool is active.
A new workspace opens. The tools sit on the left. The settings sit on the right.
Step 4: Pick a View Mode That Shows the Problem
In the Properties panel, open the View menu. Choose a view that contrasts with the hair:
- On Black for blonde, gray, or light hair
- On White for dark hair
- Overlay (red) to see exactly what’s selected
Press F to cycle through views quickly. Check your edges on both black and white before you finish. A halo that hides on white often shows up on black.
Step 5: Click Refine Hair
In the options bar at the top, click Refine Hair. Photoshop looks for hair around the selection and softens the edges for you. On a plain background, this alone can get you about 80% of the way.
Step 6: Paint the Edges with the Refine Edge Brush
Select the Refine Edge Brush (shortcut R). Now paint along the outer edge of the hair. Keep the brush half on the hair and half on the background. Sweep over the flyaways and loose strands.
A few rules:
- Don’t paint over solid hair or the face. That can make those areas see-through.
- Use the [ and ] keys to resize the brush.
- Hold Alt (or Option) to subtract if you go too far.
Watch the preview update as you paint. You’ll see strands appear that weren’t there before.
Step 7: Adjust the Settings, Lightly
On the right side, tweak these settings. Small moves work best.
- Edge Detection: Turn on Smart Radius and try a radius of 5 to 15 px.
- Smooth: Keep it low (0 to 5). High values blur strands into a blob.
- Feather: 0 to 1 px is usually enough.
- Contrast: Keep it low. Too much makes edges harsh.
- Shift Edge: Try -10% to -20% to pull the edge in and reduce halos.
Step 8: Turn On Decontaminate Colors
Tick Decontaminate Colors and set the amount between 50% and 100%. This removes the old background color hiding inside the strands. It’s the single best fix for color fringe.
Note: this setting creates a new layer with new pixels. Your original layer stays untouched, which is a good thing.
Step 9: Output to a New Layer with a Layer Mask
Set Output To as New Layer with Layer Mask and click OK. Photoshop builds a new layer with your hair mask attached.
Step 10: Clean Up the Mask by Hand
Add a solid color layer under your subject (Layer > New Fill Layer > Solid Color). Pick a color close to your final background. This shows every flaw.
Now click the mask thumbnail and paint with a soft brush:
- White at 100% to fill holes in solid hair
- Black at low opacity (10% to 30%) to hide leftover background
Zoom in to check details, then zoom out to judge the overall look. That’s it. You’ve masked hair in Photoshop the right way.
Method 2: Channel Masking (Best for Tricky or Low-Contrast Hair)
When Select and Mask leaves mushy edges, channel masking saves the day. Use it for:
- Frizzy, curly, or wind-blown hair
- Busy or textured backgrounds
- High-end studio shots where every strand counts
- Print work that will be seen up close
The idea is simple. One of your three color channels usually shows the hair and background with the strongest contrast. You push that channel into black and white, and it becomes your mask.
Step 1: Find the Channel with the Most Contrast
Open the Channels panel (Window > Channels). Click Red, Green, and Blue one at a time. Look for the one where the hair looks darkest and the background looks lightest (or the other way around). The Blue channel often wins for dark hair on a light background, but always check all three.
Step 2: Duplicate That Channel
Drag your chosen channel onto the New Channel icon at the bottom of the panel. You’ll get a copy, such as “Blue copy.” Never edit the original channels, or you’ll change the colors in your photo.
Step 3: Boost the Contrast
With the copy selected, press Ctrl + L (or Cmd + L) to open Levels. Drag the black and white sliders toward the middle. Your goal is a pure white background and very dark hair.
Stop before the fine strands start to break up. If you push too hard, you lose the very detail you’re trying to save. Curves (Ctrl + M or Cmd + M) works here too if you prefer it.
Step 4: Clean the Channel with a Brush
Set your Brush Tool to Overlay blend mode. Here’s why this trick works:
- Painting black in Overlay mode darkens dark areas but leaves white areas alone.
- Painting white in Overlay mode brightens light areas but leaves dark areas alone.
So you can paint right over the hair edges without wiping out strands. Then switch the brush back to Normal mode and fill the solid areas (face, body, clothing) with pure black.
Step 5: Invert the Channel
Press Ctrl + I (or Cmd + I) to invert. Now your subject is white and the background is black. That’s how a mask should look.
Step 6: Load the Channel as a Selection
Hold Ctrl (or Cmd) and click the channel thumbnail. Marching ants appear. Click the RGB channel at the top to go back to your full-color view.
Step 7: Add the Layer Mask
Go back to the Layers panel, select your duplicate layer, and click the Add Layer Mask icon. Your channel is now a hair mask.
For an even better result, open Select and Mask with this mask and apply Decontaminate Colors as a final pass.
Step 8: Check and Fix the Edges
Place a new background underneath and inspect the hair. Use the fixes in the troubleshooting section below for any halo or fringe.
Channel masking can take 10 to 30 minutes per photo. But the strand detail is often far better than any automatic tool can give you.
Method 3: The Fast Way with Select Subject or Remove Background
Sometimes you just need speed. Think social media posts, quick mockups, or rough drafts.
- Remove Background: In the Properties panel, find Quick Actions and click Remove Background. Photoshop selects the subject and adds a layer mask in one go.
- Select Subject (Cloud): Go to Preferences > Image Processing and set Select Subject to Cloud mode. Cloud processing often catches finer hair detail than device mode.
These tools work well on plain, high-contrast backgrounds. They struggle with busy scenes, light hair, and messy flyaways. Always zoom to 100% and check the edge. If it looks rough, send the selection into Select and Mask and refine it.
Which Hair Masking Method Should You Use?
| Method | Best For | Speed | Detail | Skill Level |
|---|---|---|---|---|
| Remove Background / Select Subject | Plain backgrounds, quick jobs | Very fast | Medium | Beginner |
| Select and Mask | Most portraits and fashion photos | Fast | High | Beginner to intermediate |
| Channel masking | Frizzy hair, busy or low-contrast backgrounds | Slow | Very high | Intermediate |
| Channel + Select and Mask combined | Ecommerce hero shots, high-end retouching | Slowest | Best | Advanced |
In real projects, our editors often combine methods. A channel mask handles the outer strands, Select and Mask cleans the color, and a hand-painted pass fixes the rest.
How to Fix Common Hair Masking Problems
Even a good mask needs a final polish. Here are the problems we see most and how to fix each one.
White or Gray Halo Around the Hair
Cause: Bits of the old background are still in the edge pixels.
Fixes:
- In Select and Mask, move Shift Edge to a negative value.
- On a flattened or merged cut-out layer, try Layer > Matting > Defringe at 1 to 2 px.
- Paint the mask edge with a black brush set to Overlay at low opacity.
Color Fringe in the Strands
Cause: The old background color (green screen, blue sky, a red wall) bleeds into the hair.
Fixes:
- Turn on Decontaminate Colors in Select and Mask.
- Create a new layer above your subject and clip it (Layer > Create Clipping Mask). Set its blend mode to Color. Hold Alt (or Option) to sample a clean hair color, then paint over the fringe.
- Add a clipped Hue/Saturation layer and lower the saturation of just the fringe color.
Hair Looks Chopped or Like a Helmet
Cause: Smooth and Contrast are set too high, or the fine edges were painted out.
Fixes:
- Lower Smooth and Contrast and run the Refine Edge Brush again.
- If strands are fully gone, paint a few new ones with a 1 to 3 px brush using a sampled hair color. Pro retouchers do this all the time. A few added strands make the edge look natural again.
Solid Hair Looks See-Through
Cause: The Refine Edge Brush went too far into the hair.
Fix: Paint white on the mask at 100% opacity over the solid areas.
Fine Flyaways Disappeared
Cause: Low contrast or an automatic tool skipped them.
Fix: Try the channel method, or paint a few back by hand. Also ask yourself if you need them. For many product and catalog photos, slightly tidier hair looks more polished.
Hair Edges Don’t Match the New Background
Cause: The lighting or color of the new background doesn’t match the original photo.
Fixes:
- Pick a new background with similar brightness to the old one.
- Match the light direction and color temperature.
- Soften the mask edge slightly (a 0.5 px blur on the mask) if it looks too crisp.
Pro Tips for Natural-Looking Hair Masks
These small habits make a big difference.
- Judge at 100%, paint at 200% to 300%. Zooming in too far makes you chase flaws nobody will ever see.
- Test on several backgrounds. Check on black, white, mid-gray, and your final background.
- Start with a good photo. If you control the shoot, use a plain background, keep the model a few feet away from it, and add a rim light behind the hair. A light gray backdrop is often easiest, because it doesn’t spill strong color into the hair.
- Choose final backgrounds wisely. A new background close in tone to the original hides small edge flaws.
- Save your work. Use Select > Save Selection and keep a layered PSD file. You’ll thank yourself during client revisions.
- Use pressure control. A pen tablet lets you build up the mask gently.
- Stay non-destructive. Masks, not the Eraser. Always.
- Take a break, then look again. Fresh eyes spot halos you missed.
Why Hair Masking Matters for Ecommerce and Fashion Brands
Clean hair edges aren’t just about looking nice. They affect trust and sales.
Online shoppers notice when something looks off. A gray halo on a white background makes a product page feel cheap. That’s a real problem for:
- Fashion brands showing clothes on models
- Beauty and haircare brands where the hair is the product
- Wig and hair extension sellers who need every strand to look real
- Marketplace sellers following white-background rules, such as Amazon’s pure white main image requirement
- Portrait and headshot photographers delivering images on new backdrops
- Marketing agencies building ads, banners, and social creatives
There’s also the time problem. A careful hair mask can take anywhere from 10 to 40 minutes per image. For a catalog of 500 model shots, that’s hundreds of hours of editing. Keeping every image consistent across that many files is even harder.
That’s where a professional image masking service comes in.
Clipping Area: Premium Hair Masking and Post-Production Services
Need perfect hair masks without spending hours in Photoshop?
Clipping Area is a premium post-production photo retouching agency trusted by ecommerce brands, fashion labels, photographers, real estate agencies, and marketing agencies worldwide. Based in Dhaka, Bangladesh, our team has been delivering professional image editing since 2014.
We are a complete image editing solution provider. Our services include:
- Image Masking: Hair, fur, and transparent or soft-edged objects masked strand by strand
- Clipping Path: Hand-drawn Pen Tool paths for sharp, clean product cut-outs
- Background Removal: Pure white, transparent, or custom backgrounds
- Ghost Mannequin: Invisible mannequin effect for apparel photos
- Ecommerce Image Editing: Marketplace-ready product images for Amazon, Shopify, eBay, and more
- Real Estate Photo Editing: HDR blending, sky replacement, and interior enhancement
- Jewelry Retouching: Metal cleanup, stone sparkle, and dust removal
- Product Retouching: Scratch, dust, and reflection cleanup for flawless products
- Color Correction: Accurate, consistent color across every image in a catalog
- Photo Retouching: Skin, model, and portrait retouching for fashion and beauty
- Video Editing, 3D Rendering, and AI Creative Services
Why brands choose Clipping Area for hair masking:
- Every mask is refined by hand by trained editors, not just an automatic tool
- Fine strands and flyaways are kept natural, with no halos or color fringe
- Consistent results across small batches and bulk catalogs
- Layered PSD files with editable masks on request
- Every image goes through a quality check before delivery
Ready to see the difference? Visit clippingarea.com to request a quote or send a few test images.
Frequently Asked Questions About Masking Hair in Photoshop
What is the best way to mask hair in Photoshop?
For most photos, the best way is Select and Mask with the Refine Hair button and the Refine Edge Brush. For frizzy hair or busy backgrounds, the channel masking method gives better detail. Pros often combine both.
How do I mask hair on a busy background?
Use the channel method. Find the color channel with the most contrast, boost it with Levels, and clean it with a brush in Overlay mode. Then load it as a selection and refine it in Select and Mask. Very busy scenes may still need some hand painting on the mask.
How do I remove the white halo around hair in Photoshop?
Set Shift Edge to a negative value in Select and Mask, or use Layer > Matting > Defringe on a cut-out layer. You can also paint the mask edge with a black brush in Overlay mode at low opacity.
What does Decontaminate Colors do in Photoshop?
It replaces leftover background color in the edge pixels with nearby hair color. This removes color fringe, such as a green tint from a green screen or a blue tint from the sky.
Can Photoshop’s AI mask hair automatically?
Partly, yes. Select Subject (especially in Cloud mode) and Remove Background can handle hair well on plain, high-contrast backgrounds. On complex photos, they still miss strands or leave halos, so a manual check and touch-up is usually needed.
Is hair masking the same as a clipping path?
No. A clipping path is a sharp vector outline drawn with the Pen Tool, best for hard-edged objects. Hair masking uses a layer mask with soft gray edges, which keeps fine strands looking natural.
How long does it take to mask hair in Photoshop?
A simple photo on a plain background can take 2 to 5 minutes. A complex image with frizzy hair on a busy background can take 30 minutes or more. Bulk catalog work often goes to a professional image masking service to save time.
Should I use the Eraser tool to remove the background around hair?
No. The Eraser deletes pixels for good and gives hard, unnatural edges. A layer mask is non-destructive, so you can fix mistakes and keep soft, realistic strands.
Final Thoughts
Masking hair in Photoshop gets much easier once you know which method fits which photo. Start with Select and Mask for most images. Switch to channel masking when the background is busy or the hair is frizzy. Use the AI tools when speed matters more than perfection.
Then polish. Fix halos, remove color fringe, and check your edges on more than one background. Those last few minutes are what turn an okay cut-out into a clean, natural, professional image.
And if you have hundreds of images to process, or you just want flawless results without the hours of work, the team at Clipping Area is ready to help. From hair masking and clipping paths to ghost mannequin and full ecommerce image editing, we handle the post-production so you can focus on growing your brand.