Want your workout pics to look as strong as your progress? Learning how to edit gym photos is the key. With just your phone or computer, you can turn dark, dull shots into bold, vibrant images that stand out.
Imagine fitness photos that inspire, grab attention, and show your dedication in the best light. This guide will teach you how to edit gym photos step-by-step—no pro skills needed!
Why Photo Editing Is the Secret Weapon of Gym Photography
Gym photos aren’t just about documenting the place you work out – they are motivational tools, marketing material for gym owners, and a reflection of the hard work seen in the results of body transformations. Professional photo editing elevates these photos, highlighting the vibrant energy of the gym, the crisp lines of the equipment, and the raw determination of the individuals captured in each image.
Editing can help you correct the lighting to compensate for the harsh shadows cast by gym equipment, adjust the white balance that’s often thrown off by the artificial lighting, or enhance the contrasts to emphasize muscle definition. Every edit brings you closer to sharing the pure energy of the gym experience through visuals.
Now, let’s explore the digital darkroom with Adobe Lightroom, a versatile and user-friendly editing software that offers an abundance of presets and tools for a personalized touch.
Learn More: How To Edit Wedding Photos In Photoshop Like A Pro
How To Edit Gym Photos on iPhone Like a Pro
To edit gym photos on your iPhone, follow these steps:
- Open Photos App: Start by opening the Photos app and selecting the gym photo you want to edit.
- Use Built-in Editing Tools: Tap “Edit” in the top right corner. You can adjust brightness, contrast, and saturation to enhance the photo.
- Apply Filters: Scroll through the filters to find one that best suits your photo. Adjust the intensity by tapping on the filter again.
- Crop and Straighten: Use the crop tool to remove any unwanted parts of the image and straighten it if necessary.
- Adjust Details: Use the “Detail” tool to sharpen the image and bring out textures like muscles and gym equipment.
- Save Your Edits: Once satisfied, tap “Done” to save your changes.
For more advanced editing, consider using third-party apps like Snapseed or Adobe Lightroom, which offer more precise control over photo adjustments.
or Watch This Video:
How To Edit Gym Photos Lightroom?
Editing gym photos in Lightroom can enhance the intensity and aesthetics of your images. Here are some steps to follow:
- Adjust Exposure and Contrast: Start by tweaking the exposure to ensure the image is well-lit. Increase the contrast to highlight muscle definition and create a more dramatic look.
- Fine-tune Highlights and Shadows: Reduce highlights to avoid overexposure and recover details. Lift the shadows to reveal more detail in darker areas.
- Enhance Clarity and Texture: Use the clarity and texture sliders to accentuate details and add sharpness, giving the image a more defined and gritty appearance.
- Saturate Colors: Increase the vibrance and saturation slightly to make the colors pop, but be careful not to overdo it, which can make the image look unnatural.
- Crop and Straighten: Crop the photo to remove distractions and ensure the subject is the focal point. Straighten the image if necessary to maintain a professional look.
- Apply Presets: Use or create gym-specific presets to maintain consistency across your photos and speed up your editing process.
These steps will help you create striking and professional-looking gym photos that highlight your hard work and dedication.
or Watch this video:
How To Edit Gym Photos in Photoshop
Editing gym photos in Photoshop can enhance the overall look and feel of your images. Here are some essential steps:
- Adjust Lighting and Exposure: Use the “Levels” or “Curves” adjustments to correct the lighting and exposure. This helps bring out details and create a more dynamic range.
- Enhance Muscle Definition: Use the “Dodge” and “Burn” tools to accentuate highlights and shadows on muscles, giving them a more defined and sculpted appearance.
- Smooth Skin: Apply the “Gaussian Blur” filter selectively to smooth out skin imperfections. Use a layer mask to ensure only the skin is affected, preserving the details in other areas.
- Color Correction: Adjust the color balance to ensure the skin tones are natural. You can use the “Hue/Saturation” adjustment layer to tweak colors and make the image more vibrant.
- Sharpen Details: Apply the “Unsharp Mask” or “Smart Sharpen” filter to enhance the overall sharpness of the image. This will make the details pop, especially in high-resolution photos.
By following these steps, you can create polished and professional-looking gym photos that highlight the best features of your subjects.
Or watch this video:
How To Edit Muscle Photos?
Editing muscle photos to enhance their appearance involves several steps and tools. Start by using photo editing software like Adobe Photoshop or free alternatives like GIMP. Adjust the brightness and contrast to highlight muscle definition.
Use the dodge and burn tools to add depth and shadow, making muscles appear more prominent. Be mindful of the liquify tool; while it can reshape and enhance muscles, overuse can result in unnatural looks.
Consider using filters to enhance overall photo quality and color balance. Finally, remember to keep edits subtle to maintain a natural and authentic appearance.
How to Edit Fitness Photos Like a Experts?
Editing fitness photos involves enhancing the overall look while maintaining a natural appearance. Start by adjusting the lighting and exposure to highlight muscle definition and create a vibrant image.
Use contrast and clarity settings to make the details pop, especially on muscles. Correct any color imbalances to ensure skin tones look natural. Apply slight sharpening to enhance definition, but avoid over-editing to prevent an unnatural look.
Finally, use tools to remove any minor imperfections or distractions in the background, keeping the focus on the subject. Remember, the goal is to enhance, not alter, the authentic representation of your fitness progress.
Watch this video:
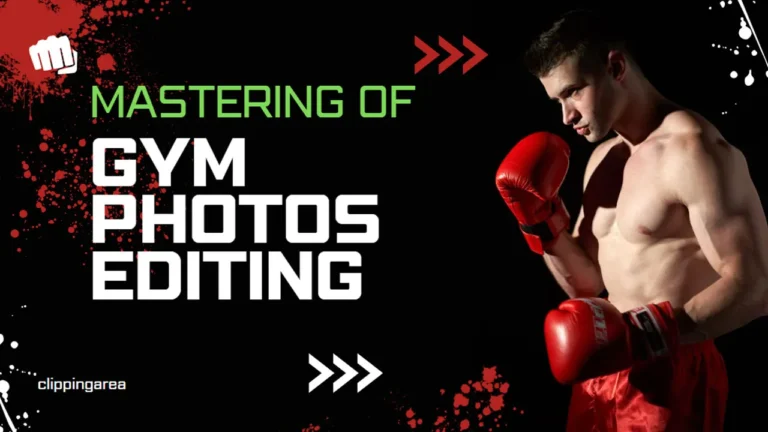
Take Your Fitness Photography to the Next Level
Great photos tell your fitness story—editing makes them unforgettable. You’ve learned how to edit gym photos like a pro, but expert edits can take your shots to the next level.
At Clipping Area, we specialize in Gym Photo Editing Services that make every picture sharp, vibrant, and brand-ready. Enhance your fitness photos today—contact Clipping Area for flawless, professional edits!
FAQs
How do I look good in gym pictures?
To look good in gym pictures, ensure you’re wearing well-fitting, flattering workout attire. Opt for bright colors or patterns to stand out. Focus on capturing pictures while executing exercises with good form, as this showcases your strength and dedication. Lighting is vital, so aim for natural light or well-lit areas in the gym. Finally, confidence is key – always wear a smile or a look of determination for truly engaging shots.
How Do I Make My Gym Pictures Look Aesthetic?
To make your gym pictures look aesthetic, start by focusing on lighting. Natural lighting is best, but if that’s not possible, ensure your gym has good quality artificial lighting.
Next, consider the composition of your shot. Try to include interesting elements in the background like gym equipment or mirrors, but avoid clutter. Capturing action shots can add a dynamic feel to your pictures.
How Do I Change My Gym Picture To Look More Muscular?
To make your gym picture appear more muscular, you can utilize specific poses and lighting techniques that emphasize muscle definition. Opt for poses that flex your muscles, such as the classic front double bicep pose.
Lighting can also play a vital role; soft, indirect lighting can highlight your body’s contour and muscular definition. However, remember that the most reliable way to look more muscular is through regular workouts and a balanced diet. Consistency is key in achieving and maintaining a muscular physique.
What Camera Settings Are Best For Gym Pics?
When capturing gym photos, it’s paramount to consider the camera settings to get the best results. A fast shutter speed, typically around 1/250 sec or higher, can effectively freeze motion, crucial in any fast-paced gym environment.
An ISO setting ranging between 800-3200 helps in low light conditions, prevalent in most gyms, while ensuring less grainy images. The aperture, ideally set between f/2.8 and f/4, allows for a shallow depth of field, keeping the subject in sharp focus against a blurred backdrop.
Always remember, the perfect settings vary and tweaking might be needed to get the desired outcome.
How do I edit my gym photo?
Use a photo editing app like Adobe Lightroom or Snapseed. Adjust the brightness, contrast, and saturation to enhance the details. Apply filters for a polished look and use the healing tool to remove any blemishes.
How do I make my gym pictures look aesthetic?
Focus on good lighting and clean backgrounds. Use natural light or gym lighting to highlight muscles. Edit with consistent filters and adjust the composition to follow the rule of thirds.
How to make gym pics look better on iPhone?
Use the built-in camera app with HDR enabled. Edit using the Photos app by adjusting exposure, contrast, and sharpness. Experiment with Portrait mode for depth effects.
How to make muscles pop in pictures?
Ensure good lighting from the side to create shadows and highlights. Tense and flex muscles slightly while taking the shot. Post-process by increasing contrast and clarity to emphasize muscle definition.