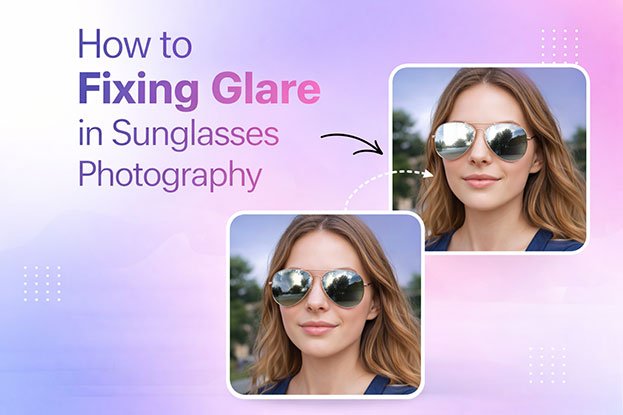
Why Sunglasses Product Photos Have Glare (And How to Fix It Professionally)
A pair of sunglasses can look flawless on the display table and still turn into a problem the moment it goes under studio lights. The lenses act like small curved mirrors, so every softbox, window, camera body, and white wall nearby can show up across the glass. That is the root of most sunglasses product photo glare: bright patches that hide the lens tint, wash out frame details, and make a premium product look cheap or unclear. For ecommerce brands, this is not only a cosmetic issue. Shoppers judge lens color, shape, and quality from the image alone. The good news is that glare is manageable. Better lighting technique prevents most of it, and careful professional post-production handles the rest without making the sunglasses look fake.
What Is Glare in Sunglasses Product Photography?
Glare is uncontrolled, overly bright light bouncing off the lens surface into the camera, strong enough to hide what is behind or within the lens.
A few related terms are worth separating:
- Reflection: any image of the surrounding environment visible on the lens (a softbox, a wall, a window).
- Hotspot: a concentrated, often blown-out white area where light hits the lens directly.
- Specular highlight: a small, bright point or stripe of light that shows a surface is glossy.
- Glare: the problem version of the above, where brightness overwhelms product information.
Sunglasses are difficult because they combine several challenging surfaces in one small object: curved glossy lenses, tinted or mirrored coatings, thin frame edges, metal hinges, and small logos.
Not every reflection is a problem. A soft, natural highlight tells the shopper the lens is real, glossy, and three-dimensional. The goal is controlled reflection, not a completely reflection-free lens.
Why Do Sunglasses Product Photos Have Glare?
Glare happens when a bright light source sits at an angle where its reflection bounces off the lens directly into the camera. The main causes:
1. Direct studio lighting. A bare or hard light source creates small, intense reflections on curved lenses that often clip to pure white.
2. Softbox reflection. Softboxes are large and bright, so their rectangular shape frequently appears across the lens as a clear white panel.
3. Lens angle. A rotation of just a few degrees can move a reflection from the edge of the lens to its center.
4. Curved lens surface. Flat surfaces reflect light in one direction. Curved lenses reflect light from a much wider area of the studio, so more of the room ends up visible.
5. Glossy lens coatings. Smooth, polished coatings produce sharp, high-contrast highlights rather than soft, diffused ones.
6. Nearby objects. Cameras, tripods, windows, light stands, walls, and even the photographer’s shirt can appear in the lens.
7. Polarized or mirrored lenses. Mirrored lenses reflect almost everything in front of them. Polarized lenses can shift in appearance depending on the angle of light, sometimes showing uneven tones or rainbow-like patterns.
8. Incorrect exposure. Exposing for the dark frame or lens can push reflections into blown-out areas with no recoverable detail.
9. Poor lighting setup. Mixed or uncontrolled light sources (a window plus studio strobes, for example) create inconsistent reflections from shot to shot.
Glare vs Reflection: What Should Actually Be Removed?
Not every reflection should be removed. Good retouching separates distracting glare from the highlights that make a product look real.
| Visual Element | Remove? | Reason |
|---|---|---|
| Large white hotspot hiding lens detail | Usually reduce | Blocks product information |
| Small natural highlight | Often keep | Shows realistic lens surface |
| Studio equipment reflection | Often reduce | Distracts from product |
| Natural environmental reflection | Depends | May be part of the image |
| Lens color reflection | Preserve carefully | Can represent product appearance |
| Product-defining detail | Never remove | Accuracy matters |
When every reflection is erased, the lens reads as a flat dark shape or a painted surface. Shoppers may not identify the problem, but they sense the image looks wrong. Realism builds trust, and trust affects whether a product image works at all.
How to Prevent Sunglasses Glare During Photography
Preventing glare in camera is almost always faster and cleaner than fixing it later.
Change the light angle. Light reflects at the same angle it hits the lens. Moving the light higher, lower, or further to the side can push its reflection out of the camera’s view.
Adjust the sunglasses angle. Tilting the frame slightly forward or rotating it a few degrees often moves a hotspot off the lens entirely.
Change camera position. Raising or lowering the camera changes which part of the studio the lens “sees.”
Use larger diffused light. A large, soft source creates a gentle gradient highlight instead of a harsh hotspot. Diffusion panels or scrims between the light and the product help.
Use flags and negative fill. A flag is a black card that blocks light from hitting a specific area. Negative fill is a black surface placed near the product so the lens reflects darkness instead of a bright wall. Both give you control over what appears in the lens.
Control the studio environment. Cover windows, move reflective equipment out of the frame’s reflective zone, and use dark clothing when shooting close.
Test before shooting the full collection. One test image, reviewed at full size, can reveal a lighting problem before it repeats across 200 SKUs.
How to Photograph Sunglasses Without Glare: Step by Step
- Clean the lenses. Use a microfiber cloth and blower. Fingerprints and dust scatter light and add to glare.
- Set up controlled lighting. Turn off or block ambient light so only your studio lights affect the lens.
- Position the main light. Start with a large diffused source placed high and to the side, not directly in front.
- Check reflections. Look through the camera or tethered screen, not just at the product.
- Rotate the sunglasses. Make small angle changes until hotspots move off the key lens areas.
- Adjust camera angle. Raise or lower the camera slightly to refine what the lens reflects.
- Use flags if needed. Block stray light and add black cards to darken unwanted reflections.
- Review the lens surface. Zoom in to check tint visibility, highlight shape, and edge clarity.
- Take test shots. Try variations and compare them side by side.
- Lock the setup. Mark light, camera, and product positions so the full collection stays consistent.
Can Photo Editing Remove Glare From Sunglasses?
Yes, professional editing can reduce or remove many glare and reflection problems, but the result depends heavily on the original photo.
Key factors include:
- Source image quality: high-resolution RAW files give retouchers more data to work with.
- Amount of glare: a small hotspot is simple; a lens covered by a softbox is not.
- Lens color: dark lenses hide retouching more easily than transparent or gradient lenses.
- Reflection strength: fully blown-out white areas contain no lens detail to recover.
- Available lens detail: if tint, gradient, or texture is visible nearby, it can guide reconstruction.
- Lighting conditions: consistent lighting makes consistent editing possible.
- Number of affected areas: multiple reflections across both lenses and the frame add time.
Editing supports good photography. It is not a full substitute for it.
Professional Techniques for Fixing Sunglasses Glare
- Masking: isolating the lens, frame, and background so each can be edited without affecting the others.
- Layer-based retouching: keeping every correction on separate layers so changes stay reversible and adjustable.
- Clone and healing techniques: replacing small reflections with surrounding lens texture and tone.
- Highlight reduction: pulling down overly bright areas while keeping a natural highlight shape.
- Local exposure correction: darkening or brightening specific lens zones instead of the whole image.
- Color correction: restoring the real lens tint where glare washed it out.
- Reflection reconstruction: rebuilding a clean, believable highlight when the original one is distracting or damaged.
- Selective contrast adjustment: restoring depth to lenses flattened by glare.
- Lens detail preservation: protecting logos, etched markings, and gradient transitions during cleanup.
- Controlled retouching: stopping at the point where the product looks clean but still real.
How to Remove White Hotspots From Sunglasses Lenses
Hotspots appear when a light source reflects directly into the lens. Because they often clip to pure white, they erase the lens color underneath.
Prevention: move the light off-axis, add diffusion, tilt the product, or use a flag.
Retouching: a retoucher samples the surrounding lens tone, rebuilds the missing color with soft, low-opacity layers, and then reintroduces a smaller, softer highlight so the lens still looks glossy.
Removing a hotspot completely is not always the right call. A lens with zero highlight often looks painted. The final image should still look like a real pair of sunglasses photographed under light.
How to Fix Glare Without Making Sunglasses Look Fake
Aggressive retouching creates predictable problems:
- Flat-looking lenses with no sense of curve
- Artificial transparency that makes tinted lenses look clear
- Lost lens tint after highlights are pulled down too far
- Unrealistic reflections that do not match the lighting direction
- Distorted lens shape from careless cloning near the edges
- Plastic-looking surfaces caused by over-smoothing
- Missing highlights that remove all depth
- Incorrect frame color from global color shifts
The rule: remove distractions while preserving the visual characteristics that make the product look real.
Before approving an edit, ask: does this lens still look curved, glossy, and the same color as the physical product? If any answer is no, the edit went too far.
How Lens Color Can Be Damaged During Glare Removal
Glare removal often involves sampling and adjusting color, which is where damage happens.
- Dark lenses: can become pure black, losing depth.
- Brown lenses: may shift toward orange or gray.
- Gray lenses: can pick up blue or green casts.
- Blue and green lenses: saturation can drift, changing the perceived product.
- Gradient lenses: cloning can break the smooth top-to-bottom transition.
- Mirrored lenses: removing reflections can remove the mirror effect that defines the product.
- Transparent lenses: background tones may bleed through incorrectly.
Color correction should be controlled and checked against a reference photo or the physical product. A retoucher should never change the actual product color just to make the image look cleaner. Customers return products that do not match the photo.
Background Removal and Glare Control
Most ecommerce sunglasses images end up on a white background or transparent background, which means background processing and glare control happen together.
Important considerations:
- Clipping paths work well for solid frame outlines.
- Masking is needed for tinted or transparent lenses, where the background shows through.
- Edge cleanup matters on thin metal frames and temple arms.
- Lens boundaries must stay crisp so the lens shape remains accurate.
- White halos around frames signal careless cutouts.
- Background contamination, such as a gray studio sweep visible through a tinted lens, should be corrected so the lens reads naturally on the new background.
Clean background removal should never damage lens transparency or frame details.
Glare Problems in Different Types of Sunglasses
Mirrored sunglasses: these reflect the entire studio. The goal is to show a clean, attractive mirror effect (often a controlled gradient or simple environment) rather than a camera or light stand.
Polarized sunglasses: they can show uneven tones or color patterns at certain angles. Consistent lighting angles help, and retouching may smooth uneven areas while keeping the lens’s real tone.
Gradient sunglasses: the priority is a smooth, unbroken color transition. Glare cleanup must follow the gradient direction.
Transparent sunglasses: clear lenses and crystal frames need careful edge separation so they do not disappear against a white background.
Dark-lens sunglasses: preserve some visible depth and a subtle highlight so the lens does not look like a flat black cutout.
Luxury sunglasses: fine details carry the value. Logos on lenses and temples, acetate patterns, metal finishes, and hinge details must stay sharp and accurate.
Common Sunglasses Photo Editing Mistakes
Removing all reflections
What happens: lenses look flat. Why: over-correction. Fix: restore a soft natural highlight.
Over-darkening lenses
What happens: tint disappears into black. Why: highlights pulled down globally. Fix: use local exposure adjustments.
Changing the actual lens color
What happens: product misrepresentation. Why: uncontrolled color correction. Fix: compare against a color reference.
Distorting frame shape
What happens: asymmetrical frames. Why: careless cloning or warping. Fix: check symmetry against the original.
Leaving white halos
What happens: visible outlines on the background. Why: loose masking. Fix: refine edges at high zoom.
Removing logos
What happens: brand detail lost. Why: logo cloned out with glare. Fix: mask logos before retouching.
Other frequent issues include over-sharpening, creating fake reflections, over-smoothing, excessive contrast, poor background removal, and shadows that do not match the light direction. Each is fixed the same way: work locally, compare often, and stop earlier.
Before-and-After Quality Control
Product accuracy: frame shape, lens shape, lens color, logos, fine details.
Reflection: unwanted glare removed, hotspots controlled, natural highlights kept, remaining reflections intentional.
Editing: clean retouching, sharp edges, pure background, realistic shadows, accurate color.
Technical: correct resolution, dimensions, crop, file format, and compression.
Always compare the edited image with the original side by side. Small shifts in color or shape are easy to miss in isolation and obvious in comparison.
Sunglasses Glare Editing Workflow for eCommerce
Original Image → Initial Inspection → Glare Assessment → Background Processing → Reflection Retouching → Color Correction → Detail Cleanup → Shadow Adjustment → Final QC → Export
- Initial inspection: check resolution, focus, and overall usability.
- Glare assessment: classify each reflection as keep, reduce, or remove.
- Background processing: clipping path and masking.
- Reflection retouching: hotspot and glare cleanup.
- Color correction: match lens and frame to the real product.
- Detail cleanup: dust, scratches, logos, edges.
- Shadow adjustment: natural or drop shadow as required.
- Final QC and export: check against the original and export to platform specs.
Scaling: for 10 images, one editor can handle everything. For 100 images, create a written style guide with highlight and shadow rules. For 500 images or large catalogs, split tasks by stage, use reference images per lens type, and run QC on every batch before delivery.
DIY vs Professional Sunglasses Photo Retouching
DIY / in-house editing
Advantages: direct control, useful for small projects, no external communication.
Challenges: requires expertise, time-consuming, reflection cleanup is difficult, quality may vary, consistency is harder at scale.
Professional editing
Potential advantages: specialized retouching skills, consistent workflow, bulk capacity, experienced reflection cleanup, structured quality control.
The right choice depends on image volume, editing complexity, internal skills, deadlines, budget, and required consistency. A brand shooting ten new styles a season may manage in-house. A retailer launching hundreds of SKUs may benefit from outside support. Neither option is automatically better.
AI-Assisted Glare Removal in 2026
AI tools are useful in parts of the workflow:
- Background removal
- Object cleanup
- Basic glare reduction
- Automated enhancement
- Batch processing
- Masking assistance
Human review is still valuable for complex lens reflections, product accuracy, lens color, transparent materials, mirrored surfaces, fine frame details, and brand-specific standards. AI can guess at what is behind a hotspot, but it does not know the real product. AI works best as one step in a workflow where a person checks the result.
How Much Does Sunglasses Photo Editing Cost?
Pricing varies by provider and project. The main factors:
- Number of images
- Glare complexity and reflection removal
- Background removal and clipping path
- Retouching level
- Color correction
- Shadow creation
- Source image quality
- Turnaround time
- Revision requirements
- Bulk volume
Common pricing models: per image, per project, hourly, or bulk/monthly arrangements.
Hypothetical example: if a provider quoted a basic rate for background removal and a higher rate for images needing glare retouching, a 200-image catalog where 60 images have heavy glare would cost more than 200 images with background removal only. Always request a quote based on your actual images.
How to Choose a Professional Sunglasses Photo Editing Service
Look for:
- Eyewear editing experience
- Proven glare and reflection handling
- Lens color accuracy
- Clean backgrounds and edges
- Product accuracy
- Consistent results across batches
- A defined quality control process
- Clear communication
- A fair revision policy
- Bulk capacity
- Transparent pricing
- Sample editing
Start with a small test batch that includes your hardest images (mirrored, gradient, transparent) before committing to a large order.
Clipping Area: Professional Sunglasses Photo Editing Support
Clipping Area is a Post-Production Photo Retouching Agency. Since 2014, the team has worked with ecommerce brands, fashion labels, photographers, and marketing teams on product image editing.
For sunglasses brands, eyewear ecommerce stores, product photographers, and online retailers, Clipping Area supports the full glare-control workflow described in this article:
- Eyewear and sunglasses photo editing
- Product photo retouching and reflection cleanup
- Background removal and clipping path
- Color correction for lens and frame accuracy
- Shadow creation
- Ecommerce product photo editing
- Bulk image editing for large catalogs
Brands with large sunglasses collections often need the same thing: consistent reflection control, clean backgrounds, accurate lens color, and a final quality check on every image.
Get a Free Sample. Send a small batch of your sunglasses images, including a few difficult ones, and review the results before starting a larger project.
Professional Sunglasses Glare Removal Checklist
Photography
- Main light positioned off-axis
- Camera angle tested for reflections
- Product angle adjusted to move hotspots
- Studio reflections (windows, stands, walls) controlled
- Lenses cleaned before every shot
Lens
- Distracting glare reduced
- Hotspots controlled
- Natural highlight kept
- Lens color matches the product
- Lens transparency looks realistic
Frame
- Shape accurate and symmetrical
- Frame color correct
- Edges clean
- Logos intact and sharp
- Hinges and fine details preserved
Editing
- Background clean and consistent
- Clipping path accurate
- Masking clean on lenses
- Retouching not visible
- Shadows match light direction
Technical
- Resolution meets platform requirements
- Dimensions correct
- Crop consistent across the catalog
- Correct file format
- Final export compressed without artifacts
FAQ
1. Why do sunglasses product photos have glare?
Curved, glossy lenses reflect studio lights, windows, and nearby objects into the camera. Direct lighting and poor angles make it worse.
2. How do you remove glare from sunglasses photos?
Retouchers mask the lens, reduce highlights locally, rebuild lens color, and restore a soft natural highlight.
3. How can I photograph sunglasses without reflections?
Use large diffused light placed off-axis, adjust product and camera angles, and use flags or black cards to control what the lens reflects.
4. Can Photoshop remove glare from sunglasses?
Yes, in most cases. Results depend on how much lens detail remains in the original image.
5. How do you reduce reflections on sunglass lenses?
Change light position, tilt the sunglasses slightly, and add negative fill. In editing, use local exposure and healing tools.
6. Should all reflections be removed from sunglasses photos?
No. Small natural highlights make lenses look real. Remove only distracting glare.
7. How do you fix white hotspots on sunglasses lenses?
Prevent them with diffusion and angle changes. In editing, rebuild the lens tone and replace the hotspot with a softer highlight.
8. How can I preserve lens color when removing glare?
Use local corrections, sample from unaffected lens areas, and compare with a reference photo of the real product.
9. How do professionals edit reflective sunglasses?
They assess each reflection, keep realistic highlights, clean distractions with layer-based retouching, and run QC against the original.
10. How much does sunglasses photo editing cost?
It depends on image count, glare complexity, background work, turnaround, and volume. Request a quote using your real images.
11. Can sunglasses photo editing be outsourced?
Yes. Many brands outsource bulk or complex reflection work while keeping simple edits in-house.
12. How do I choose a professional sunglasses photo editing service?
Check eyewear experience, color accuracy, edge quality, QC process, and revision policy, and start with a small test batch.



