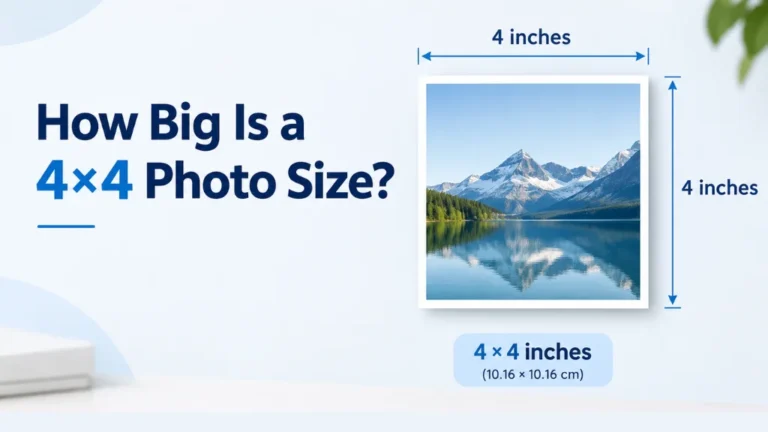
How Big Is a 4×4 Photo Size? A 4×4 photo is a square image that measures 4 inches wide by 4 inches tall when printed at its intended physical size. In metric, that is 10.16 × 10.16 cm.
Because both sides are equal, a 4×4 photo has a 1:1 aspect ratio. That makes it a true square, unlike the rectangular 4×6 print most people know.
On screen, the size depends on resolution. At 300 PPI, the standard for sharp prints, a 4×4 image is 1200 × 1200 pixels. At 150 PPI it is 600 × 600 pixels.
Printing one correctly takes a little care. Printer scaling, paper size, and margins can all change the final size on paper. The good news is that you can make and print a 4×4 photo yourself with Photoshop, Canva, or a basic home printer.
This guide covers the exact dimensions, the pixel sizes you need, step-by-step resizing, home printing, and fixes for the most common problems.
What Is a 4×4 Photo Size?
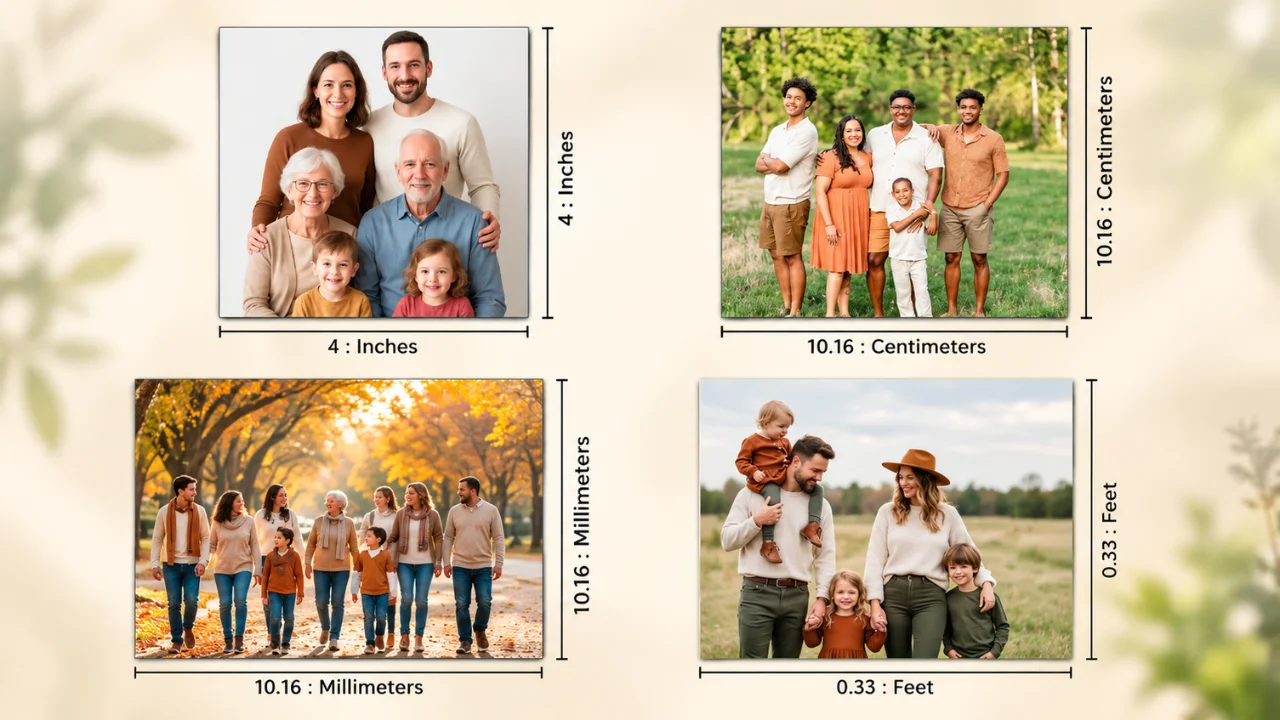
A 4×4 photo size means the print is 4 inches wide and 4 inches tall. The first number is the width. The second is the height.
Quick definition: 4×4 photo = 4 inches × 4 inches = a square image with a 1:1 aspect ratio.
Aspect ratio is the relationship between width and height. A 1:1 ratio means the two sides match, so the shape is a perfect square. Most classic print sizes are rectangles.
| Photo Size | Dimensions | Aspect Ratio | Shape |
|---|---|---|---|
| 4×4 | 4 × 4 inches | 1:1 | Square |
| 4×6 | 4 × 6 inches | 2:3 | Rectangle |
| 5×7 | 5 × 7 inches | 5:7 | Rectangle |
| 8×10 | 8 × 10 inches | 4:5 | Rectangle |
A 4×4 print is the same height as a 4×6 print, just 2 inches narrower.
How Big Is a 4×4 Photo in Real Life?
A 4×4 photo is small enough to hold in one hand. It is 4 inches across and 4 inches top to bottom, or about 10 cm each way.
A few honest comparisons help:
- It is a bit larger than a standard 3×3 inch sticky note.
- It is close to the size of many square drink coasters.
- It matches a 4×6 print with 2 inches trimmed off one end.
In a photo album, a 4×4 picture size leaves room for captions or a second photo on the same page. In a frame, it suits desks, shelves, and bedside tables. On a wall, one print looks small, but a grid of nine or twelve makes a strong display.
What Is the Pixel Size of a 4×4 Photo?
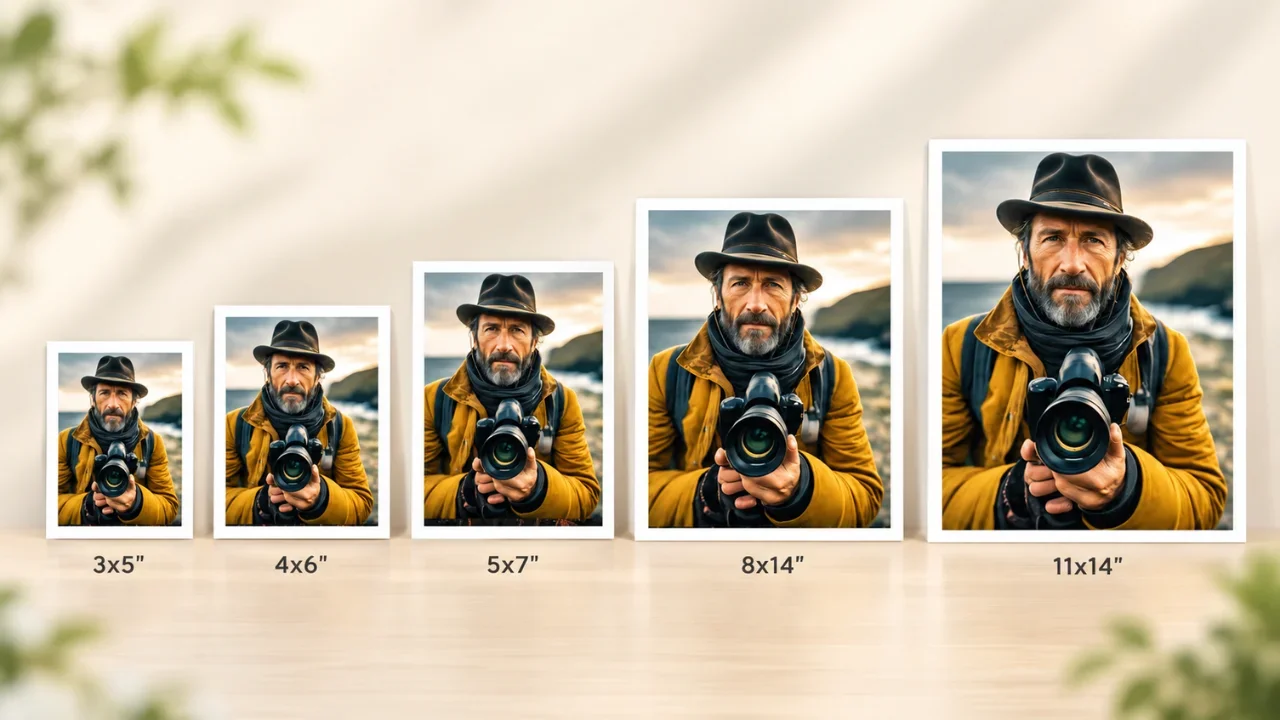
The pixel size of a 4×4 photo depends on the resolution you choose. There is no single answer until you pick a PPI value.
Three terms matter here:
- Physical dimensions are the size on paper, such as 4 × 4 inches.
- Pixel dimensions are how many pixels the file contains, such as 1200 × 1200.
- Resolution (PPI) is how many of those pixels fit into each printed inch.
The math is simple: inches × PPI = pixels. So 4 inches × 300 PPI = 1200 pixels per side.
| Resolution | 4×4 Image Size in Pixels | Typical Use |
|---|---|---|
| 72 PPI | 288 × 288 px | Screen previews only |
| 96 PPI | 384 × 384 px | Web graphics |
| 150 PPI | 600 × 600 px | Draft or casual prints |
| 300 PPI | 1200 × 1200 px | High-quality photo prints |
| 600 PPI | 2400 × 2400 px | Fine detail, archiving |
Key relationship: 4×4 inches → 300 PPI → 1200 × 1200 pixels.
PPI vs DPI
People mix these up all the time. PPI (pixels per inch) describes your image file. DPI (dots per inch) describes how many tiny ink dots a printer places on paper.
A printer uses several ink dots to reproduce one pixel, so a printer’s DPI number is usually much higher than the image’s PPI. When you prepare a file, PPI is the setting you control.
What Resolution Is Best for a 4×4 Photo?
The best resolution for a 4×4 photo print is 300 PPI, which gives you a 1200 × 1200 pixel file. At that density, the eye cannot pick out single pixels at normal viewing distance, so the print looks smooth and sharp.
Resolution matters because a print is viewed up close. A small photo held in the hand shows soft edges and jagged lines much faster than a poster seen from across a room.
Some practical rules:
- 300 PPI is the safe target for photo prints, gifts, and client work.
- 200 to 250 PPI still looks good for most casual prints.
- 150 PPI is fine for drafts, test sheets, and crafts where fine detail does not matter.
- 600 PPI helps only when the original has that much real detail, such as a scan of line art or small text.
One warning. You cannot add detail that was never captured. If you stretch a 400 × 400 pixel image up to 1200 × 1200, the software invents the missing pixels by guessing. The file gets bigger, but the image quality does not improve. Always start from the largest original you have.
4×4 Photo Size vs Other Common Photo Sizes
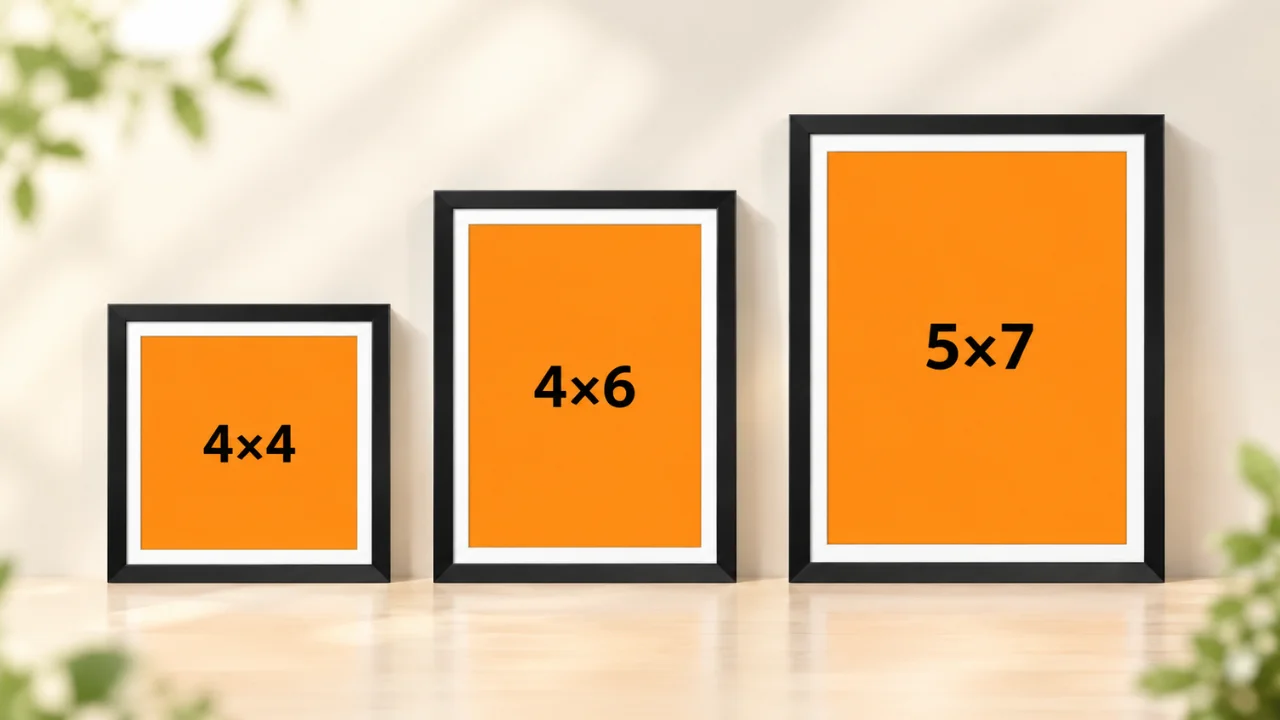
A 4×4 print sits in the middle of the small square sizes. Here is how the 4×4 photo dimensions compare with other popular prints.
| Photo Size | Shape | Aspect Ratio | Pixels at 300 PPI |
|---|---|---|---|
| 2×2 | Square | 1:1 | 600 × 600 |
| 3×3 | Square | 1:1 | 900 × 900 |
| 4×4 | Square | 1:1 | 1200 × 1200 |
| 4×6 | Rectangle | 2:3 | 1200 × 1800 |
| 5×5 | Square | 1:1 | 1500 × 1500 |
| 5×7 | Rectangle | 5:7 | 1500 × 2100 |
| 8×8 | Square | 1:1 | 2400 × 2400 |
| 8×10 | Rectangle | 4:5 | 2400 × 3000 |
The square sizes are 2×2, 3×3, 4×4, 5×5, and 8×8. They all share the same 1:1 ratio, so a photo cropped for one fits the others without recropping. You only need to resize it.
The rectangular sizes (4×6, 5×7, 8×10) each have a different ratio. Moving a photo between them always means cropping again.
Is a 4×4 Photo the Same as a Square Photo?
Yes. Every 4×4 photo is a square photo, but not every square photo is 4×4. “Square” describes the shape (1:1). “4×4” describes one specific square photo size.
Most cameras and phones shoot rectangles, usually 4:3 or 3:2. To get a square image, you have to crop, and cropping removes part of the picture.
Two quick examples:
- A wide group shot loses the people standing at each end.
- A full-length portrait loses either the head room or the feet.
Before you crop, check what sits near the edges. If the subject fills the frame, a square crop may not work, and a 4×6 print could be the better choice. Photos with a centered subject and some empty space around it make the best squares.
How to Resize a Photo to 4×4 Inches
To resize a photo to 4×4 inches, crop it to a square first, then set the size to 4 × 4 inches at 300 PPI. These steps work in almost any image editing app.
- Open the image. Use the original file, not a screenshot or a copy saved from social media.
- Crop to a square. Choose a 1:1 crop and move the frame until the subject sits well.
- Set the dimensions. Enter 4 inches for width and 4 inches for height.
- Set the resolution. Enter 300 PPI. The file should now be 1200 × 1200 pixels.
- Check image quality. Zoom to 100% and look at eyes, hair, and text for softness.
- Export correctly. Save a high-quality JPEG for photos.
- Prepare it for printing. Keep the file at 100% scale in the print dialog.
Why crop first? If you type 4 × 4 inches into a rectangular photo without cropping, the software has to squash or stretch it to fit. Faces go wide or thin. Cropping to 1:1 first keeps the proportions right, and resizing afterward only changes the pixel count.
How to Make a 4×4 Photo in Photoshop
In Photoshop, create a 4 × 4 inch document at 300 PPI, place your photo, and export a JPEG. There are two easy ways to do it.
Method 1: Start with a new document
- Go to File > New.
- Set the units to inches. Enter Width: 4 and Height: 4.
- Set Resolution to 300 pixels/inch.
- Choose RGB Color as the color mode.
- Click Create, then drag your photo onto the canvas.
- Press Ctrl+T (Cmd+T on Mac) and scale the photo while holding the proportions.
- Position the subject. Keep faces and key details away from the edges.
Method 2: Crop an existing photo
- Open the photo and select the Crop Tool.
- In the options bar, choose W × H × Resolution.
- Enter 4 in, 4 in, and 300 px/in.
- Drag the crop box into place and press Enter.
This crops and resizes in one move.
Export settings
Use File > Save a Copy and pick JPEG at quality 10 or higher. This keeps the 300 PPI value inside the file. Quick web export options may not store the print resolution, so check the print size again if you use them.
JPEG or PNG? JPEG is the normal choice for photos because files stay small and labs accept it everywhere. PNG suits graphics with text, logos, or transparent areas.
How to Make a 4×4 Photo in Canva
In Canva, create a custom design of 4 × 4 inches, add your photo, and download it for print.
- Click Create a design, then Custom size.
- Switch the units to inches and enter 4 × 4.
- Upload your photo and drag it onto the square canvas.
- Double-click the photo to crop and adjust placement.
- Click Share > Download.
- Choose PDF Print for the most reliable print quality.
One thing to know. Canva is a design tool built around screens, so a PNG or JPG download of an inch-based design may come out with fewer pixels than the 1200 × 1200 you want. Check the pixel dimensions of the downloaded file before you print.
If you need a JPG or PNG, a simple workaround is to create the design at 1200 × 1200 pixels instead. Then set the print size to 4 inches in your printer settings. The canvas shape is what Canva controls. The physical size on paper is decided by the export and the printer workflow.
How to Print a 4×4 Photo at Home
Yes, you can print a 4×4 photo at home with a standard inkjet printer. The key is to stop the printer from resizing your image.
- Choose photo paper. Use paper made for your printer type (inkjet or laser).
- Check printer capabilities. Look at which paper sizes it accepts and whether it supports borderless printing.
- Select the correct paper size. The size in the print dialog must match the paper in the tray.
- Set the print dimensions. Confirm the image is 4 × 4 inches, or set scale to 100%.
- Choose photo quality. Pick “High” or “Best” and select the matching paper type.
- Check scaling. Turn off “Fit to Page,” “Scale to Fit,” and “Fill Page.”
- Print a test copy. Use plain paper first and measure it with a ruler.
- Check the margins. Make sure no edge of the photo is cut off.
Why do printer settings change the final size? Options like “Fit to Page” tell the printer to enlarge or shrink the image until it fills the sheet. Your 4×4 file can come out at 8 inches wide without warning. “Actual Size” or 100% keeps it at exactly 4 inches.
Can You Print a 4×4 Photo on 8.5×11 Paper?
Yes. A 4×4 photo fits easily on 8.5×11 inch letter paper, and you can often fit more than one. You then cut the photos out by hand.
How many fit depends on your printer’s margins. Most printers cannot print to the very edge of the sheet unless borderless mode is on.
The math for a 2 × 2 grid:
- Two photos side by side need 8 inches of width. Letter paper is 8.5 inches wide, so only 0.25 inch remains on each side.
- Two photos stacked need 8 inches of height. Letter paper is 11 inches tall, so there is plenty of room.
If your printer’s unprintable margin is 0.25 inch or less per side, four 4×4 photos can fit with no gap between the two columns. If the margin is larger, the outer edges get clipped. In that case, print two per sheet with space around each.
A4 paper is narrower (about 8.27 inches), so two photos side by side leave almost no margin. Plan for two per A4 sheet unless your printer handles borderless printing.
Another simple option is 4×6 photo paper. Print the 4×4 at one end and trim off the spare 2 inch strip.
What Paper Is Best for a 4×4 Photo?
Luster or semi-gloss photo paper is the best all-round choice for 4×4 photos. It shows rich color and resists fingerprints. The right pick depends on how the print will be used.
| Paper Type | Advantages | Disadvantages | Best For |
|---|---|---|---|
| Glossy | Vivid color, deep blacks, sharp look | Glare, shows fingerprints | Albums, bright colorful photos |
| Matte | No glare, soft look, easy to write on | Colors and blacks look flatter | Framing behind glass, scrapbooks, cards |
| Semi-gloss / luster | Good color with low glare | Costs a little more | Portraits, gifts, general use |
| Plain paper | Cheap, always on hand | Dull color, ink can bleed | Size and layout tests only |
Pre-cut 4×4 photo paper is harder to find than 4×6 or letter size. That is why most people print on a larger sheet and trim.
How to Print Multiple 4×4 Photos on One Sheet
To print several 4×4 photos on one sheet, build a print layout the same size as your paper and place the photos on it.
- Create a new document at your paper size (for example 8.5 × 11 inches) and 300 PPI.
- Place the first 4×4 image, then duplicate it or add different photos.
- Keep every photo inside the printable area, away from the sheet edges.
- Use equal spacing. A gap of about 0.25 inch makes cutting much easier.
- Add thin, light cutting guides or small corner marks.
- Print at 100% with scaling turned off.
- Cut with a paper trimmer or a craft knife and metal ruler.
Photoshop, Canva, and most free layout apps can do this. A local or online print shop can also build an efficient layout for you, which saves paper on large orders.
Common Problems When Printing a 4×4 Photo
Most 4×4 photo printing problems come from scaling, paper settings, or a weak source file. Here is how to fix each one.
| Problem | Likely Cause | Fix |
|---|---|---|
| Photo prints too large | “Fit to Page” or “Fill Page” is on | Print at 100% or “Actual Size” |
| Photo prints too small | File saved at the wrong size, or “Shrink to Fit” is on | Confirm 4 × 4 inches in the file, turn scaling off |
| Blurry output | Low-resolution source image | Use a file close to 1200 × 1200 px |
| Wrong crop | Printer auto-cropped a rectangle to fill the paper | Crop to 1:1 yourself before printing |
| White borders | Printer does not support borderless on that paper | Turn on borderless, or trim the border off |
| Unexpected margins | Paper size in the dialog does not match the tray | Match the paper size setting to the real sheet |
| Color differences | Screen too bright, wrong paper type selected | Lower screen brightness, select the exact paper type |
| Printer scaling | Driver default is set to scale | Check scale in both the app and the driver |
| Low-resolution source | Image came from a chat app or screenshot | Find the original camera file |
| Incorrect paper settings | Set to plain paper while using photo paper | Choose the photo paper type and high quality |
A plain paper test print catches most of these before you waste a good sheet.
Why Does My 4×4 Photo Look Blurry?
A 4×4 photo usually looks blurry because the file does not contain enough real pixels for the print size. Other causes add to it:
- Low-resolution original. A 300 × 300 pixel image prints at only 75 PPI on a 4 inch square.
- Excessive enlargement. A tiny crop from a large photo gets stretched too far.
- Incorrect export. The file was downsized by accident on save.
- Compression. Low JPEG quality, or repeated saving, creates blocky artifacts.
- Poor sharpening. Too little leaves the print soft. Too much adds halos.
- Low-quality source. Motion blur or missed focus cannot be fixed by resizing.
Upscaling raises the pixel count, but it does not bring back genuine detail. The software only estimates what sits between existing pixels. AI upscalers do a better job of estimating, yet they can also invent texture that was never there. The reliable fix is a better original.
How to Choose the Right Photo Paper
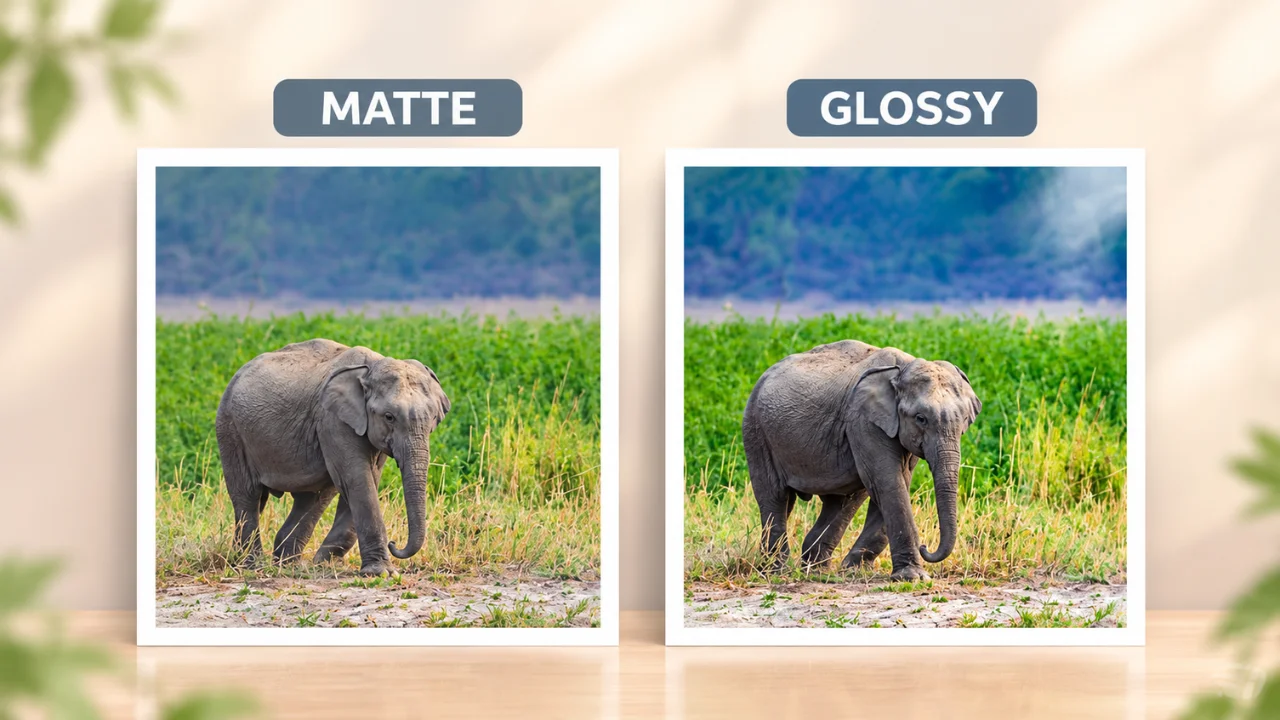
The right photo paper texture and finish depends on what you need from the print. Each type has its own strengths and trade-offs. Here are the main options:
Glossy Paper
- Pros: This will give you vibrant colors, a professional look, and sharp details.
- Cons: They are too susceptible to fingerprints. Plus, their glossiness makes the paper glare in bright light.
- Best for: Handheld prints or an album.
Matte Paper
- Pros: Unlike the glossy paper, matte has no glare issue. It provides an elegant look. You won’t need to worry about the fingerprints, either.
- Cons: You may find slightly muted tones and less saturated colors with this paper.
- Best For: Framed photos or hanging pictures on displays.
How to Prepare a 4×4 Photo for Professional Printing
For a print lab, send a square 1200 × 1200 pixel file at 300 PPI, saved in the format and color space the lab asks for. A simple workflow:
- Crop to 1:1 and keep important details away from the edges. Labs often trim a small amount.
- Resize to 4 × 4 inches.
- Check resolution. Aim for 300 PPI.
- Review sharpness at 100% zoom.
- Check color and exposure on a screen that is not set too bright.
- Save correctly. A high-quality JPEG is accepted by most labs.
- Confirm print dimensions in the order form.
- Review the final proof or preview before you pay.
RGB or CMYK?
RGB is the color mode used by cameras and screens. CMYK is used by many commercial printing presses.
Many consumer photo labs and home inkjet printers are set up to receive RGB files, often in the sRGB color space, and they handle the conversion to ink themselves. Some commercial printers ask for CMYK instead. Requirements differ from one provider to the next, so check the lab’s file guidelines before you convert anything.
4×4 Photo Size for Frames, Albums, Crafts & Gifts
The 4×4 print size works well anywhere a small square fits better than a rectangle. Popular uses include:
- Small photo frames for desks, shelves, and gift sets.
- Scrapbooks and memory books, where squares leave space for notes and decoration.
- Photo walls, built as a neat grid of matching squares.
- Albums designed for square prints.
- Handmade cards, with one print mounted on folded card stock.
- Crafts such as magnets, ornaments, and collage boards.
- Gifts like a boxed set of prints from a trip or a year.
- Small business displays, including product swatches, menu tiles, and market stall signs.
If you are buying a frame, check whether “4×4” refers to the photo opening or the outer frame. A frame with a mat needs a smaller print than the frame size suggests.
How Photo Editing Improves a 4×4 Print
Good image editing makes a small print look clean and intentional. On a 4 inch square, every distraction takes up a larger share of the picture, so small fixes go a long way.
- Cropping. Center the subject or use the rule of thirds within the square.
- Background cleanup. Remove clutter that pulls the eye from the subject.
- Exposure correction. Prints often look darker than a backlit screen, so lift the shadows slightly.
- Color correction. Fix color casts so whites look white and skin looks natural.
- Skin retouching. Soften blemishes while keeping real skin texture.
- Removing distractions. Take out dust spots, stray hairs, and background objects.
- Noise reduction. Smooth grain from low-light shots before you sharpen.
- Sharpening. Apply it last, at the final 1200 × 1200 size.
Keep edits natural. Heavy smoothing, strong saturation, and over-sharpening look worse on paper than on screen. The goal is a print that looks like a better version of the real scene.
Professional Help with Image Preparation
Editing one photo is easy. Editing hundreds to the same standard is a different job. That is where professional post-production helps.
Clipping Area is a Post-Production Photo Retouching Agency. The team prepares images for print and digital use, so each file meets the size, crop, and quality a project needs. Services include:
- Photo retouching
- Background removal
- Clipping path
- Image masking
- Color correction
- Image cleanup
- Product photo editing
- Apparel photo editing
- Ghost mannequin editing
- Bulk image editing
Clipping Area works on the image files. Printing itself is done by your own printer or the lab you choose.
This kind of support suits photographers, eCommerce sellers, and small businesses that need consistent image preparation across a whole catalog or shoot. For example, a seller who wants every product photo cropped square, color matched, and placed on a clean background.
Not sure if it fits your workflow? Get a Free Sample. Send a small batch for testing and judge the results on your own images.
Frequently Asked Questions
How big is a 4×4 photo size?
A 4×4 photo is 4 inches wide and 4 inches tall, which equals 10.16 × 10.16 cm. It is a small square print that fits in the palm of your hand.
What are the dimensions of a 4×4 photo?
The 4×4 photo dimensions in inches are 4 × 4. In millimeters, that is 101.6 × 101.6. The aspect ratio is 1:1.
What is a 4×4 photo in pixels?
At 300 PPI, a 4×4 photo is 1200 × 1200 pixels. At 150 PPI it is 600 × 600 pixels, and at 72 PPI it is 288 × 288 pixels.
What resolution is best for a 4×4 print?
300 PPI is best for a high-quality 4×4 print. Around 200 PPI still looks good for casual use, and 150 PPI is enough for drafts.
Is 4×4 a standard photo size?
4×4 is a common square print size, but it is less universal than 4×6. Many print services offer it, while pre-cut 4×4 paper for home printers is harder to find.
Can I print a 4×4 photo at home?
Yes. Print it on 4×6 or letter-size photo paper at 100% scale, then trim it to size. Turn off “Fit to Page” so the printer keeps the exact dimensions.
How do I make a 4×4 photo in Photoshop?
Select the Crop Tool, choose W × H × Resolution, and enter 4 in, 4 in, and 300 px/in. Position the crop, press Enter, and save a high-quality JPEG.
How do I make a 4×4 photo in Canva?
Create a custom size design of 4 × 4 inches, add your photo, and download it as PDF Print. Check the pixel dimensions if you download a JPG or PNG instead.
Can I print multiple 4×4 photos on one sheet?
Yes. A letter-size sheet can hold up to four 4×4 photos in a 2 × 2 grid if your printer’s margins are small enough. Otherwise, print two per sheet.
What paper is best for 4×4 photos?
Luster or semi-gloss photo paper suits most 4×4 photos. Choose glossy for vivid color and matte for framed prints or scrapbooks.
Why does my 4×4 photo look blurry?
The image most likely has too few pixels. A sharp 4×4 print needs a file near 1200 × 1200 pixels. Heavy JPEG compression and printer scaling can also soften it.
How do I resize an image to 4×4 inches?
Crop the image to a 1:1 square first. Then set the width and height to 4 inches and the resolution to 300 PPI. Export it as a high-quality JPEG.
Final Thoughts
A 4×4 photo is a 4 inch by 4 inch square with a 1:1 aspect ratio. For a sharp print, prepare the file at 1200 × 1200 pixels, which is 300 PPI.
Crop to a square before you resize. Print at 100% with scaling off. Run a test on plain paper before using photo paper. Those three habits prevent most sizing and quality problems.
If you have a large set of images to prepare, a professional retouching team can take care of the cropping, cleanup, and color work, so every file is ready to print.