Every edit in Photoshop starts in one place: the toolbar. If you want to work faster and with more confidence, learning the Photoshop tools and toolbar guide is the best first step you can take. This guide covers every main tool group, the hidden tools most people miss, the newest AI features, and the shortcuts we use every day.
I’m Mamun, founder of Clipping Area. Since 2014, our editors have worked in Photoshop every single day, cutting out products, retouching fashion shots, and blending real estate photos for clients in more than 52 countries. Everything in this guide comes from real client work, not from a manual.
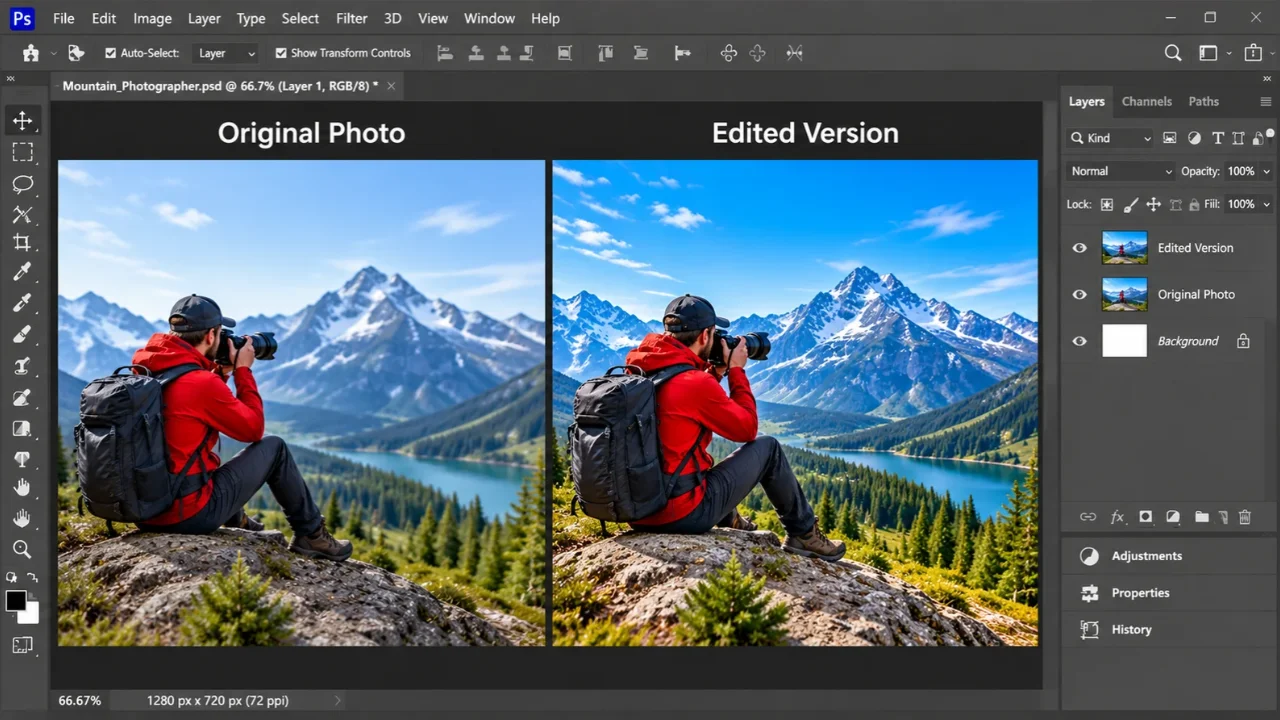
Quick answer: The Photoshop toolbar is the panel on the left side of the screen that holds more than 60 tools for selecting, retouching, painting, drawing, and navigating. Related tools share one icon, and a small triangle on an icon means more tools are hidden underneath.
In this guide:
Understanding the Photoshop toolbar layout
How to find hidden Photoshop tools
How to customize the Photoshop toolbar
Photoshop toolbar tools explained, group by group
AI tools in Photoshop for 2027
Photoshop keyboard shortcuts
The Options Bar and Contextual Task Bar
Powerful features beyond the toolbar
Real workflows from our studio
FAQs
Understanding the Photoshop Toolbar Layout
The toolbar sits on the left edge of your workspace by default. You will see it in Photoshop on desktop, web, and iPad, but only the desktop app has the full set of tools.
Image: screenshot of the full Photoshop toolbar in single and double column view. Alt text: “Photoshop tools and toolbar in single and double column view”
Single Column vs Double Column
The toolbar opens as one long column. Click the small double arrow at the top to switch to two short columns. This helps on laptop screens, where tools at the bottom can drop out of view. Click the arrow again to go back.
How Tools Are Grouped
Adobe arranges the toolbar in the same order most people edit an image:
Move and selection tools at the top
Crop and slice tools next
Measurement tools like the Eyedropper and Ruler
Retouching and painting tools in the middle
Drawing and type tools below them
Navigation tools like Hand and Zoom near the bottom
Under the tools, you will find the foreground and background color swatches, the Quick Mask button, and the Screen Mode button. On a typical product job, our editors move down the toolbar in this same order: select the product, clean it up, then zoom in to check every edge.
How to Find Hidden Photoshop Tools
Most toolbar icons hold more than one tool. This is the number one thing beginners miss. If you cannot find a tool, it is almost always hiding under another icon.
Look for a tiny triangle in the bottom right corner of an icon. To see the hidden tools:
Right-click the icon (Windows) or Control-click it (Mac)
Or click and hold the icon until a fly-out menu opens
Or hold Shift and press the shortcut key to cycle through the group, like Shift + M to switch between the Rectangular and Elliptical Marquee
Image: the hidden tools fly-out menu open under the Marquee tool. Alt text: “Hidden Photoshop tools in the Marquee tool fly-out menu”
For example, the Rectangular Marquee icon also hides the Elliptical Marquee, Single Row Marquee, and Single Column Marquee tools. The icon you see is always the last tool you picked from that group, and Photoshop remembers it next time.
How to Customize the Photoshop Toolbar
You can shape the toolbar around the way you work. Fewer icons means less searching and faster editing.
Edit the Toolbar
Go to Edit > Toolbar. A dialog opens with your current toolbar on the left and an Extra Tools list on the right.
Drag a tool to Extra Tools to hide it
Drag a tool back to the left column to show it
Drag one tool onto another to put them in the same group
Click Restore Defaults to undo everything
You can also hide the color swatches, Quick Mask, and Screen Mode buttons from the bottom of the same dialog.
Image: the Edit > Toolbar customization dialog. Alt text: “Customize Photoshop toolbar dialog with Extra Tools list”
Save Toolbar Presets
Click Save Preset to keep your layout. Many editors save one toolbar for photo retouching, one for design work, and one for painting. Load the one you need with Load Preset. Pair it with a saved workspace from Window > Workspace and your whole screen changes in two clicks.
Use Spring-Loaded Shortcuts
Our retouchers use this trick all day. Hold a tool key instead of tapping it. Photoshop switches to that tool while you hold the key and jumps back to your last tool when you let go.
For example, while painting a mask with the Brush, hold Spacebar to pan with the Hand tool, or hold Z to zoom. Release the key and you are back to painting with no extra clicks.
Photoshop Toolbar Tools Explained, Group by Group
Each tool group solves one kind of job. Learn what each group does and you will always know where to reach.
Move Tool (V)
The Move tool moves layers, selections, and guides. Turn on Auto-Select in the Options Bar to pick a layer just by clicking it on the canvas. The Artboard tool sits in the same group for web and app design.
Selection Tools
Selection tools tell Photoshop which part of the image to change. Without a selection, every edit affects the whole layer. These tools are the heart of clipping paths, background removal, and image masking.
Marquee tools (M): Draw rectangles, ellipses, or single-pixel rows and columns. Great for frames, buttons, and simple shapes.
Lasso tools (L): The Lasso draws freehand. The Polygonal Lasso draws straight lines point to point. The Magnetic Lasso snaps to high-contrast edges.
Object Selection tool (W): Hover over an object and it highlights. Click once and Photoshop selects it with AI.
Quick Selection tool (W): Paint over an area and the selection grows to the nearest edges.
Magic Wand tool (W): Click once to select pixels of similar color. Raise or lower Tolerance to control how much it grabs.
These key combos work with almost every selection tool:
Shift + drag adds to a selection
Alt (Option) + drag subtracts from a selection
Shift + Alt (Shift + Option) + drag keeps only the overlap
For hair, fur, and soft edges, click Select and Mask in the Options Bar. Then paint along the edge with the Refine Edge Brush. This is the same base technique behind professional image masking.
Crop and Slice Tools (C)
The Crop tool trims and straightens your image. Turn on Content-Aware in the Options Bar and Photoshop fills empty corners when you rotate. The Perspective Crop tool fixes tilted buildings and documents. The Slice tools cut layouts into web pieces, and the Frame tool (K) creates placeholder frames for images.
Measurement Tools (I)
The Eyedropper picks a color from your image. The same group holds the Color Sampler for reading color values, the Ruler for measuring and straightening, the Note tool, and the Count tool for counting objects by hand.
Retouching Tools
Retouching tools remove flaws and clean up images. These are the tools our retouchers open most.
Spot Healing Brush (J): Click on a spot or blemish and it blends away.
Remove tool (J): Paint over an object, person, or wire and AI fills the space with a natural background.
Healing Brush (J): Alt-click to sample clean skin or texture, then paint. It matches light and tone.
Patch tool (J): Draw around a problem area and drag it to a clean area.
Content-Aware Move (J): Select an object and move it. Photoshop fills the spot it left behind.
Red Eye tool (J): Fixes red eyes from flash with one click.
Clone Stamp (S): Alt-click a source, then paint an exact copy. Best for edges and patterns where healing smudges detail. Turn on Aligned to keep the source moving with your brush.
History Brush (Y): Paints back an earlier state of your image in only the areas you choose.
Painting Tools
Brush tool (B): Your main painting tool. Change size, hardness, opacity, and flow. Use [ and ] to resize fast.
Pencil tool (B): Hard pixel edges, useful for pixel art.
Color Replacement tool (B): Paints a new color over an old one while keeping the shading. Handy for quick product color variants.
Mixer Brush (B): Blends colors like real wet paint.
Eraser (E): Removes pixels. For safer edits, use a layer mask instead so you can bring pixels back.
Gradient tool (G): Creates smooth blends. Newer versions draw live, editable gradients you can tweak on canvas.
Paint Bucket (G): Fills an area with one color.
Blur, Sharpen, and Smudge: Soften, crisp up, or push pixels. This group has no default shortcut, but you can add one.
Dodge, Burn, and Sponge (O): Lighten, darken, or change color strength in small areas.
Drawing and Type Tools
Pen tool (P): Draws exact vector paths with anchor points. This is the professional choice for a clean clipping path on products with hard edges. On a simple shoe or bottle, a trained editor finishes a Pen tool path in a few minutes, and the edge stays sharp at any size. The group also holds the Freeform Pen, Curvature Pen, and tools to add, delete, or convert anchor points.
Path Selection and Direct Selection (A): Move whole paths or single anchor points.
Shape tools (U): Rectangles, ellipses, triangles, polygons, lines, and custom shapes. Draw them as a vector shape, a path, or pixels. Hold Shift for perfect proportions.
Type tools (T): Click once for point text or drag a box for paragraph text. Vertical type and type masks live in the same group.
Hundreds of product cutouts on your desk? Our editors draw every path by hand with the Pen tool. Try our clipping path service free on 2 images.
Navigation Tools
Hand tool (H): Pans around the image. Hold Spacebar to use it anytime. Double-click its icon to fit the image on screen.
Rotate View tool (R): Turns the canvas without changing the image, which helps when painting or retouching at an angle. Press Esc or click Reset View to straighten it.
Zoom tool (Z): Click to zoom in and Alt-click to zoom out. Double-click its icon to jump to 100%.
AI Tools in Photoshop for 2027
AI now sits inside almost every part of Photoshop. These tools turn hours of manual work into minutes, but they work best when you still know the classic tools behind them. Here are the AI features that matter most as we head into 2027.
Generative Fill and Generative Expand
Make a selection, type what you want, and Photoshop adds, removes, or replaces content. Generative Expand grows the canvas and fills the new space so it matches the photo. You can now choose the model behind each result: Adobe Firefly (including Firefly Image 5 for prompt-based masked edits), Google’s Gemini (Nano Banana), FLUX.1 Kontext, and since September 2026, OpenAI’s GPT Image 2 for generating and editing images with prompts.
Remove Tool
Brush over a distraction and it disappears. The Remove tool now gives cleaner edges and higher detail. Since May 2026, you can also run it on your own computer instead of the cloud.
Harmonize
Harmonize blends a pasted object or person into a new scene. It matches light, shadows, and color so the composite looks like one photo. For product and lifestyle composites, it replaces a long round of manual color matching.
Generative Upscale, AI Denoise, and AI Sharpen
Go to Image > Generative Upscale to enlarge an image 2x or 4x with added detail. You can choose the Firefly Upscaler or the Topaz Labs models, Gigapixel and Bloom. The Topaz models need a premium plan. Filter > AI Denoise and Filter > AI Sharpen also use Topaz technology to clean noisy or soft photos.
Relight and the New Adjustment Layers
The November 2026 release (version 28.0) added Relight, which lets you add and control new lighting after the photo is taken. The August 2026 update brought a non-destructive Light adjustment layer, and January 2026 added Clarity and Dehaze and Grain adjustment layers. All of them work with masks, so you can change one area without touching the rest.
AI Assistant and AI Assisted Editor
The AI Assistant lets you describe an edit in plain words, like “remove the people in the background” or “make the sky warmer.” You can let it make the edit for you or ask it to show the steps so you learn as you go. It launched in public beta on Photoshop web and mobile in March 2026. On desktop, the AI Assisted Editor (beta) arrived in August 2026 as a simple, prompt-based workspace, and in November 2026 the AI Assistant reached the Photoshop (beta) desktop app. AI Markup lets you draw on the image to show exactly where a change should go.
Layer Cleanup
Messy files slow everyone down. Layer Cleanup removes empty layers and gives the rest clear names automatically.
New: Freemium Access for Beginners
Since version 28.0, you can download Photoshop on desktop and sign in with just an email address. If you are learning the toolbar for the first time, this is the easiest way to start practicing.
Tip: Adobe ships updates almost every month. Open Help > What’s New in Photoshop to see the features in your version.
Photoshop Keyboard Shortcuts for Every Tool
Shortcuts are the fastest way to switch tools. Single-letter tool keys are the same on Windows and Mac.
| Key | Tool group |
|---|---|
| V | Move, Artboard |
| M | Marquee tools |
| L | Lasso tools |
| W | Object Selection, Quick Selection, Magic Wand |
| C | Crop, Perspective Crop, Slice |
| K | Frame tool |
| I | Eyedropper, Ruler, Count |
| J | Spot Healing, Remove, Healing, Patch |
| B | Brush, Pencil, Mixer Brush |
| S | Clone Stamp |
| Y | History Brush |
| E | Eraser tools |
| G | Gradient, Paint Bucket |
| O | Dodge, Burn, Sponge |
| P | Pen tools |
| T | Type tools |
| A | Path Selection, Direct Selection |
| U | Shape tools |
| H (or hold Spacebar) | Hand |
| R | Rotate View |
| Z | Zoom |
| Shift + tool key | Cycle through tools in a group |
| D / X | Default colors / swap colors |
| Q / F | Quick Mask / Screen Mode |
| [ / ] | Brush size smaller / larger |
Combo shortcuts change between systems:
| Action | Windows | Mac |
|---|---|---|
| Undo (multiple steps) | Ctrl + Z | Cmd + Z |
| Redo | Ctrl + Shift + Z | Cmd + Shift + Z |
| Free Transform | Ctrl + T | Cmd + T |
| New layer via copy | Ctrl + J | Cmd + J |
| Fit on screen | Ctrl + 0 | Cmd + 0 |
| 100% view | Ctrl + 1 | Cmd + 1 |
| Keyboard Shortcuts dialog | Alt + Shift + Ctrl + K | Option + Shift + Cmd + K |
You can change any shortcut from Edit > Keyboard Shortcuts. Save your set so you can load it on a new computer.
The Options Bar: Each Tool’s Control Panel
The Options Bar runs across the top of the screen and changes with every tool. Pick the Brush and you see size, hardness, opacity, and flow. Pick a Marquee and you see feather and selection modes. Pick Type and you see font, size, and alignment. When a tool does not behave the way you expect, check the Options Bar first. Nine times out of ten, a setting there is the reason.
The Contextual Task Bar
The Contextual Task Bar is a small floating bar on the canvas that shows the next steps you are likely to need. After you make a selection, it offers Generative Fill, Invert, and mask and fill options. After you add a shape, it shows fill and stroke options. You can move it, pin it, or hide it from Window > Contextual Task Bar.
Image: the Contextual Task Bar under an active selection. Alt text: “Photoshop Contextual Task Bar with Generative Fill and selection options”
Powerful Photoshop Features Beyond the Toolbar
Some of the most useful features do not live in the toolbar at all. These are worth knowing:
Vanishing Point (Filter > Vanishing Point): Clone and paint in correct perspective on walls, floors, and packaging.
Puppet Warp (Edit > Puppet Warp): Bend an arm, a strap, or a product shape by moving pins, without breaking the image.
Sky Replacement (Edit > Sky Replacement): Swap a dull sky for a better one, with automatic color matching. Very handy for real estate exteriors.
Neural Filters (Filter > Neural Filters): AI filters for skin smoothing, colorizing old photos, and more.
Content-Aware Fill (Edit > Content-Aware Fill): Remove an object and control exactly which area Photoshop samples to fill it.
Real Workflows: Which Photoshop Tools We Use and When
Knowing each tool alone is only half the job. On a real client order, our editors switch between four or five tools for every single image. Here are three workflows we run every day.
Background Removal for Ecommerce Products
Click Select Subject in the Contextual Task Bar for a fast first selection.
Use the Pen tool to trace hard edges like bottles, boxes, and shoes for a crisp clipping path.
Open Select and Mask for soft edges such as fabric, fur, or hair.
Add a layer mask instead of deleting pixels, so you can fix mistakes later.
Place a pure white or transparent background and check the edges at 200% zoom.
This is the exact process behind our background removal service.
Natural Portrait Retouching
Duplicate the layer with Ctrl + J so the original stays safe.
Clear small blemishes with the Spot Healing Brush.
Fix larger areas with the Healing Brush or Patch tool.
Use the Clone Stamp for stray hairs near edges.
Shape light with Dodge and Burn on a separate gray layer, and keep it subtle.
Product Photo Cleanup
Straighten and trim with the Crop tool.
Remove dust and scratches with the Remove tool and Spot Healing Brush.
Fix color with adjustment layers like Curves and Hue/Saturation.
Add a soft shadow on its own layer so the product does not float.
Export at the size each marketplace asks for.
Clipping Area: Your Premium Post-Production Partner
Learning every Photoshop tool takes months. Editing thousands of images by hand takes even longer. That is the work we take off your plate.
We are Clipping Area, a premium post-production and photo retouching agency founded in 2014 in Dhaka, Bangladesh. We work as a complete image editing solution provider for ecommerce brands, fashion labels, photographers, real estate agencies, and marketing teams in more than 52 countries. We use the same tools in this guide every day, at scale, with a quality check on every image.
Our image editing services:
Clipping Path: Hand-drawn Pen tool paths for sharp, clean cutouts
Background Removal: White, transparent, or custom backgrounds ready for Amazon, Shopify, and eBay
Image Masking: Detailed masks for hair, fur, lace, and other soft edges
Ghost Mannequin: The invisible mannequin effect for clean apparel photos
Ecommerce Image Editing: Consistent, marketplace-ready product images in bulk
Real Estate Photo Editing: HDR blending, window pulls, sky replacement, and virtual staging
Jewelry Retouching: Bright metal, clear stones, and zero dust
Product Retouching: Scratch, dust, and reflection cleanup
Color Correction: Accurate, matching color across every product and variant
Photo Retouching: Natural skin and fashion retouching
Shadow Creation: Natural drop, reflection, and cast shadows
Video Editing, 3D Rendering, and AI Creative Services for brands that need more than stills
Pricing starts at $0.29 per image, with volume discounts for large monthly orders. See full rates on our pricing page. Want to judge the quality first? Send us 2 images and we will edit them free.
Frequently Asked Questions
What is the Photoshop toolbar?
The Photoshop toolbar is the vertical panel on the left side of the screen. It holds more than 60 tools for selecting, retouching, painting, drawing, typing, and navigating, grouped by job.
Why can’t I see all the tools in my Photoshop toolbar?
Many tools hide under other icons. Right-click any icon with a small triangle to see them. If a tool is still missing, open Edit > Toolbar and check the Extra Tools list.
How do I reset the Photoshop toolbar?
Go to Edit > Toolbar and click Restore Defaults. To reset your full layout, choose Window > Workspace > Reset Essentials.
My toolbar disappeared. How do I get it back?
Go to Window > Tools. If all panels are hidden, press Tab once to bring them back.
What is the difference between the Healing Brush and the Clone Stamp?
The Clone Stamp copies pixels exactly. The Healing Brush copies texture but blends the light and color with the area around it. Use Clone Stamp near hard edges and Healing Brush on skin and smooth surfaces.
Which Photoshop tool is best for removing objects?
The Remove tool is the fastest choice for most objects. For larger areas, use Generative Fill. For full control near edges and patterns, use the Clone Stamp.
What is the best Photoshop tool for cutting out a product?
The Pen tool gives the cleanest result for products with hard edges. For hair or fur, start with Select Subject and refine with Select and Mask.
How do I upscale an image in Photoshop?
Go to Image > Generative Upscale, choose 2x or 4x, and pick a model such as Firefly Upscaler or Topaz Gigapixel. Photoshop creates the larger image in a new document.
Can I use Photoshop for free?
Since version 28.0 (November 2026), Adobe offers Freemium access that lets you download Photoshop on desktop and sign in with just an email. Some features and AI credits still need a paid plan.
Final Thoughts
The Photoshop toolbar looks busy at first, but it follows a simple order: select, fix, create, and navigate. Learn the hidden tools, set up a custom toolbar, and practice the shortcuts for one week. Once the Photoshop tools and toolbar feel natural, add AI features like Generative Fill, Remove, and Harmonize to finish jobs even faster.
And when your image volume grows bigger than your hours, let us handle the editing. Try Clipping Area free on 2 images today.