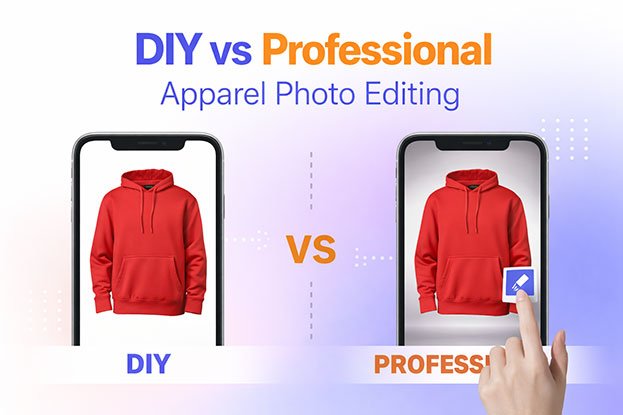
A clothing brand launches a new collection with 250 product shots. The photos look good on camera, but every image still needs background cleanup, color fixes, and some wrinkle work before it can go live. Doing it in-house feels like the smart move. The team already has Photoshop, and there is no outsourcing invoice to approve. That is usually where the DIY vs professional apparel photo editing question starts.
On paper, DIY looks almost free. In practice, it costs labor hours, software, training, revisions, and all the work your team did not get to that week. This guide breaks down the true cost of each option, shows you how to calculate your own numbers, and helps you decide what actually saves your business money.
DIY Apparel Photo Editing: What Does It Really Mean?
DIY apparel photo editing means your business edits its own product images instead of paying an outside editor or agency. For most clothing brands, it looks like one of these:
- The founder edits images late at night after other work is done
- A marketing or ecommerce employee handles editing alongside uploads and social media
- Someone uses Photoshop or Lightroom for retouching and color correction
- Canva or an AI tool is used for quick background removal
- The business trains an internal employee to become the “photo person”
DIY feels inexpensive because the costs are spread out. There is no single bill. Software is a small monthly charge, and the editing time disappears into someone’s regular salary. That is exactly why its real cost is so easy to underestimate.
The Real Cost of DIY Apparel Photo Editing
The real cost of DIY editing is software plus the value of every hour spent learning, editing, fixing, and checking images. Here is how it breaks down.
Software Cost
Most DIY setups use some mix of Adobe Photoshop, Lightroom, Canva, and AI image editing tools. Some brands also pay for plugins, stock backgrounds, or cloud storage. Subscription prices change often, so check current pricing directly with each provider before you budget.
Labor Cost
Employee time has a monetary value, even when it does not show up as a separate expense. If a team member spends eight hours a week editing product images, that is eight hours not spent on:
- Product uploads and listing optimization
- Customer support
- Marketing campaigns and social media
- Merchandising and SEO
- Inventory management
Training Cost
Apparel editing is harder than it looks. Clean masking around fabric edges, accurate color correction, garment retouching, and ghost mannequin editing all take practice. Learning them costs time, and early work often needs to be redone.
Revision Cost
Inexperienced editing creates extra rounds of work. A product color that looks slightly off, a jagged edge, or a missing shadow can send an image back for another pass. Each revision adds time without adding new output.
Opportunity Cost
Opportunity cost is the value of the work you gave up to do the editing. This is often the biggest cost of DIY, and the one most businesses ignore.
Think of it simply. If your ecommerce manager spends a full day editing 60 images, the real question is not “what did editing cost?” It is “what else could that person have done with the day?” If the answer is launching a campaign, fixing product pages, or answering customers, the editing day may have cost far more than its hourly wage suggests.
What Is Professional Apparel Photo Editing?
Professional apparel photo editing is the post-production work done by trained editors to prepare clothing images for ecommerce, catalogs, and marketing. It usually covers:
- Background removal and clipping path for clean product cutouts
- Image masking for soft edges, fur, lace, and fine fabric
- Color correction and color matching to keep garments true to life
- Wrinkle removal, lint cleanup, and fabric retouching
- Shadow creation, including natural and drop shadows
- Ghost mannequin editing (mannequin removal and neck joint work)
- Model retouching for skin, hair, and fit
- Cropping, resizing, and marketplace-ready file preparation
- Bulk image editing with built-in quality control
In a typical ecommerce workflow, professional editing sits between photography and upload. You shoot, send the raw files with your guidelines, receive edited images, review them, and publish. Your team stays involved in direction and approval, not in the repetitive pixel work.
DIY vs Professional Apparel Photo Editing: Cost Comparison
| Factor | DIY Editing | Professional Editing |
|---|---|---|
| Software | Ongoing subscriptions you pay for | Included in the editor’s service |
| Labor | Your team’s paid hours | Vendor fee per image or project |
| Training | Required, often ongoing | Not your responsibility |
| Editing speed | Depends on individual skill | Usually faster at volume |
| Quality control | Handled by your team | Often part of the service |
| Consistency | Varies with editor and workload | Easier to standardize with guidelines |
| Revisions | Consume internal time | Depends on vendor policy |
| Scalability | Limited by team capacity | Easier to scale for large batches |
| Bulk orders | Can overwhelm small teams | Built for high volume |
| Management time | Low coordination, high hands-on time | Some coordination, low hands-on time |
| Skill requirement | High for complex edits | Handled by specialists |
| Turnaround | Competes with other tasks | Agreed timelines |
| Long-term cost | Grows with volume and hidden time | More predictable per image |
Neither column wins automatically. The right choice depends on your image volume, internal skills, deadlines, budget, editing complexity, business size, and quality standards.
The Hidden Cost of Doing Apparel Photo Editing Yourself
- Employee time. Editing hours come out of someone’s week. Track them for one month and the total often surprises people.
- Learning Photoshop. Pen tool paths, layer masks, and color work take weeks to learn well. That learning time is paid time.
- Revisions. Every image sent back for a fix is paid for twice.
- Inconsistent image quality. Different editors, rushed batches, and tired eyes produce catalogs that do not match.
- Delayed product launches. If editing is the last step before upload, it can become the step that holds back a new collection.
- Workflow bottlenecks. When one person is the only editor, everything waits on their availability.
- Quality control. Someone has to check edges, colors, and crops. That is another block of time.
- Managing large image volumes. Naming, sorting, exporting, and organizing hundreds of files is its own job.
- Re-editing poor images. Weak early edits often need to be redone later when standards rise.
- Opportunity cost. Every hour spent editing is an hour not spent growing the business.
When DIY Apparel Photo Editing Makes Sense
DIY is a reasonable choice in many situations. It often works well when:
- You edit only a small number of images each month
- The work is simple, such as basic background removal on flat lays
- The owner or a team member already has strong editing skills
- Your product photography is clean and consistent from the start
- You carry a limited number of SKUs
- You have a capable in-house creative team with spare capacity
- Editing needs are occasional rather than ongoing
In these cases, outsourcing may add coordination without saving much time. Keeping it in-house can be the sensible call.
When Professional Apparel Photo Editing Makes More Financial Sense
Outsourcing becomes more practical as volume, complexity, and deadlines grow. It often makes sense when you have:
- Hundreds of product images per month or per collection
- Large seasonal drops or frequent product launches
- Listings across multiple ecommerce marketplaces with different image rules
- Fashion catalogs or lookbooks that need a consistent style
- Tight launch deadlines
- Ghost mannequin, model retouching, or other complex edits
- An internal team that is already overloaded
The logic is simple. The more repetitive editing work you have, the more internal time it absorbs, and the more a specialist workflow can help reduce that load.
DIY vs Professional Apparel Photo Editing: Time vs Money
You are not only paying for image editing. You are paying for all the time it takes to produce a finished, upload-ready image. That includes minutes per image, hours per batch, revisions, quality checks, file preparation, exporting, uploading, and communication.
Hypothetical example (for illustration only, not industry data):
A clothing brand has 300 product images to edit.
- DIY editing time: 6 minutes per image = 30 hours
- Revision time: 15% of images need rework = about 4.5 hours
- Quality check: 3 hours
- File prep and management: 2 hours
- Total internal time: about 39.5 hours
If that employee’s time costs the business $20 per hour, the DIY batch costs roughly $790 in labor, before software and before opportunity cost.
Now imagine a vendor quote of $1.50 per image for the same work. That is $450, plus perhaps 3 hours of internal review and communication ($60). Total: about $510.
Your numbers will be different. Complex edits take longer, simple ones take less, and real quotes vary. The point is the method: compare full internal time against the full outsourced cost, not software against an invoice.
How to Calculate Your True DIY Photo Editing Cost
True DIY Cost = Editing Labor + Software + Training + Revision Time + Quality Control + Opportunity Cost
- Editing labor: images × minutes per image ÷ 60 × hourly cost
- Software: monthly subscriptions for all editing tools
- Training: hours spent learning, spread across months, × hourly cost
- Revision time: hours spent fixing images × hourly cost
- Quality control: hours spent checking output × hourly cost
- Opportunity cost: an honest estimate of the value of work that was delayed
Monthly worksheet:
| Item | Your Number |
|---|---|
| Number of images | ___ |
| Average editing time per image (minutes) | ___ |
| Hourly labor cost | ___ |
| Software cost | ___ |
| Revision hours | ___ |
| QC hours | ___ |
| Management time (hours) | ___ |
| Total monthly editing cost | ___ |
Fill this in with tracked numbers, not guesses. One month of honest tracking is usually enough to see the real picture.
How to Calculate the Cost of Professional Apparel Photo Editing
Professional editing is usually priced in one of these ways:
- Per-image pricing
- Bulk or volume pricing
- Project pricing for full collections
- Monthly packages for recurring work
- Complexity-based pricing (ghost mannequin costs more than simple cutouts)
- Rush fees for faster turnaround
Also check revision policies, whether quality control is included, and standard turnaround times.
Do not choose a vendor on the lowest per-image price alone. A cheap edit that needs three rounds of fixes is not cheap. Evaluate quality, consistency, turnaround, communication, revision handling, file requirements, and whether the vendor can scale when your volume jumps.
What Actually Determines Apparel Photo Editing ROI?
Apparel photo editing ROI is the value you get back compared to what you spend, and it includes time and productivity, not only revenue. The main drivers are:
- Time saved for your internal team
- Better labor efficiency
- Faster product preparation and launches
- Less rework
- More consistent image quality
- Reduced internal workload
- A workflow that scales with growth
- Fewer editing bottlenecks
- The ability to process more products in the same period
Outsourcing can reduce costs and free up capacity, but results depend on your volume, your vendor, and how you use the time you get back.
AI vs DIY vs Professional Apparel Photo Editing
AI editing is fast and handles simple background removal and batch processing well. It can struggle with complex garments, hair, sheer fabrics, realistic shadows, color accuracy, and unusual shapes. Output still needs quality control.
DIY manual editing gives you full control and flexibility, with no outside dependency. The trade-off is time, skill requirements, and limited scalability.
Professional human editing brings specialized skills, quality control, and consistency on complex and bulk work. It adds coordination and a direct cost.
Many teams now combine these. AI handles quick first passes, humans handle detail and final checks. The best mix depends on your products and standards.
Why Image Consistency Matters for Fashion Ecommerce
A consistent catalog uses the same background, crop, product position, colors, shadows, brightness, model retouching style, and ghost mannequin look across every listing.
When images vary, a store can look less organized. Shoppers may also feel unsure whether a color is accurate or whether two products are really the same style. Consistency will not guarantee sales, but it can make your store easier to browse and your products easier to compare.
Professional Apparel Photo Editing Services That Can Save Time
- Background removal: Isolates the garment on a clean background. Needed for marketplaces with white-background rules. Outsource when volume is high.
- Clipping path: Creates precise hand-drawn cutouts. Needed for hard-edged products. Outsource when accuracy matters at scale.
- Ghost mannequin editing: Removes the mannequin for a 3D hollow look. Needed for clean apparel listings. Outsource because it is skill-heavy and slow to learn.
- Apparel retouching: Cleans lint, dust, and flaws. Outsource for large collections.
- Color correction: Matches garment color to the real product. Can help reduce color-related confusion. Outsource when color accuracy is critical.
- Fabric enhancement and wrinkle removal: Makes fabric look neat and natural. Outsource when shoots produce many creased items.
- Shadow creation: Adds natural or drop shadows for depth. Outsource for catalog-wide consistency.
- Image masking: Handles fur, lace, and fine edges. Outsource because AI and beginners often struggle here.
- Bulk image editing: Processes large batches to one standard. Outsource during seasonal peaks.
- Ecommerce image optimization: Crops, resizes, and formats for each platform. Outsource when selling across several channels.
Internal link suggestions: “apparel photo editing services,” “ghost mannequin photo editing,” “clipping path service,” “background removal service,” “color correction service,” “ecommerce photo editing services.”
How to Choose Between DIY, Freelancer, and Photo Editing Agency
DIY suits low volume, simple editing, and teams with strong internal skills.
Freelancer suits smaller projects, occasional outsourcing, and flexible workloads.
Professional photo editing agency suits bulk work, ongoing projects, large catalogs, consistent quality needs, structured workflows, and recurring ecommerce image production.
Pricing and quality vary within each group, so always test with a sample before committing.
How Clipping Area Helps Apparel Brands With Photo Editing
Clipping Area is a post-production photo retouching agency that supports fashion brands, apparel retailers, and ecommerce stores with image editing. Services relevant to apparel include apparel and clothing photo editing, ghost mannequin photo editing, background removal, clipping path, image retouching, color correction, shadow creation, ecommerce product photo editing, and bulk image editing.
The problem it helps solve is straightforward. Instead of having your marketing or ecommerce team spend hours on repetitive editing, you can outsource suitable tasks and keep your team focused on the work that grows the business.
If you are unsure whether outsourcing makes financial sense for your volume, send Clipping Area a small batch of apparel images and request a sample or quote. Then compare it against your own worksheet numbers.
Questions to Ask Before Outsourcing Apparel Photo Editing
- What exactly is included in the editing price?
- Is quality control included?
- How are revisions handled, and are they charged?
- Can you handle bulk images on a regular schedule?
- Can you follow our brand guidelines?
- Which file formats do you accept and deliver?
- How do you keep editing consistent across batches?
- How do you handle color accuracy?
- Can you manage complex apparel images like lace, fur, or sheer fabric?
- Do you offer a sample edit before we commit?
- How is confidential product data handled?
- What happens during large seasonal campaigns?
10 Ways to Reduce Apparel Photo Editing Costs
- Standardize image requirements. Write down background color, crop, size, and margins once.
- Batch similar images. Group flat lays, mannequin shots, and model shots so editing stays efficient.
- Create clear editing guidelines. Share reference images so editors know exactly what “done” looks like.
- Reduce unnecessary revisions. Approve a sample first, then run the full batch.
- Use consistent photography. Fixed lighting and camera settings can cut editing time sharply.
- Separate simple and complex edits. Do easy work in-house and outsource the hard parts.
- Automate repetitive tasks where appropriate. Use actions, presets, or AI for simple first passes.
- Outsource high-volume work. Keep internal time for work only your team can do.
- Track editing time. You cannot manage a cost you do not measure.
- Review the true cost every month. Volume changes, so your best option may change too.
DIY vs Professional Apparel Photo Editing: Which One Should Your Business Choose?
Choose DIY if:
- Your volume is low
- Editing is simple
- You already have the skills
- You have enough internal time
Consider outsourcing if:
- Image volume is growing
- Editing is eating into employee time
- You need consistent output
- Your team faces workflow bottlenecks
- Image production is recurring
Consider a hybrid workflow if:
- Simple edits can stay in-house
- Complex or bulk editing is better handled externally
Many businesses land on a hybrid model. It keeps quick fixes fast while moving heavy, repetitive work off the team.
Apparel Photo Editing Cost Calculator Framework
Step 1: Monthly Images × Average Editing Time (hours) × Labor Cost = Basic Internal Editing Cost
Step 2: Add software, training, revision time, QC time, management time, and opportunity cost.
Step 3: Compare that total with real professional editing quotes, including review time on your side.
This gives you a far more realistic comparison than setting a vendor quote against a software subscription.
FAQ
Is DIY apparel photo editing cheaper than professional editing?
It can be for low volumes and simple edits. As volume and complexity grow, labor, revisions, and opportunity cost often make DIY more expensive than it looks. Calculate full internal time, not just software fees, before deciding.
How much does professional apparel photo editing cost?
It depends on complexity, volume, turnaround, and the vendor. Simple background removal usually costs less than ghost mannequin or model retouching. The best approach is to request quotes and a sample edit using your own images.
Is professional apparel photo editing worth it?
It is often worth it when editing takes significant internal time, volumes are high, or edits are complex. For small, simple, occasional work, DIY may be enough. Compare your true DIY cost against real quotes.
What is included in apparel photo editing services?
Common services include background removal, clipping path, image masking, color correction, wrinkle removal, shadow creation, ghost mannequin editing, model retouching, cropping, resizing, and quality control. Check each vendor’s exact inclusions.
Should fashion brands outsource photo editing?
Brands with large catalogs, frequent launches, or complex edits often benefit from outsourcing. Smaller brands with low volume and in-house skills may not need to. A hybrid approach works well for many.
How can businesses reduce apparel photo editing costs?
Standardize photography, write clear guidelines, batch similar images, approve samples before full batches, automate simple tasks, outsource high-volume work, and track editing time every month.
Is AI good for apparel photo editing?
AI works well for fast, simple background removal and batch tasks. It can struggle with fine fabrics, hair, shadows, and color accuracy. Most results still benefit from human quality control.
What is the difference between in-house and outsourced photo editing?
In-house editing uses your own staff and tools, giving control but consuming internal time. Outsourced editing uses an external editor or agency, reducing internal workload but adding coordination and a direct fee.
How do you calculate apparel photo editing ROI?
Compare what you spend on editing with what you gain, including time saved, less rework, faster launches, and team capacity freed for other work. ROI includes productivity gains, not only direct revenue.
Can professional photo editing save businesses time?
Yes, it can. Outsourcing moves repetitive editing work off your team, which can free hours for marketing, product uploads, and customer service. Some internal time is still needed for briefing and review.
Conclusion
DIY editing can make sense when your image volume is low and your edits are simple. As volume grows, professional editing often becomes the more practical choice, because the true cost of DIY includes labor, training, revisions, quality checks, and lost time, not just software.
When you measure ROI, look beyond the invoice. Consider productivity, rework, image quality, and how smoothly your workflow runs during busy seasons. For many brands, a hybrid approach works best: simple edits stay in-house, while complex and bulk work goes to specialists.
Clipping Area is a post-production photo retouching agency that helps apparel and ecommerce brands handle that second part. Run your numbers with the framework above, then compare them with a real result.
Get a Free Sample or Get a Free Quote from Clipping Area.