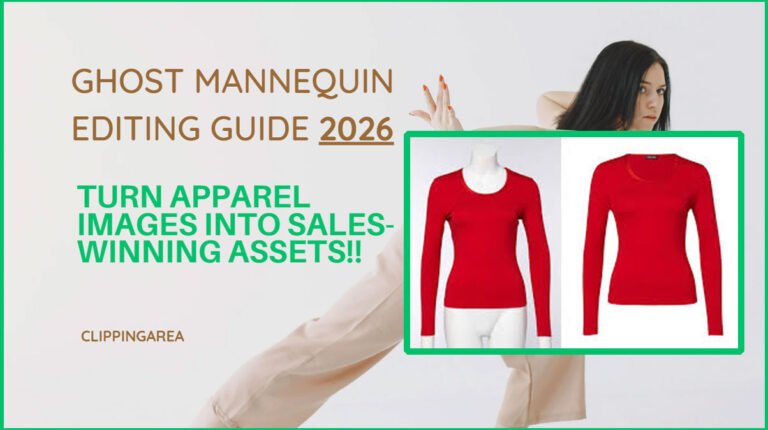
If you sell clothing online, your product photos do most of the selling work. Shoppers cannot touch the fabric or try the garment on. They rely on the image to understand shape, fit, and detail.
That is why so many apparel brands use ghost mannequin editing. It gives clothing a clean, 3D look, as if an invisible person is wearing it. There is no model, no mannequin, and no distraction. Just the garment.
This guide explains how the ghost mannequin effect works, how to photograph for it, what it costs, where it fits (and where it does not), and how to get consistent results for Amazon, Shopify, and your own store.
What Is Ghost Mannequin Editing?
Ghost mannequin editing is a photo editing technique that removes the mannequin from a clothing photo, so the garment looks like it is being worn by an invisible body.
It is also called the invisible mannequin effect, the hollow man effect, or the invisible model effect.
Here is how it works in simple terms:
- A garment is placed on a mannequin and photographed.
- An editor removes the mannequin in Photoshop.
- Hidden areas, like the inside of the neck, are rebuilt using a second photo.
- The final image shows the garment holding its natural 3D shape, with nothing inside it.
A simple example: Picture a navy crewneck sweater. On a mannequin, you see a plastic neck and shoulders. After editing, the mannequin is gone. You see the sweater’s shape, its shoulders, and the back of the neckline through the opening. It looks worn, but no one is there.
Ecommerce brands like this style because it shows the product clearly and keeps the whole catalog looking consistent.
What Does a Ghost Mannequin Image Look Like?
A finished ghost mannequin image usually has:
- Front view: The garment faces the camera, with a natural chest and shoulder shape.
- Back view: The rear of the garment, often with the inside of the front collar visible.
- Side view: Useful for showing silhouette, drape, or length.
- Inside-neck detail: The inner collar, label, and back panel visible through the neck opening.
- Hollow effect: Sleeves and body look filled out, but empty.
- Natural shape: The garment keeps the form it would have on a body.
- Clean background: Usually white or a light solid color.
The result keeps the customer’s eye on the product. There is no face, pose, or plastic torso competing for attention.
How Does Ghost Mannequin Editing Work?
The full workflow combines photography and post-production. Here are the steps.
Step 1: Photograph the Garment
Good editing starts with good photos. Before shooting:
- Lighting: Use soft, even light. Two softboxes at 45 degrees is a common setup.
- Camera position: Keep the camera at chest height and square to the garment.
- Garment preparation: Steam or iron. Remove lint, tags, and loose threads.
- Wrinkles: Fix them now. Heavy wrinkle removal in editing takes time and can look fake.
- Positioning: Pin or clip the garment so it sits evenly on the mannequin.
- Framing: Lock the camera on a tripod so every product sits in the same spot.
Step 2: Photograph the Front
The front image is the main image. It must be sharp, centered, well lit, and free of creases. Everything else is built around it.
Step 3: Photograph the Inside of the Garment
The mannequin blocks parts of the garment, especially the inner back of the neck. To fill that gap, photographers take an extra shot:
- The garment is turned inside out, or
- The mannequin’s neck piece is removed and the back collar is shot from the front.
This “neck shot” gives the editor real fabric to work with instead of guessing.
Step 4: Remove the Mannequin
The editor creates a precise selection of the garment using a clipping path (a hand-drawn vector outline) or image masking for soft edges. The mannequin and background are then removed.
Step 5: Reconstruct the Hidden Areas
This is where skill shows. The editor rebuilds:
- Neck area: The inside neck photo is placed behind the front image and blended in. This is called neck joint editing.
- Collar: Aligned so it looks round and natural.
- Chest: Shaped so it does not look flat or dented.
- Sleeves: Openings are checked for mannequin arms and cleaned.
- Inside details: Labels, seams, and linings stay visible where they should.
Step 6: Clean the Edges
Edges decide whether an image looks professional or cheap. The editor fixes:
- Fine fibers on knits and wool
- Rough fabric edges
- Jagged selection lines
- White or gray halos around the garment
- Background color bleeding into the fabric
Step 7: Correct the Color
The goal is simple: the photo must match the real product. Editors use a color reference (like a gray card shot on set) and compare against the physical sample. Accurate color reduces the chance of “it looked different online” complaints.
Step 8: Add or Adjust Shadows
A garment floating on pure white can look flat or fake. A soft drop shadow or natural shadow gives weight and depth. The key word is subtle.
Step 9: Final Quality Control
Before delivery, check shape, color, edges, background, cropping, and consistency with the rest of the batch. One off image in a collection page stands out immediately.
Ghost Mannequin Photography vs Ghost Mannequin Editing
These are two parts of one process.
Ghost mannequin photography is what happens on set: camera setup, lighting, garment preparation, and capturing multiple images (front, back, and inside neck).
Ghost mannequin editing is post-production: removing the mannequin, combining images, rebuilding hidden areas, cleaning edges, and correcting color.
Good photography makes editing faster and better. Bad photography limits what any editor can do. If the neck shot is missing, the editor has to create fabric from nothing. If lighting changes between shots, the combined image will not match.
Why Do Ecommerce Brands Use Ghost Mannequin Images?
Brands choose this style for practical reasons:
- Clean presentation: Nothing on screen but the product.
- Focus on clothing: No model or mannequin pulls attention away.
- Consistent catalog: Every product has the same angle, scale, and background.
- Professional look: It signals an organized, established store.
- Shows garment shape: Unlike flat lay, the garment looks three-dimensional.
- Shows fit structure: Shoppers see how collars, shoulders, and hems fall.
- Scalable: One mannequin and one setup can produce hundreds of images.
- Supports large catalogs: Easier to keep consistent than repeated model shoots.
These benefits can support a better shopping experience. They do not guarantee more sales on their own. Pricing, product quality, descriptions, and reviews all play a part.
Ghost Mannequin Editing vs Model Photography
| Factor | Ghost Mannequin | Model Photography |
|---|---|---|
| Product focus | Very high. Only the garment is shown | Shared with the model |
| Human presentation | None | Shows how clothing looks on a real body |
| Styling needs | Minimal | Hair, makeup, styling, casting |
| Editing needs | High (removal, neck joint, cleanup) | Moderate (skin, color, background) |
| Production cost | Usually lower per product | Usually higher (model fees, studio time) |
| Catalog consistency | Easy to keep consistent | Harder across shoots and models |
| Brand storytelling | Limited | Strong. Shows lifestyle and mood |
| Clothing shape | Clear, neutral shape | Shape depends on pose and body |
| Best use cases | Catalogs, marketplaces, basics | Campaigns, fashion-forward brands, fit guides |
Neither is better for everyone. Many brands use both: ghost mannequin for the main product image and model shots for secondary images or campaigns.
Ghost Mannequin vs Flat Lay Photography
- Product shape: Ghost mannequin shows 3D form. Flat lay shows the garment lying flat, so volume is lost.
- Presentation: Ghost mannequin looks worn. Flat lay looks styled and casual.
- Editing: Ghost mannequin needs more editing. Flat lay needs background cleanup and wrinkle work.
- Cost: Flat lay is usually cheaper to shoot and edit.
- Space: Flat lay needs overhead camera space. Ghost mannequin needs a mannequin and room for lights.
- Consistency: Both can be consistent with a fixed setup.
- Ecommerce use: Ghost mannequin suits structured items. Flat lay suits kidswear, accessories, and social content.
- Catalog use: Ghost mannequin often looks more formal in a full fashion catalog.
Ghost Mannequin vs Hanger Photography
Hanger photography shows a garment hanging from a hanger. It is fast and cheap, but the garment usually looks limp, with sagging shoulders and no body shape. The hanger is also visible.
Ghost mannequin images look more structured and professional. They need more editing, but they show the product the way it is worn. Hanger shots can work for quick social posts, resale listings, or internal line sheets.
What Types of Products Use Ghost Mannequin Editing?
The technique works best where shape and construction matter:
- T-shirts and polo shirts
- Shirts and blouses
- Dresses
- Jackets and coats
- Hoodies and sweaters
- Blazers and suits
- Jeans and trousers (on lower-body mannequins)
- Skirts
- Sportswear and activewear
- Children’s clothing (on child-size forms)
- Underwear and swimwear, where appropriate for the brand
- Some accessories, like hats or scarves shown with form
Benefits of Ghost Mannequin Editing for Ecommerce
- Clean product presentation with no clutter.
- Strong garment focus that highlights design and details.
- Consistent catalog images across seasons and categories.
- Professional appearance that fits most store designs.
- Easy comparison between colors and styles on collection pages.
- Scalable production for hundreds or thousands of SKUs.
- Less visual distraction than model or hanger photos.
- Better view of structure, like collars, darts, and seams.
- Works for large catalogs where model shoots are hard to schedule.
- Flexible post-production, since images can be adjusted for different platforms later.
- Reusable setup, as the same mannequin and lights serve many products.
- Neutral presentation that does not tie the product to one body type.
Limitations of Ghost Mannequin Editing
It is not the right choice for every brand or product. Be aware of these limits:
- Needs good source photos. Editing cannot fully fix bad lighting or missing angles.
- Needs skilled editors. Neck joints and edges are easy to get wrong.
- Complex garments take longer. Layered or detailed items cost more time.
- Difficult fabrics need extra work. Sheer, furry, or shiny materials are harder.
- No lifestyle context. Shoppers do not see the garment in real life.
- Some products look better on a model. Flowing dresses and fitted pieces often need a body.
- Multiple images per product. More shots mean more shooting and editing time.
- Quality takes time. Rushed edits look rushed.
How Much Does Ghost Mannequin Editing Cost?
There is no single market price. Cost depends on several factors:
- Number of images in the order
- Number of views per product (front, back, side)
- Garment complexity (simple tee vs lined blazer)
- Neck reconstruction needed or not
- Background removal and background color
- Retouching (wrinkles, lint, stains)
- Color correction and color matching
- Shadow work
- Bulk quantity
- Turnaround time (rush jobs often cost more)
- Revision requirements
Common pricing models:
- Per image: You pay for each edited file.
- Per view: Each angle is priced separately.
- Per product: One price covers all views of a product.
- Bulk pricing: Lower rates for larger volumes.
- Monthly packages: A set number of images each month.
- Custom quotes: Based on your samples and needs.
Example (hypothetical): A basic t-shirt front view with neck joint will usually cost less than a lace dress needing front, back, and detailed edge masking. Always send samples for an accurate quote.
What Makes Ghost Mannequin Editing Difficult?
- Fine fabric edges: Knits and wool have fibers that are hard to select.
- Lace: The background shows through every hole.
- Transparent fabric: Chiffon and mesh need careful masking to stay see-through.
- Fur and faux fur: Soft edges need detailed masking, not hard cutouts.
- Dark clothing: Details get lost in shadow. Black can turn gray or muddy.
- White clothing: Easy to lose against a white background.
- Complex collars: Hoods, lapels, and turtlenecks are hard to rebuild.
- Layered clothing: Linings and multiple layers need separate attention.
- Wrinkles: Too many creases mean heavy retouching.
- Reflective materials: Satin, leather, and sequins pick up hot spots.
- Patterns: Stripes and checks must line up after reconstruction.
- Fine stitching: Can be blurred by over-smoothing.
- Hidden areas: Anything the camera did not capture must be rebuilt.
These are the areas where an experienced editor makes the biggest difference.
Common Ghost Mannequin Editing Mistakes
- Visible mannequin parts: Plastic showing at sleeves or hem looks careless.
- Poor neck reconstruction: A misaligned inner collar makes the garment look broken.
- Jagged edges: Rough outlines look cheap, especially when zoomed.
- White halos: Leftover background around edges shows on colored pages.
- Gray background: An off-white background makes the catalog look uneven.
- Wrong clothing shape: Warped edits make the garment look unlike the real item.
- Incorrect proportions: Stretched sleeves or shortened bodies mislead buyers.
- Over-smoothing: Fabric looks plastic and loses texture.
- Over-sharpening: Creates crunchy edges and noise.
- Incorrect color: Leads to customer disappointment and possible returns.
- Missing fabric details: Removed seams or texture hide real product features.
- Unrealistic shadows: Heavy or misplaced shadows look fake.
- Excessive cropping: Cutting off hems or sleeves hides the full product.
- Poor consistency: Different sizes and positions make collection pages messy.
- Removing real features: Editing out labels, pleats, or intentional distressing.
- Mismatched inner fabric: Inside neck color or lighting does not match the outside.
- Hollow-looking edges: Openings that show nothing instead of garment interior.
How to Create a Professional Ghost Mannequin Image
Before Photography
- Clean and steam the garment.
- Remove wrinkles, lint, and loose threads.
- Set up soft, even lighting.
- Fix camera settings (manual exposure, fixed white balance).
- Use a mannequin with removable parts that fits the size.
- Plan the angles for each product type.
During Photography
- Keep framing identical for every product.
- Shoot the front view.
- Shoot the back view where needed.
- Capture hidden areas, especially the inside neck.
- Include a color reference card at the start of each set.
During Editing
- Create an accurate selection (clipping path or mask).
- Remove the mannequin.
- Reconstruct the neck and hidden areas.
- Clean all edges.
- Remove or replace the background.
- Correct color against the real sample.
- Add subtle shadows.
- Retouch lightly. Keep texture.
Final Quality Control
Check shape, color, edges, background, details, cropping, consistency, and file quality (size, format, color profile).
Ghost Mannequin Editing for Amazon
Ghost mannequin editing for Amazon is common in apparel listings. It can help with:
- Product presentation: Clear, garment-only images.
- Main image considerations: Amazon has specific main-image rules for many categories, including background and how clothing may be shown.
- Secondary images: Back views, details, and alternate angles.
- Background: Clean backgrounds, where the category requires them.
- Product accuracy: The image must match what the buyer receives.
- Image quality: High resolution helps zoom.
- Clothing visibility: The full product should be visible.
- Mannequin removal: Visible mannequins may not be allowed in some main images.
Professional editing does not guarantee Amazon approval. Amazon’s requirements change and vary by category and image type. Always check Amazon’s current image guidelines in Seller Central for your category before uploading.
Ghost Mannequin Editing for Shopify and Ecommerce Stores
On Shopify, WooCommerce, and other store platforms, you control the design, so you usually have more flexibility than on marketplaces. Ghost mannequin images work well for:
- Product pages: Clear main images plus back and detail views.
- Collection pages: Consistent sizing makes grids look tidy.
- Product catalogs: One style across all categories.
- Consistent image style: Same crop, background, and shadow.
- Product variants: Each color shot the same way for easy switching.
- Mobile shopping: Clean images read well on small screens.
- Bulk uploads: Standard file names and sizes speed up publishing.
Even with more freedom, images must still show the real product accurately.
Ghost Mannequin Editing for Fashion Brands
Fashion brands use ghost mannequin images for:
- Seasonal collections
- Product catalogs and lookbooks
- Wholesale line sheets for retailers
- Online stores
- Product launches
- Social commerce (Instagram and Facebook shops)
- Marketplace listings
When every season is shot and edited to the same standard, the full catalog looks unified, even when products come from different factories or shoots.
DIY Ghost Mannequin Editing vs Professional Editing
| Factor | DIY | Professional Service |
|---|---|---|
| Cost | Software and your time | Per-image or package fees |
| Learning time | Weeks to months to get good | None for you |
| Editing speed | Slow at first | Faster with trained teams |
| Quality consistency | Depends on your skill | Usually standardized |
| Bulk capacity | Limited by your hours | Can handle large batches |
| Technical skill | You must learn masking and neck joints | Handled by editors |
| Quality control | Self-checked | Usually a separate QC step |
| Revisions | Your time | Depends on the service policy |
DIY can make sense for small stores with few products, simple garments, and time to learn Photoshop.
Professional editing can make sense for growing catalogs, complex garments, tight launch dates, or when your time is better spent running the business.
How to Choose a Ghost Mannequin Editing Service
Use this checklist:
- Portfolio quality: Look closely at neck joints and edges.
- Apparel experience: Ask about difficult fabrics like lace and fur.
- Sample editing: Test with your own images.
- Pricing transparency: Clear prices with no hidden extras.
- Bulk capacity: Can they handle your peak season?
- Communication: Fast, clear replies.
- Revision policy: How are corrections handled?
- Turnaround: Realistic timelines for your volume.
- Quality control: Is there a separate check before delivery?
- File delivery: Formats, sizes, and naming you need.
- Data and file handling: How your unreleased products are protected.
- Consistency: Same result across large batches.
Always request a sample edit before sending a large batch. It is the fastest way to judge quality.
Professional Ghost Mannequin Editing by Clipping Area
Clipping Area is a Post-Production Photo Retouching Agency.
We help ecommerce stores and apparel businesses turn raw clothing photos into clean, consistent product images. Common problems we fix include visible mannequin parts, uneven necklines, rough edges, off colors, and catalogs that do not match.
Our post-production services include:
- Ghost mannequin photo editing
- Apparel and clothing photo editing
- Product photo retouching
- Background removal
- Clipping path
- Image masking
- Color correction
- Ecommerce photo editing
- Bulk image editing
- Amazon product image editing
Send a few of your own photos, tell us your style and platform, and review the result before placing a larger order.
Get a Free Sample | Get a Free Quote
How to Prepare Clothing Photos for Ghost Mannequin Editing
- Clean garments: No lint, stains, or pet hair.
- Remove wrinkles: Steam before shooting.
- Consistent lighting: Same light setup for the whole batch.
- Avoid harsh shadows: Use diffused light sources.
- Center the garment: Same position in every frame.
- Capture multiple angles: Front, back, and side as needed.
- Photograph hidden areas: Inside neck, inner collar, and linings.
- Fix camera settings: Manual exposure and white balance.
- Keep colors accurate: Use a gray card or color checker.
- Shoot high resolution: Gives the editor room to work and supports zoom.
Ghost Mannequin Editing Checklist
☐ Garment is clean
☐ Wrinkles are controlled
☐ Lighting is consistent
☐ Product is centered
☐ Front image captured
☐ Hidden areas captured
☐ Mannequin removed cleanly
☐ Neck reconstructed naturally
☐ Edges are clean
☐ No halos
☐ Product color is accurate
☐ Fabric texture preserved
☐ Shadows are natural
☐ Background is clean
☐ Product is not distorted
☐ Important details are visible
☐ Image is properly cropped
☐ Resolution is sufficient
☐ File is exported correctly
☐ Final quality check completed
Frequently Asked Questions
What is ghost mannequin editing?
It is a technique that removes the mannequin from clothing photos so the garment looks worn by an invisible body. Editors combine photos and rebuild hidden areas to create a clean 3D effect.
What is an invisible mannequin?
An invisible mannequin is another name for the ghost mannequin effect. The mannequin is used during the shoot and then removed in editing.
How does ghost mannequin editing work?
The garment is photographed on a mannequin, plus an inside-neck shot. The editor removes the mannequin, merges the neck image, cleans edges, corrects color, and adds shadows.
Why do clothing brands use ghost mannequin images?
They show the product clearly and consistently. Shoppers see shape and details without distractions, and brands can scale production for large catalogs.
What is the difference between ghost mannequin and model photography?
Ghost mannequin shows only the garment. Model photography shows clothing on a real person, which adds lifestyle context but costs more and is harder to keep consistent.
What is the difference between ghost mannequin and flat lay photography?
Ghost mannequin shows 3D shape. Flat lay shows the garment lying flat from above. Flat lay is simpler and cheaper, but it loses volume.
How much does ghost mannequin editing cost?
It depends on garment complexity, number of views, neck reconstruction, retouching, volume, and turnaround. Most services give custom quotes based on samples.
Is ghost mannequin editing good for ecommerce?
Yes, for many apparel stores. It gives clean, consistent product images. Some brands also add model shots for lifestyle context.
Can I use ghost mannequin images on Amazon?
Often, yes, but rules vary by category and image type. Check Amazon’s current guidelines before uploading. Editing alone does not guarantee approval.
Can Shopify stores use ghost mannequin images?
Yes. Shopify stores have flexible image options, and ghost mannequin images work well on product and collection pages.
What clothing products work best with ghost mannequin editing?
Structured items work best: shirts, t-shirts, jackets, hoodies, sweaters, blazers, dresses, and trousers.
How long does ghost mannequin editing take?
It varies. A simple tee is quick. Lace, fur, or layered garments take much longer. Service turnaround also depends on volume.
Can I create ghost mannequin images in Photoshop?
Yes. Photoshop is the standard tool. You need skills in the Pen Tool, layer masks, blending, and color correction.
What is neck joint editing?
Neck joint editing is merging a separate inside-neck photo with the front image. It fills the space where the mannequin’s neck was, so the collar looks natural.
Why does my ghost mannequin image look unnatural?
Common causes are poor neck alignment, flat shape, halos, wrong shadows, or mismatched lighting between the front and neck shots.
How do I remove a mannequin from a clothing photo?
Select the garment with a clipping path or mask, delete the mannequin and background, then rebuild hidden areas using an inside shot of the garment.
Should I outsource ghost mannequin editing?
It can make sense if you have many products, complex garments, or limited time. Small catalogs with simple items may be fine to edit in-house.
How do I choose a ghost mannequin editing service?
Review their portfolio, ask for a free sample with your own images, and check pricing, revision policy, turnaround, and quality control.
Does ghost mannequin editing improve product presentation?
It usually makes images cleaner and more consistent. Actual results also depend on photo quality and how well the edit is done.
What should I provide to a ghost mannequin editing company?
Send high-resolution front, back, and inside-neck photos, plus your background color, image size, file format, shadow style, and any platform requirements.
Conclusion
Ghost mannequin editing removes the mannequin from clothing photos and rebuilds hidden areas, so the garment looks worn by an invisible body. The process starts with careful photography, including an inside-neck shot, and continues with mannequin removal, neck joint editing, edge cleanup, color correction, and shadow work.
Ecommerce brands use it because it produces clean, consistent, product-focused images that scale well across large catalogs. Its benefits include clear garment shape, easy comparison, and a professional look. Its limits are real too: it needs good source photos, skilled editing, and extra time for difficult fabrics, and it cannot replace the lifestyle context of model photography.
It is not the best method for every product. Many brands mix ghost mannequin, model, and flat lay images depending on the item and platform. If you have a growing catalog, complex garments, or tight deadlines, professional ghost mannequin editing can save time and keep your images consistent.



