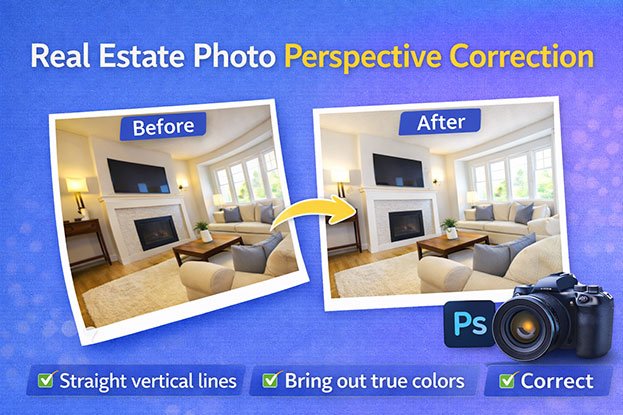
A buyer opens a listing and sees a living room where the walls lean inward, the doorframe tilts, and the ceiling seems to slope toward one corner. Nothing is wrong with the house. The problem is the photo. Real estate photo perspective correction fixes this by bringing vertical and horizontal lines back to where they belong, so rooms look the way they actually feel in person.
Straight lines matter because buildings are built on them. When walls lean or windows bend, the image feels off, even if viewers cannot say why. Correcting those lines can reduce visual distraction and help people understand the space more clearly. Here is how distortion happens and how professional editing fixes it.
What Is Perspective Correction in Real Estate Photography?
In photography, perspective is how three-dimensional space gets flattened onto a two-dimensional image. It depends on where the camera sits, which direction it points, and how far it is from the subject.
Our eyes and brain handle perspective well. When you stand in a room, you know the walls are vertical, so your brain treats them that way. A camera does not make that adjustment. It records exactly what the lens and sensor see from that one position.
Perspective correction is the editing process that adjusts the geometry of an image so architectural lines appear straight and properly aligned. In most real estate work, that means:
- Making vertical lines (walls, door frames, window edges, cabinet sides) truly vertical
- Leveling horizontal lines (countertops, ceilings, floors, rooflines) where needed
- Keeping room proportions believable after the adjustment
A simple example
A photographer stands on the sidewalk and tilts the camera up to fit a two-story house in the frame. In the photo, the corners of the house lean toward each other near the top, like the building is falling backward. This is called converging lines.
Perspective correction stretches and reshapes the image so those corners stand upright again. The house looks the way it does from the street, solid and square.
Perspective distortion vs. lens distortion
These two terms get mixed up a lot, but they are different problems.
Perspective distortion comes from camera position and angle. If the camera tilts up, down, or sideways, parallel lines in the scene start to converge in the image. The lens is not at fault. Any lens will do this if the camera is not level.
Lens distortion comes from the optics of the lens itself. The most common type in real estate work is barrel distortion, where straight lines near the edges of the frame bow outward. Some wide-angle lenses also show a wavy pattern often called mustache distortion. This happens even when the camera is perfectly level.
A good edit usually handles both. Lens distortion is corrected first using a lens profile, then perspective is adjusted.
Why wide-angle lenses make it more noticeable
Real estate photographers rely on wide-angle lenses (often in the 14mm to 24mm range on a full-frame camera) because they need to show as much of a room as possible. Wide lenses exaggerate the effect of any camera tilt. A tiny upward angle that barely registers with a 50mm lens can make walls lean dramatically at 16mm.
Wide lenses also stretch objects near the edges of the frame. A chair in the corner can look oddly large or pulled sideways. Some of that can be reduced in editing, though not all of it.
How editing software corrects architectural lines
Editing tools like Adobe Lightroom, Camera Raw, and Photoshop use a mix of automatic and manual methods:
- Lens profile correction removes barrel distortion and vignetting based on the specific lens used.
- Upright or transform tools analyze the image and try to straighten lines automatically.
- Guided correction lets the editor draw lines along walls or edges that should be vertical or horizontal, and the software adjusts the image to match.
- Manual transform and warp tools handle what automation misses.
Automatic tools are a starting point. They often get confused by furniture, sloped ceilings, or reflections, so a trained editor checks and refines every result.
Why Real Estate Photos Develop Crooked Lines
Crooked lines rarely come from one mistake. Usually, several small factors stack up during a shoot.
Camera tilt
This is the biggest cause. When the camera points slightly up to include a ceiling feature, or slightly down to show more floor, vertical lines start to converge. Tilt up and walls lean inward at the top. Tilt down and they spread outward at the top, making the room look like it is sinking.
Camera height
Photographers often shoot interiors from around chest height, roughly four to five feet, so the camera can stay level while still showing a balanced amount of floor and ceiling. When the camera is set too high or too low, the photographer tends to angle it to compensate, and that is when lines start to tilt.
Uneven tripod setup
A tripod on thick carpet, a sloped driveway, or an uneven patio can throw the camera slightly off level. The photographer may not notice through the viewfinder, but it shows up clearly in the final image as a sideways tilt.
Shooting tall exteriors from the ground
Multi-story homes, apartment buildings, and commercial properties are hard to capture from street level. Unless the photographer has a pole camera, a drone, or room to back up far enough, some upward tilt is almost unavoidable.
Tight spaces
Small bathrooms, laundry rooms, and hallways force photographers into corners. With little room to move, they tilt and angle the camera to fit everything in, and the distortion becomes more severe.
Handheld and fast-paced shoots
Agents shooting listings on a phone, or photographers moving quickly through a large property, often shoot handheld. Every photo ends up with a slightly different tilt, which makes the full gallery feel inconsistent.
Lens characteristics
Even with perfect technique, many wide-angle lenses introduce barrel distortion. Phone cameras apply their own processing, which can bend lines near the frame edges.
The point here is not that photographers are doing something wrong. Real estate shoots happen in real conditions with limited time. Some correction in post-production is normal and expected.
How Distortion Affects Property Presentation
A crooked photo is not a disaster, but it does change how a property comes across.
It pulls attention away from the space
When walls lean, viewers notice the lean before they notice the kitchen island or the hardwood floors. The distortion becomes the first thing people see, and the features you want to highlight become secondary.
It can make rooms feel smaller or stranger
Converging verticals can make a ceiling look lower than it is. Barrel distortion can make a room feel curved. Stretched corners can make furniture look out of proportion. None of this reflects the actual home, and it can make the space harder to read.
It weakens trust in the listing
People browsing listings compare dozens of properties quickly. Clean, straight photos tend to look more professional. Tilted photos can make a listing feel rushed, and some viewers may wonder what else was done carelessly.
It creates inconsistency across the gallery
A listing usually has 20 to 40 photos. If some are straight and others lean in different directions, the gallery feels uneven. Consistent vertical alignment helps the whole set look like it belongs together.
It can cause problems with printed materials
Brochures, postcards, and window displays make distortion even more obvious because the image is larger and viewed longer.
To be clear, perspective correction will not sell a home on its own. But it removes a distraction, and that helps the actual property get the attention it deserves.
Common Types of Distortion in Real Estate Photos
Knowing what to look for makes it easier to spot problems before a listing goes live.
Converging verticals
Vertical lines that lean toward each other at the top or bottom of the frame. Most common in exterior shots and interiors where the camera tilted up or down.
Tilted horizon or sideways lean
The whole image rotates slightly to one side. Floors and countertops slope. Usually caused by an uneven tripod or handheld shooting.
Keystone distortion
A form of converging lines where a rectangular shape, such as a building facade or a wall with windows, turns into a trapezoid. The name comes from the wedge-shaped stone at the top of an arch.
Barrel distortion
Straight lines bow outward, especially near the edges. Door frames and window edges look curved.
Edge stretching
Objects near the corners of wide-angle photos appear pulled or enlarged. A dining chair in the corner may look twice its real width.
Uneven two-point perspective
In corner shots, the two walls should recede evenly toward their vanishing points. When the camera is also tilted, the room can look skewed, as if one side is leaning away.
How Professional Real Estate Photo Editing Fixes Distortion
Here is how an experienced editor typically approaches a distorted real estate image. The exact steps vary by image, but the logic stays the same.
Step 1: Apply lens correction
The editor starts by enabling the lens profile for the camera and lens used. This removes barrel distortion and edge darkening. If the lens profile is missing, the editor adjusts distortion manually until straight edges near the frame borders look straight.
Step 2: Identify the reference lines
Before changing anything, the editor picks the lines that should be perfectly vertical. In interiors, that is usually the corners of walls, door frames, and window edges near the center of the image. In exteriors, it is the corners of the building.
Step 3: Correct verticals
Using guided or manual transform tools, the editor pulls the leaning verticals upright. This is the core of real estate perspective correction. For most interior shots, verticals should be fully straight.
Step 4: Level horizontals where appropriate
In straight-on shots, where the camera faces a wall directly, horizontal lines should also be level. In corner shots, horizontals naturally angle toward vanishing points, so the editor only makes sure the image is not rotated sideways.
Step 5: Check proportions
Correcting perspective stretches parts of the image. A strong correction can make a room look too tall or furniture look squeezed. The editor adjusts the aspect or scale settings so everything stays believable.
Step 6: Crop and fill the edges
Transforming an image creates empty or warped areas along the edges. The editor crops to a clean frame. When the crop would remove important details, content-aware fill or careful cloning can rebuild small edge areas.
Step 7: Review for consistency
Finally, the editor compares the image to the rest of the gallery. All photos should share the same straight, level look. This matters especially for high-volume listings where dozens of images are processed together.
Interior vs. Exterior Perspective Correction
The same principles apply inside and out, but the challenges differ.
Interior photography
Interiors usually need full vertical correction. Rooms feel most natural when walls stand perfectly upright. Common challenges include:
- Sloped or vaulted ceilings that confuse automatic tools
- Mirrors and glass that reflect lines at odd angles
- Cabinets and built-ins that are themselves slightly out of square
- Tight bathrooms shot from extreme angles
Editors often rely on door frames and wall corners as their most reliable guides because furniture and decor lines can be misleading.
Exterior photography
Exteriors are trickier. Fully correcting a tall building shot from low on the ground can make the top look unnaturally wide, as if the building is getting bigger as it goes up. Many architectural editors leave a very slight convergence in tall exteriors because it looks more natural to the eye. Single-story and two-story homes usually handle full correction well.
Exterior shots may also have sloping ground, fences, or neighboring structures that do not line up with the house. The editor keeps the home itself straight and lets surrounding elements fall where they may.
Common Perspective Correction Mistakes
Correction done poorly can look worse than no correction at all. Here are the most common issues.
Over-correction
Pushing verticals past straight makes walls lean outward. This often happens when an editor corrects based on a piece of furniture or a slightly crooked door frame instead of a true wall edge.
Stretched, unnatural rooms
Heavy vertical correction on a strongly tilted image can make ceilings look too high and objects look tall and skinny. Adjusting the aspect ratio helps, but some images are simply too distorted to fix cleanly.
Too much cropping
Correction eats into the frame. If the photographer shot tight, the corrected image may lose part of a key feature, like a fireplace or window.
Relying only on auto tools
Automatic upright functions are fast but not reliable. They sometimes straighten the wrong lines, especially with angled ceilings, staircases, or patterned walls.
Inconsistent results across a gallery
When images are corrected one by one without a shared standard, some end up slightly different from others. A professional workflow keeps every photo in a listing aligned to the same standard.
Correcting everything the same way
Not every line should be straight in the frame. A staircase rail should follow its slope. A sloped attic ceiling should stay sloped. Good editing respects the actual architecture.
How to Reduce Distortion Before Editing
Editing can fix a lot, but better captures lead to cleaner results. A few habits help:
- Level the camera. Use the camera’s built-in level or a hot-shoe bubble level. Keeping the camera level is the single best way to avoid converging verticals.
- Set the right height. For most interiors, around chest height keeps the camera level while showing a balanced view of floor and ceiling.
- Shoot slightly wider. Leave some extra space around the edges so there is room to crop after correction.
- Avoid extreme focal lengths. Going ultra-wide can make small rooms look larger, but it also exaggerates edge stretching. Many photographers find a middle ground works better.
- Back up for exteriors. Shooting from farther away with a slightly longer focal length reduces the need to tilt up.
- Consider a tilt-shift lens. These lenses let the photographer shift the view upward without tilting the camera. They are expensive, but many architectural photographers rely on them.
- Shoot on a stable tripod. Consistent framing makes correction faster and more predictable.
Even with good technique, most real estate images still benefit from a final correction pass during editing.
DIY Correction vs. Professional Real Estate Photo Editing
Many agents and photographers correct their own images. For a handful of photos, that works fine. Lightroom’s upright tools can handle simple cases in seconds.
Things get harder when:
- A listing has 30 or more images, and each one needs individual attention
- Rooms have unusual shapes, sloped ceilings, or reflective surfaces
- Photos also need HDR blending, window pulls, color correction, or sky replacement
- Deadlines are tight and listings need to go live the next morning
- Photographers are shooting several properties a day and cannot spend evenings editing
Professional real estate photo retouching services handle correction as part of a complete workflow. That means lens correction, perspective correction, color balance, window detail, and cleanup are all handled together, so every image in the gallery matches.
For photographers, outsourcing editing frees up time for shooting and client work. For agents and brokers, it means consistent, polished listing photos without learning advanced editing software.
How Clipping Area Handles Real Estate Photo Perspective Correction
Clipping Area is a post-production photo retouching agency that has been editing images for photographers, agencies, and property businesses since 2014. Real estate photo editing is one of its core services, and vertical and perspective correction is handled on every property image where it is needed.
The editing team works through each photo manually rather than relying only on automatic tools. That includes lens correction, vertical alignment, horizontal leveling, proportion checks, and edge cleanup. Galleries are reviewed as a set so every image in a listing follows the same standard.
Perspective correction can be ordered on its own or combined with other real estate edits such as HDR blending, window masking, white balance and color adjustment, sky replacement, and object removal. Vertical correction starts at $0.15 per image, and full real estate editing packages are also available for photographers and agencies working at higher volumes.
If you want to see how your own images would look after correction, Clipping Area offers two free trial edits so you can judge the quality before committing to a larger order.
Frequently Asked Questions
Why do real estate photos look distorted?
Most distortion comes from camera tilt combined with wide-angle lenses. When the camera points slightly up or down, vertical lines lean. Wide lenses exaggerate that lean and can also bend lines near the edges of the frame.
How do you fix crooked lines in real estate photos?
Start with lens profile correction to remove barrel distortion. Then use a transform or guided upright tool to straighten vertical lines, check proportions, and crop the edges cleanly. Professional editors refine each step manually for accuracy.
Should all vertical lines be perfectly straight?
For interiors and most one or two-story exteriors, yes. For very tall buildings shot from the ground, a slight amount of convergence can look more natural than full correction.
Can perspective correction make a room look better?
It can make a room look more accurate and easier to understand. Straight walls and level lines reduce visual distraction, which helps viewers focus on the features of the property.
Does perspective correction change what the room really looks like?
Proper correction brings the photo closer to how the room looks in person. It adjusts geometry, not size or features. Over-correction, however, can distort proportions, which is why careful editing matters.
Can phone photos be perspective corrected?
Yes. Phone photos can be straightened and corrected like any other image. Results depend on resolution and how much tilt was in the original shot.
How long does professional perspective correction take?
For a single image, correction by an experienced editor usually takes a few minutes. Full listing galleries with other edits are commonly delivered within a day, depending on volume and the service provider.
Final Thoughts
Straight lines are easy to take for granted until they go missing. A leaning wall or a tilted doorway might seem minor, but in a listing gallery, those details add up and shape how the property comes across.
Real estate photo perspective correction fixes what the camera gets wrong. It straightens walls, levels horizons, removes lens bending, and keeps room proportions believable. Done well, nobody notices it. They just see a clean, accurate view of the space.
Good technique on location reduces how much correction is needed. Careful editing handles the rest. Whether you correct images yourself or work with a professional real estate photo editing team, the goal stays the same: show the property as it really is, without the distractions that a crooked frame creates.



