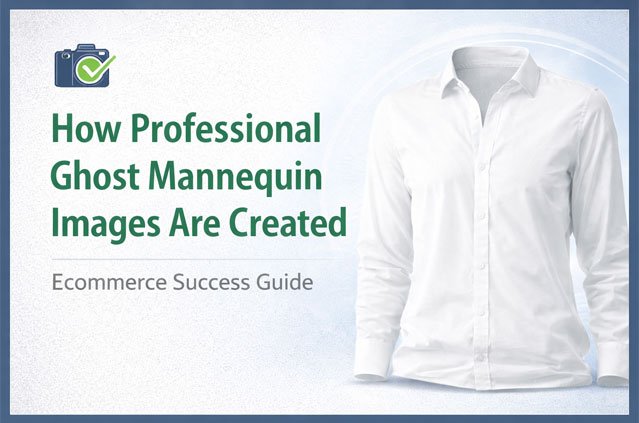
Scroll through any well-run clothing store online and you will notice something. The shirts, jackets, and dresses look like they are worn by an invisible person. The garment has shape. The collar opens naturally. You can even see the inside back of the neckline. But there is no model and no mannequin.
That is a ghost mannequin image. It is also one of the most requested edits in ecommerce photo production.
In this guide, I will walk you through exactly how professional ghost mannequin images are created. We will cover garment preparation, photography, the editing process, quality checks, and final delivery. Whether you run a Shopify store, sell on Amazon, shoot products for clients, or manage a wholesale catalog, you will understand what goes into a clean result and how to avoid the mistakes that make images look cheap.
What Is a Ghost Mannequin Image?
A ghost mannequin image (also called the invisible mannequin effect or hollow man effect) shows a garment in a natural, 3D shape without any visible mannequin or model.
It is made by photographing the clothing on a mannequin, then taking one or more extra shots of the parts the mannequin hides, such as the inside of the neck or the inner back of the waistband. An editor then removes the mannequin and blends those extra shots into the main image. The final picture looks like the garment is floating in its true shape.
This is different from a flat lay (clothing laid flat on a surface) and different from on-model photography. It sits in the middle. You get the shape and fit of a worn garment, but the product stays the hero.
Why Ecommerce Brands Use Ghost Mannequin Photography
Before we get into the process, it helps to know why so many fashion sellers choose this style.
It shows fit and shape. A flat lay hides how a garment drapes. A ghost mannequin image shows the cut, the fall of the fabric, and the structure of the shoulders and collar.
It keeps attention on the product. No model’s face, hair, or pose competes with the clothing. Shoppers look at the fabric, stitching, and design.
It creates a consistent catalog. When every product is shot the same way and edited to the same standard, your category pages look clean and professional. Consistency builds trust.
It meets marketplace rules. Amazon, for example, requires a pure white background for main product images and has strict rules about what can appear in them. Ghost mannequin images on white fit those rules well.
It costs less than model shoots. You do not need to book models, stylists, or makeup artists for every new product drop. A mannequin, a good setup, and a skilled editor can cover a large catalog.
It works across channels. The same image can be used on your website, marketplaces, Google Shopping, social ads, and wholesale line sheets.
Step 1: Preparing the Garment Before the Shoot
Many people think ghost mannequin quality is decided in Photoshop. In reality, a large part of it is decided before the camera is even turned on. Good preparation saves editing time and gives a more natural result.
Steam or Iron Every Piece
Wrinkles and fold lines from packaging show up clearly in high-resolution photos. An editor can remove small creases, but deep folds across a whole garment take much longer to fix and can look fake after heavy retouching. Steam every item before it goes on the mannequin.
Remove Tags, Stickers, and Loose Threads
Hanging price tags, plastic loops, and stray threads distract from the product. Remove what you can. Tuck in inner care labels unless you want them shown.
Use Lint Rollers
Dark fabrics like black cotton and navy wool pick up dust and fibers easily. A quick pass with a lint roller prevents dozens of tiny spots that an editor would otherwise need to clean one by one.
Choose the Right Mannequin
A professional ghost mannequin setup usually uses a mannequin with removable parts. The chest plate, neck, arms, and sometimes shoulders can be taken off. This makes it much easier to capture the inside of the garment later.
The mannequin size should match the garment size. If the mannequin is too small, the clothing sags. If it is too big, the fabric stretches and seams pull. Both make the final image look wrong.
Style the Garment on the Mannequin
This is where experience matters. Use clips and pins on the back of the garment to pull loose fabric and create a tailored fit from the front. Straighten the hem. Make sure both sleeves hang evenly. Align the buttons and zippers down the center. Check that the collar sits symmetrically.
Small styling choices make a big difference. A slightly twisted hem or uneven shoulder will be visible in every thumbnail on your store.
Step 2: Photographing the Garment
Once the garment is styled, the photography begins. The goal is to capture sharp, evenly lit images that give the editor everything needed to build the final result.
Camera and Lighting Setup
Most studios use a DSLR or mirrorless camera on a tripod. The tripod is important. It keeps the camera in exactly the same position between shots, which makes alignment easier during editing.
Lighting should be soft and even. A common setup uses two softboxes placed at 45 degrees on either side of the garment, with a light on the background to keep it bright and clean. The aim is to show fabric texture without harsh shadows or hot spots.
Shoot with a small aperture (such as f/8 to f/11) so the whole garment stays in focus from front to back. Keep ISO low to avoid noise, which is the grainy look that appears in darker areas.
Background Choice
A plain white or light gray background works best. It makes the mannequin removal and background cleanup faster and more accurate. Some photographers prefer gray because white fabrics stand out against it, which helps the editor separate garment edges from the backdrop.
The Shots You Need
A full ghost mannequin set usually includes several images per product. Here is what photographers typically capture:
Front shot on the mannequin. This is the main image. The garment is fully styled, facing the camera.
Back shot on the mannequin. Turn the mannequin around (or the garment) and capture the back view with the same lighting and camera position.
Inside neck shot (neck joint shot). Remove the garment from the mannequin, or remove the mannequin’s neck and chest piece, and photograph the inside back of the neckline. This is the part the mannequin normally hides. It includes the inner label and collar lining.
Inside back or inner detail shots. For items like pants, skirts, or open jackets, you may also need inner waistband shots or inner lining shots.
Side and detail shots (optional). Many brands also shoot side angles and close-ups of buttons, stitching, pockets, and fabric texture.
Consistency Matters More Than Perfection
If you shoot a large catalog, lock in your settings. Keep the same camera height, distance, lighting, and white balance for every product in a category. This consistency makes the editing faster and the final catalog look unified.
Shoot in RAW
RAW files keep more detail in highlights and shadows. They also make it easier to correct white balance and exposure during editing without losing quality. If file size is a concern, many studios send both RAW and high-quality JPEG files to the editing team.
Step 3: The Ghost Mannequin Editing Process
This is where the invisible effect is actually created. A skilled editor combines the photos, removes the mannequin, and retouches the garment so it looks natural and ready to sell.
Here is how the professional editing workflow usually works.
1. File Review and Sorting
The editor first checks every file. Are all the required shots present? Is the neck shot included? Is the focus sharp? Are the front and back images in the same resolution?
Files are then grouped by product so the front shot and its matching inside neck shot stay together. On big orders, this step prevents costly mistakes like pairing the wrong neck image with the wrong shirt.
2. Clipping Path Around the Garment
Next, the editor creates a clipping path. A clipping path is a precise outline drawn with the Pen Tool in Photoshop, tracing the exact edge of the garment. It separates the product from everything else in the photo, including the mannequin and the background.
Why hand-drawn paths instead of automatic tools? Because automatic selection often struggles with fabric. It can cut into soft edges, miss stitching, or leave a halo of background around the garment. A hand-drawn path follows every curve, seam, and corner accurately.
For garments with soft or fuzzy edges, like knitwear, faux fur, or fleece, the editor may combine the path with masking. Masking is a technique that keeps fine, soft detail (such as fibers sticking out) that a hard outline would cut off.
3. Removing the Mannequin
With the garment isolated, the editor removes all visible parts of the mannequin. This includes the neck, shoulders, arms, and any base or stand showing below the hem.
The tricky part is the areas where the mannequin shows through openings. For example, the mannequin’s neck is visible inside the collar. The shoulder surface may be visible at the armholes of a sleeveless top. These areas are cut away, leaving empty spaces that will be filled in the next step.
4. Neck Joint (Combining the Inside Shot)
This is the heart of ghost mannequin editing. It is often called neck joint editing.
The editor takes the separate inside neck shot and places it into the empty area behind the collar. They then scale, rotate, and warp it so it fits the collar opening perfectly. The inner label and neckline lining must line up with the outer collar.
After placement, the editor blends the edges so there is no visible seam between the two images. They also adjust brightness and color so the inside matches the outside. The inside of a garment is naturally a bit darker because less light reaches it, so a good editor keeps a soft, realistic shadow there instead of making it flat.
When done well, you should not be able to tell that the image was built from two photos.
The same technique applies to other parts of a garment. Pants may need an inner waistband joint. Open jackets may need inner lining placed behind the front panels. Sleeveless dresses may need inner armhole detail.
5. Shape Correction and Symmetry
Even with careful styling, garments are rarely perfectly symmetrical on a mannequin. The editor corrects small issues such as:
- One sleeve hanging lower than the other
- An uneven hemline
- A shoulder line that dips on one side
- A slightly tilted collar
- A placket or zipper line that is not straight
The editor uses tools like Liquify and Puppet Warp in careful, small amounts. The goal is a balanced, natural shape. Overdoing it can make the garment look stiff or digitally stretched, which shoppers notice.
6. Retouching the Fabric
Now the garment gets cleaned up. Retouching usually includes:
- Removing dust, lint, and small spots that the lint roller missed
- Smoothing wrinkles and creases while keeping the natural texture of the fabric
- Fixing loose threads and small stitching flaws
- Removing pins and clips that may show at the edges
- Cleaning labels and prints so logos and graphics look crisp
A key skill here is knowing when to stop. Linen should still look like linen. Denim should still show its weave. If every garment is retouched until it looks like smooth plastic, shoppers lose the sense of quality, and returns may go up because the product looks different in person.
7. Color Correction and Color Matching
Color accuracy is one of the most important parts of the process. If a customer orders a burgundy sweater and receives a brick-red one, you likely get a return and a bad review.
The editor corrects white balance first, so whites look truly white and not yellow or blue. Then they adjust exposure, contrast, and saturation. If the brand provides a physical swatch reference or a color code, the editor matches the image to that reference.
For products that come in several colors, each color variant is checked side by side so the differences between them look true to life.
8. Shadow Creation
A garment floating with no shadow can look flat or pasted on. Many brands prefer a subtle shadow under or behind the garment to add depth and realism. Common options include:
- Natural shadow: the original shadow from the photo, kept and cleaned
- Drop shadow: a soft shadow added below the garment
- Reflection shadow: a mirrored effect, used less often for apparel
Some marketplaces and brand style guides prefer no shadow at all. The choice depends on where the image will be used.
9. Background Cleanup
The background is replaced or cleaned to meet the brand’s standard. For Amazon main images and most ecommerce stores, this means a pure white background (RGB 255, 255, 255). Other brands use a light gray or a custom color that matches their site design.
The editor checks the edges to make sure there is no leftover gray halo, jagged outline, or color fringe around the garment.
10. Cropping, Alignment, and Resizing
The final step in editing is making every image fit the brand’s layout. This includes:
- Centering the garment in the frame
- Keeping the same margin around every product
- Matching the same product height across a category (so all T-shirts look the same size on a collection page)
- Resizing to the required pixel dimensions
- Setting the correct aspect ratio (for example, square 1:1 for marketplaces or 4:5 for certain themes)
This step is easy to overlook, but it has a big effect on how professional your store looks. A category page where every product sits at a different height and position looks messy, even if each edit is good on its own.
Step 4: Quality Control
Professional editing teams do not send images straight to the client after retouching. A separate quality check catches mistakes before delivery.
A typical quality check reviews:
- Edge accuracy: Are the garment edges clean at 100% zoom? No jagged lines, no leftover background?
- Neck joint quality: Is the inner neck aligned, blended, and naturally shaded?
- Mannequin traces: Is any part of the mannequin still visible?
- Color accuracy: Does the color match the reference?
- Symmetry: Are sleeves, shoulders, and hem balanced?
- Consistency: Do all images in the batch share the same crop, margin, background, and shadow style?
- File specs: Are the size, format, color profile, and file names correct?
Images that fail any check go back for correction. This extra step is what separates a reliable editing partner from a cheap one. It is also why clients can trust the output across thousands of images, not just the first few samples.
Step 5: Final Delivery
Once the images pass quality control, they are prepared for delivery. Common output details include:
- File formats: JPEG for web use, PNG if transparency is needed, PSD or TIFF if the client wants layered or master files
- Color profile: sRGB for web and marketplaces
- File naming: Matched to the client’s SKU or original file name so images can be uploaded directly to a store
- Folder structure: Organized by product, category, or color variant
- Delivery method: Usually through a shared cloud folder, FTP, or the client’s preferred platform
Many brands also request multiple versions of the same image. For example, a large high-resolution master file for zoom features, a web-optimized version for product pages, and a smaller version for thumbnails or social media.
Common Ghost Mannequin Mistakes to Avoid
After years of editing apparel images, some problems come up again and again. Knowing them can save you time and money.
Missing the inside neck shot. Without it, the editor has to recreate the inner neckline by hand. This takes longer and rarely looks as real as a photo. Always shoot the neck.
Wrong mannequin size. A stretched or baggy garment is hard to correct in editing without making it look distorted.
Uneven lighting. Strong shadows on one side of the garment are hard to fix and often lead to color problems.
Moving the camera between shots. If the front and inside shots are taken from different angles, blending them becomes difficult.
Over-retouching. Plastic-looking fabric reduces trust. Keep the texture.
Inconsistent crops. Products that sit at different sizes and positions make your catalog look unprofessional.
Ignoring marketplace rules. Each platform has its own image requirements. Check them before you start editing a large batch.
Should You Edit Ghost Mannequin Images In-House or Outsource?
This is a practical question every growing brand faces. Both options can work, depending on your volume and team.
Editing In-House
In-house editing gives you full control and fast changes. It can make sense if you have a small catalog, a skilled retoucher on staff, and a steady but manageable flow of new products.
The challenges are cost and capacity. A trained retoucher needs a salary, software licenses, and hardware. During seasonal launches, sales, or new collection drops, the workload can spike far beyond what one or two people can handle. Ghost mannequin editing is also detailed work. Doing it well at volume takes practice.
Outsourcing to a Professional Editing Team
Outsourcing makes sense when you shoot regularly, have large or seasonal batches, or want your in-house team to focus on photography, marketing, and sales instead of editing.
A professional post-production team can handle hundreds or thousands of images with consistent quality and a fixed turnaround time. You pay per image, which makes costs predictable and easy to scale up or down.
When choosing a partner, look for:
- Hand-drawn clipping paths, not only automated tools
- Clear examples of neck joint work at full size, not just small thumbnails
- A defined quality control process
- Willingness to follow your style guide exactly
- Free trial edits so you can judge quality before committing
- Transparent per-image pricing
- Clear communication and fast revisions
How Clipping Area Handles Ghost Mannequin Editing
At Clipping Area, we are a post-production photo retouching agency, and ghost mannequin editing has been one of our core services since we started working with ecommerce and fashion clients in 2014.
Our process follows the same workflow described in this guide. Every garment is isolated with a hand-drawn clipping path. Mannequins are removed carefully. Inside neck and inner detail shots are joined and blended so the result looks like a single, natural photo. Our editors correct symmetry, clean the fabric while keeping its texture, match colors to your reference, and prepare files to your exact size, background, shadow, and naming requirements. Every batch goes through a separate quality check before delivery.
We work with ecommerce brands, fashion labels, product photographers, Shopify and Amazon sellers, and wholesalers who need consistent apparel images at scale. Pricing starts at $0.29 per image depending on complexity, and you can test our work with free trial edits before placing an order.
If you want to see how your own garments look after professional editing, you can send us a few sample images and compare the results with your current workflow.
Tips to Get Better Ghost Mannequin Results Faster
Here are a few final, practical tips if you are shooting for a professional editor:
- Share a style guide. Include background color, margins, shadow type, image size, and file format. Clear instructions reduce revisions.
- Send one approved sample first. Agree on the look before sending the full batch.
- Name files clearly. Use SKU numbers and label the neck shots so they match the right front image.
- Shoot a color reference card at the start of each session, especially for color-sensitive products.
- Keep the camera fixed between the front shot and the inside shot.
- Group products by category so similar items are edited with the same alignment rules.
- Plan ahead for launches. Send images early before big sales periods so there is time for review.
Frequently Asked Questions
What is the difference between ghost mannequin and flat lay photography?
A flat lay shows the garment lying flat on a surface, photographed from above. A ghost mannequin image shows the garment in a 3D shape as if worn, with the mannequin removed. Ghost mannequin images show fit and structure better, while flat lays are simpler and often used for casual or lifestyle styling.
Do I need a special mannequin for ghost mannequin photography?
It is not required, but it helps a lot. Mannequins with removable neck, chest, and arm pieces make it much easier to capture the inside of the garment. Regular mannequins can work, but editing may take longer.
What is neck joint editing?
Neck joint editing is the process of adding the inside back of a garment’s neckline into the main image after the mannequin is removed. It uses a separate photo of the inner neck, which is aligned and blended so the garment looks complete and natural.
Can ghost mannequin images be used on Amazon?
Yes. Ghost mannequin images on a pure white background are widely used for apparel listings. Always check Amazon’s current image requirements for your category before uploading.
How long does ghost mannequin editing take?
It depends on the garment’s complexity and the number of images. Simple T-shirts are quick, while layered jackets, lace, and knitwear take longer. Professional teams usually offer standard turnaround times for batches, with faster options for urgent orders.
What if I forgot to shoot the inside neck?
A skilled editor can recreate the inner neckline digitally, but it is more time-consuming and may not look as natural as a real photo. If possible, reshoot the neck. For future shoots, add the neck shot to your checklist.
How much does ghost mannequin editing cost?
Prices vary based on complexity, volume, and turnaround time. Simple garments cost less than detailed pieces with multiple joints. At Clipping Area, pricing starts at $0.29 per image, and free trial edits are available.
Final Thoughts
Professional ghost mannequin images are not the result of one quick click. They come from a clear process: careful garment preparation, consistent photography, precise clipping paths, clean mannequin removal, natural neck joint blending, balanced retouching, accurate color, and strict quality control.
When each step is done well, the result is a product image that shows shape, fit, and quality at a glance. It helps shoppers feel confident, makes your catalog look professional, and supports better performance across your store and marketplaces.
If you are building or scaling an apparel catalog, start with good photography habits, set a clear style guide, and work with an editing team that understands the details. And if you would like a second pair of hands for the post-production side, Clipping Area is ready to help with free trial edits so you can judge the quality for yourself.



