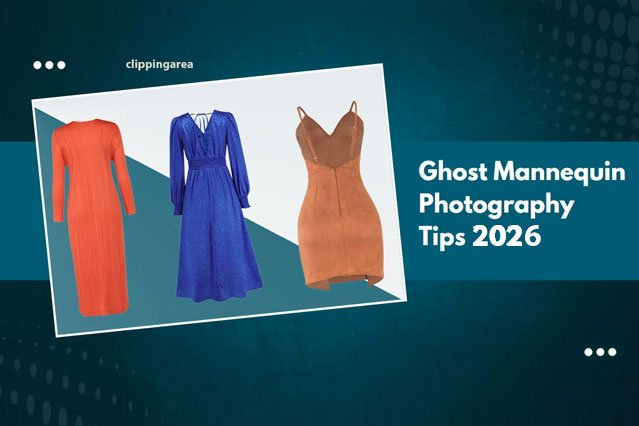
A shirt photographed flat on a table looks lifeless. The same shirt on a visible mannequin looks cheap, and hiring models for every product in a large catalog gets expensive fast. This is the problem many clothing brands and ecommerce sellers face every season. Ghost Mannequin Photography & Editing solves it by showing the true shape and fit of a garment while the mannequin disappears completely.
The technique combines two parts: careful photography on a mannequin, followed by post-production editing that removes the mannequin and rebuilds the hidden areas of the garment. In this guide, you will learn how both parts work, what equipment you need, how the Photoshop workflow runs, which mistakes to avoid, and when outsourcing the editing makes more sense than doing it yourself.
What Is Ghost Mannequin Photography & Editing?
Ghost mannequin photography is a method of photographing clothing on a mannequin so the garment holds a natural, three-dimensional shape. The mannequin gives the clothing structure: shoulders look like shoulders, a waistline sits where it should, and sleeves fall naturally.
Ghost mannequin editing is the post-production work that makes the mannequin vanish. An editor removes every visible part of the mannequin and replaces the missing areas, such as the inside of the collar or the back of the neckline, with real photographs of those parts of the garment.
The two processes depend on each other. Photography creates the raw material, and editing turns it into the final image. If the photos are shot poorly, even a skilled editor will struggle. If the editing is careless, great photos still end up looking fake.
The result is often called the “invisible mannequin” or “hollow man” effect. The garment appears to be worn by an invisible person. You can see the inner label area, the back of the collar, and the opening of the sleeves, which gives the shopper a clear sense of how the item will look when worn.
This style is popular in apparel ecommerce for three simple reasons:
- It shows fit and shape better than flat lay photos.
- It keeps attention on the product, with no model or mannequin pulling focus.
- It creates consistency across a catalog, which makes a store look more professional and trustworthy.
It helps to keep the difference between the two stages clear. Photography is about capturing accurate, well-lit, consistent images. Post-production is about combining, cleaning, and correcting those images into one realistic final product shot.
How Does Ghost Mannequin Photography Work?
Good editing starts with good photography. Here is how the shooting process works step by step.
Choose the Right Mannequin
Not every mannequin works for ghost mannequin photography. The best options have removable sections, so you can take away the parts that would block the view of the garment’s interior.
- Removable-section mannequins let you detach the neck, chest plate, or arms. Removing the neck piece, for example, lets you photograph the inside back of a collar.
- Hollow mannequins are designed so that parts of the body are open, making it easier to shoot inner areas without extra disassembly.
- Detachable neck and torso sections are especially useful for shirts, jackets, dresses, and knitwear.
Choose the mannequin according to the garment. Tops and outerwear need a torso form with a removable neck and ideally removable arms. Trousers and skirts need a lower-body form. Size matters too. A mannequin that is too large stretches the fabric, while one that is too small leaves the garment sagging and shapeless.
Prepare the Clothing
Preparation is where many shoots succeed or fail. Wrinkles and creases that you ignore on set will cost time in editing.
- Steam or iron the garment before placing it on the mannequin. Steaming usually works better for delicate fabrics.
- Remove wrinkles and fold lines, especially around the chest, sleeves, and hem.
- Check seams to make sure they sit straight and symmetrical.
- Arrange sleeves so they hang naturally and match each other.
- Position collars neatly, with both sides even.
- Check buttons and zippers, closing them fully or leaving them open consistently across similar products.
- Make sure the garment fits the mannequin correctly. Use clips or pins at the back if you need to tighten the fit, keeping them out of camera view.
Also remove tags, stickers, loose threads, and dust before shooting.
Set Up the Camera
Consistency matters more than expensive gear. Your aim is to make every shot of a product line match.
- Camera position: Place the camera straight in front of the garment so it is not distorted by an angled view.
- Lens choice: A standard or short telephoto focal length usually keeps proportions natural. Very wide lenses can distort the shape of clothing.
- Tripod: Always use one. It keeps the framing identical between the outer shot and the inner shots, which makes combining them far easier.
- Consistent framing: Keep the garment centered with similar spacing around it in every image.
- Camera height: Set the camera around the middle of the garment to avoid a top-down or bottom-up perspective.
- Consistent shooting angle: Once you find the right angle, lock it and keep it for the whole product line.
Exact settings depend on your camera, lens, and lighting. What matters is choosing settings that give sharp detail and accurate color, then keeping them the same for the entire shoot.
Set Up Lighting
Lighting affects texture, color, and how much editing you will need later.
- Use soft lighting. Softboxes or diffused light sources create even illumination and gentle shadows.
- Control light direction. Light from both sides usually shows the garment’s shape without flattening it.
- Manage shadows. Some shadow gives depth, but heavy shadows hide detail and create more editing work.
- Keep exposure consistent. Every shot in a set should have the same brightness so the inner and outer images match.
- Avoid harsh reflections, especially with satin, leather, sequins, or coated fabrics.
- Maintain accurate color. Set a correct white balance and consider shooting a color reference card so the final image matches the real product.
Photograph the Garment
A typical ghost mannequin image needs at least two photographs: the front of the garment on the mannequin, and the inside back of the neckline with the mannequin removed or the garment turned. Some products need more, such as inner sleeve shots or the inside of a waistband.
Because these images will be merged into one, they must match in lighting, angle, focus, and scale. Any difference, even a small shift in camera position or light, shows up as a visible mismatch in the final image. This is why a tripod and fixed lighting are so important.
What Is Ghost Mannequin Editing?
Ghost mannequin editing is the post-production process that transforms the separate photos into one clean, realistic image. Many people think it simply means “removing the mannequin,” but professional editing involves much more.
A skilled editor will:
- Remove visible mannequin areas, such as the neck, shoulders, and any exposed body parts.
- Use the photographed inner garment areas to fill the empty spaces left behind.
- Combine multiple images into a single composition.
- Create the hollow-neck effect so the inside back of the collar appears naturally.
- Clean the edges of the garment for a sharp, crisp outline.
- Correct wrinkles that were not fixed during preparation.
- Adjust colors so the image matches the real product.
- Remove unwanted elements, such as pins, clips, dust, and lint.
- Maintain a realistic shape so the garment looks worn, not stretched or collapsed.
- Create a clean ecommerce-ready image, usually on a white or neutral background.
The difference between average and professional editing is realism. A shopper should never notice that editing happened. They should only see a well-presented garment that looks exactly like what they will receive.
How Does Ghost Mannequin Editing Work in Photoshop?
Photoshop is the most common tool for ghost mannequin editing. The exact steps vary by garment, but the general workflow looks like this.
- Import the images. Open the front shot and the inner shots in Photoshop and place them in one document as separate layers.
- Select the garment. Isolate the clothing from the background and the mannequin.
- Create a clean clipping path or selection. The Pen Tool gives precise, smooth edges and is the preferred choice for professional work. The resulting clipping path defines the garment outline.
- Remove visible mannequin sections. Use Layer Masks to hide the mannequin’s neck, shoulders, or other exposed areas. Masks are non-destructive, so you can adjust them later.
- Add the inner garment image. Place the photo of the inside collar or neckline below the main garment layer.
- Combine the required layers. Position and scale the inner layer so it sits naturally inside the opening.
- Match the inner and outer sections. Align the inner collar with the outer edges so the seams and shapes line up.
- Refine edges. Smooth any rough or uneven outlines, both around the garment and where the inner and outer layers meet.
- Correct color and exposure. Use layer adjustments such as Levels, Curves, and Hue/Saturation to make the layers match each other and the real product.
- Remove unwanted wrinkles or distractions. The Healing tools and Clone Stamp tool handle dust, lint, pins, and small creases.
- Check garment shape. If a side looks uneven or a hem looks bent, use Liquify carefully to correct it. Use it lightly, since overdoing it makes clothing look unnatural.
- Create the final background. Place the garment on a pure white or brand-specific background. Add a subtle shadow if your store style calls for it.
- Perform quality control. Zoom in to check edges, seams, color accuracy, and any leftover mannequin traces. Where needed, apply gentle Dodge and Burn to restore depth and fabric texture.
- Export the final image. Save in the right format, size, and color profile for your website or marketplace.
For beginners, the hardest parts are usually steps 7 and 9. Getting the inner collar to blend naturally and making the colors of both layers match takes practice and patience.
Equipment You Need for Ghost Mannequin Photography
You do not need a professional studio to start, but some equipment makes a clear difference.
- A mannequin with removable parts, sized for your product range.
- A camera that allows manual control of exposure and white balance.
- A sturdy tripod to keep framing identical between shots.
- Soft lighting, such as two softboxes or diffused continuous lights.
- A plain backdrop, usually white or light gray, to simplify editing.
- A steamer or iron for garment preparation.
- Clips and pins to adjust fit from behind.
- A color reference card for accurate color correction.
- Editing software, most commonly Adobe Photoshop.
Starting with this basic kit will give you consistent results you can build on as your catalog grows.
Why Clothing Brands Use Ghost Mannequin Images
Ghost mannequin images are more than a visual trend. They solve real business problems.
They show real fit and structure. Shoppers can see how a garment will drape on a body, which helps them make buying decisions with more confidence.
They reduce cost compared with model photography. Model shoots involve booking fees, styling, hair and makeup, and more planning. Ghost mannequin shoots are faster and easier to repeat for large catalogs.
They create catalog consistency. Every product appears at the same angle, scale, and style. This makes category pages look organized and professional.
They keep the focus on the product. Without a model’s face, pose, or styling, the garment itself becomes the center of attention.
They support marketplace requirements. Many marketplaces prefer clean product images on white backgrounds, and ghost mannequin images fit well within those standards.
They may help reduce returns. When customers understand the shape and fit before buying, they are less likely to be surprised when the product arrives.
Common Ghost Mannequin Mistakes to Avoid
Even experienced teams make these mistakes. Knowing them in advance saves time and money.
- Skipping garment preparation. Wrinkles, lint, and uneven seams create hours of extra editing.
- Using the wrong mannequin size. Stretched or sagging fabric misrepresents the product.
- Moving the camera between shots. Even a small shift makes the inner and outer layers hard to align.
- Changing lighting mid-shoot. Inconsistent exposure leads to visible color differences in the final image.
- Forgetting the inner shots. Without an inner collar photo, the editor has nothing real to fill the neckline with.
- Leaving mannequin traces. Small patches of the mannequin at the shoulders or armholes look unprofessional.
- Unrealistic neck openings. A neckline that is too wide, too flat, or crooked immediately looks fake.
- Over-editing. Too much Liquify or smoothing removes fabric texture and distorts the true shape.
- Inaccurate colors. Oversaturated or incorrectly balanced colors are a common cause of returns.
- Inconsistent styling across products. Different angles, sizes, or backgrounds make a catalog look messy.
DIY vs Professional Ghost Mannequin Editing
Should you edit the images yourself or hire a professional? The right answer depends on your volume, skills, and time.
DIY editing makes sense when:
- You have a small number of products.
- You or someone on your team already knows Photoshop well.
- You have time to learn and practice.
- Your budget is very limited in the early stages.
Professional editing makes sense when:
- You have large or regular batches of products.
- You need consistent quality across the entire catalog.
- Your team’s time is better spent on photography, marketing, or sales.
- You need fast turnaround for product launches or seasonal collections.
- Your images are going to marketplaces with strict requirements.
A good way to decide is to calculate the real cost of in-house editing. Include the hours spent per image, the learning curve, software costs, and the cost of re-editing images that do not meet standards. For many growing brands, that total ends up higher than outsourcing.
When Does Outsourcing Ghost Mannequin Editing Make Sense?
Outsourcing is usually the smarter choice once editing starts slowing your business down. Common signs include:
- Your product uploads are delayed because images are waiting to be edited.
- Quality is inconsistent from one batch to another.
- You are launching large collections several times a year.
- Your photographer spends more time editing than shooting.
- You sell on several platforms that each need different image sizes and formats.
When choosing an editing partner, look for:
- A portfolio with ghost mannequin work similar to your products.
- A free or low-cost trial so you can check quality before committing.
- Clear turnaround times and the ability to handle bulk orders.
- A revision policy in case something needs to be adjusted.
- Secure file transfer and respect for unreleased product images.
- Good communication and the ability to follow a style guide.
It also helps to send a clear brief with your first order. Include background color, image size, margins, shadow preference, file format, and any examples of the look you want.
How to Prepare Ghost Mannequin Images for Ecommerce Websites and Marketplaces
Finished images need to be prepared correctly for where they will be published.
Follow platform guidelines. Each marketplace has its own image rules. Amazon, for example, requires a pure white background for main product images. Rules change over time and differ by category, so always check the current guidelines for each platform before uploading.
Use the right image size. Larger images allow shoppers to zoom in on fabric texture and details. Check your platform’s recommended dimensions, and keep the same size across your catalog.
Keep consistent margins and alignment. Every garment should sit in the same position within the frame, so category pages look neat.
Choose the correct file format. JPEG is the most common choice for product photos. PNG is useful when you need a transparent background for design or marketing use.
Use the sRGB color profile. Most web browsers and screens display sRGB correctly, which helps colors look accurate to shoppers.
Compress images without losing quality. Large files slow down your website, which hurts user experience and SEO. Compress carefully so details stay sharp.
Name files descriptively. A name like “women-black-wool-coat-front.jpg” is more useful for search engines than “IMG_4521.jpg.”
Write helpful alt text. Describe the product clearly and naturally, for example “Women’s black wool coat with notch lapel, front view.” This improves accessibility and image search visibility.
Create a complete image set. Pair the front ghost mannequin image with back views, close-ups of details, and lifestyle or model photos where possible. Shoppers trust listings that show the product from several angles.
Frequently Asked Questions
Is ghost mannequin photography better than flat lay photography?
For showing fit and shape, yes. Ghost mannequin images give garments a three-dimensional look, while flat lays appear flatter. Flat lays still work well for styled social media content and accessories.
Can I do ghost mannequin photography without a special mannequin?
You can use a standard mannequin, but it makes the process harder. Without removable parts, capturing clean inner shots takes more effort, and editing takes longer.
How many photos are needed for one ghost mannequin image?
Usually at least two: the front view on the mannequin and an inner shot of the neckline. Complex garments may need additional shots of sleeves, waistbands, or linings.
What types of clothing work best with this technique?
Shirts, t-shirts, jackets, coats, hoodies, dresses, knitwear, and trousers all work well. The technique is most useful for any garment where shape and structure matter.
How long does ghost mannequin editing take?
It depends on the garment’s complexity and the quality of the original photos. A simple t-shirt takes less time than a detailed jacket with a lining, hood, and multiple layers.
Final Thoughts
Ghost Mannequin Photography & Editing gives clothing brands a practical way to present products clearly, consistently, and professionally. The photography stage captures the garment’s real shape, while editing removes the mannequin and builds a realistic, hollow final image that shoppers can trust.
Success comes from getting both stages right: preparing garments carefully, shooting with consistent lighting and framing, and editing with attention to realism rather than shortcuts. For small catalogs, learning the process in-house can work well. For growing brands with regular product launches, outsourcing to experienced editors often saves time and keeps quality consistent.
If you need help turning your apparel photos into clean, ecommerce-ready ghost mannequin images, the team at Clipping Area has been editing product photos for brands and photographers since 2014. Send a few sample images to see how professional editing can improve your product presentation.



