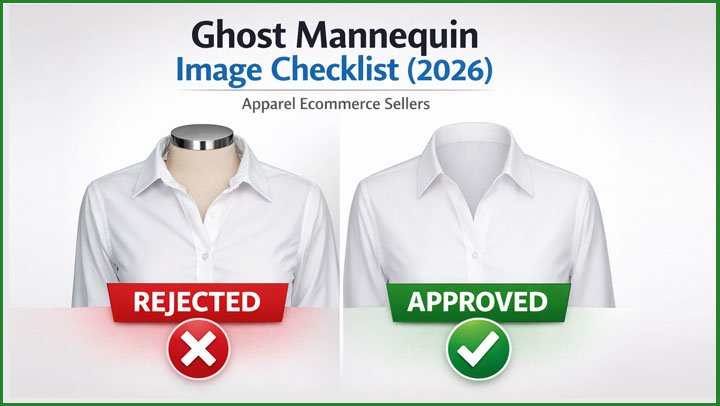
A clothing product photo can look fine on your screen and still let you down on the product page. Zoom in and you may find rough edges around the sleeves or a neck joint that looks pasted on. The navy jacket might show up as royal blue, or a small piece of the mannequin shoulder might still be visible. Put a few of these next to each other in a catalog and the store starts to look careless.
A Ghost Mannequin Image Checklist helps you catch these problems before customers see them. It gives photographers, editors, and ecommerce managers the same standard to check against, so approval doesn’t depend on one person’s mood or eyesight.
This guide covers the full process: garment preparation, source photography, editing checks, final quality control, and handling large catalogs. You can copy the checklists and use them with your own team or with an outside editor.
1. What Is a Ghost Mannequin Image?
A ghost mannequin image is a clothing product photo where the mannequin has been removed in editing, so the garment looks like it is being worn by an invisible body. It is also called an invisible mannequin image.
Here is how it works:
- The garment is photographed on a mannequin from the front (and usually the back).
- A second photo captures the inside of the garment, typically the back neckline and inner collar, often with the garment turned inside out or placed flat.
- An editor removes the mannequin with a clipping path or masking in Photoshop.
- The editor places the inner section into the main image to fill the gap where the mannequin neck used to be. This combined area is called the neck joint.
- The editor cleans the edges, corrects the color, and places the garment on the final background.
Standard mannequin photo vs ghost mannequin image
| Standard Mannequin Photo | Ghost Mannequin Image |
|---|---|
| Mannequin stays visible | Mannequin is removed |
| Neck and arms of the form can distract | Focus stays on the garment |
| Faster to produce | Needs extra shots and post-production |
| Inner neckline hidden | Inner neckline and label area visible |
Apparel brands like this technique because it shows the garment’s real 3D shape and fit without the cost of a model shoot. It also keeps the catalog clean and consistent.
2. Why Does an Apparel Brand Need a Ghost Mannequin Image Checklist?
A checklist turns image approval into a repeatable process instead of a series of personal opinions. Without one, two people can look at the same image and disagree, and problems slip through when everyone is busy.
A structured apparel image checklist protects:
- Product accuracy. The photo should match the item the customer receives.
- Garment shape. Editing should not make a boxy tee look slim-fit.
- Color accuracy. Wrong colors are a common reason for disappointed customers.
- Clean presentation. No halos, leftover mannequin parts, or rough edges.
- Catalog consistency. Every product sits at the same size, position, and background.
- Ecommerce usability. Files arrive in the right format, size, and naming.
When images are checked one by one without a standard, each reviewer notices different things. One person catches halos and misses color shifts. Another fixes cropping and ignores the neckline. A checklist makes sure everyone looks at the same points every time.
3. Pre-Photography Checklist
Most editing problems start before the camera clicks. A wrinkle that takes ten seconds to steam can take ten minutes to retouch, and some damage can’t be fixed at all without changing the product.
Garment Preparation
- Garment is clean, with no stains or marks
- Lint, dust, and pet hair removed with a lint roller
- Wrinkles and packing creases steamed out
- Buttons all present, secure, and fastened as intended
- Zippers working and lying flat
- Seams straight, with no loose threads
- Collar pressed and sitting evenly
- Cuffs clean and folded consistently
- Sleeves free of creases at the elbow and armpit
- Tags and stickers removed (unless the brand label should show)
Mannequin Preparation
- Mannequin size matches the garment size
- Mannequin type suits the product (men’s, women’s, kids’, torso, full body)
- Removable neck, arms, or shoulder pieces available if needed
- Garment fits without stretching or sagging
- Mannequin set at the same height and angle as previous shoots
Styling
- Garment hangs in its natural shape
- Side seams run straight down
- Sleeves positioned the same way for similar products
- Collar centered and symmetrical
- No unwanted folds at the hem or waist
- Pins and clips hidden from the camera
Good preparation reduces editing time, reduces the risk of over-retouching, and keeps the final image closer to the real product.
4. Source Photography Checklist
Source image quality sets the limit for the final image. An editor can clean, correct, and combine, but cannot recover detail that the camera never captured.
Check these points before sending files for post-production:
- Resolution is high enough to allow zoom and cropping without blur
- Focus is sharp across the whole garment, including edges and sleeves
- Lighting is even, without hot spots or deep shadows
- Exposure keeps detail in both whites and dark fabrics
- Background is plain and separated from the garment
- Camera angle matches the rest of the catalog
- Garment position is consistent with similar products
- Front image captured
- Back image captured if the product page shows it
- Inner garment image captured for the neck joint
- Detail shots captured for prints, logos, hardware, or texture
- Files saved in a quality format (RAW or high-quality JPEG/TIFF)
A practical tip: shoot a color reference card at the start of each session and whenever the lighting changes. It gives the editor a neutral point to correct against.
5. Inner Garment / Neck Joint Checklist
The inner garment shot is what makes a ghost mannequin image look real. Without it, the editor has to invent the inside of the collar, and invented details rarely match the actual product.
What the editor needs to see in the inner shot:
- Neckline. The full inner edge, from shoulder seam to shoulder seam.
- Collar structure. How the collar stands, folds, or lies flat.
- Inner fabric. The lining or reverse side, including its true color.
- Shoulder area. Where the inner and outer sections meet.
- Back neckline. Including the label or print, if it should appear.
Inner shot checklist:
- Inner area is clearly photographed and in focus
- Lighting matches the main shot
- No important fabric detail is cut off
- Neckline is not stretched or distorted
- Inner image matches the main garment in color and texture
- Label is positioned correctly (or removed if the brand prefers)
After editing, confirm:
- Final neck joint looks natural from normal viewing distance and when zoomed
- No mannequin remains visible inside the collar
6. Background Removal Checklist
Clean background removal means the garment edge is precise; over-cutting means the editor removed part of the product. Both can look similar at small sizes, which is why you need to zoom in.
- Edges are smooth and follow the real garment outline
- No white halos around dark garments
- No dark outlines around light garments
- No leftover mannequin pieces at the arms, neck, or base
- No missing garment edges, loose threads, or fringe cut away by mistake
- No accidental cuts into sleeves, hems, or straps
- No jagged or stair-stepped areas along curves
- Gaps between arms and body are cleared properly
- Background is consistent in color across the batch
Soft, fuzzy fabrics like knitwear, fleece, and faux fur need masking rather than a hard clipping path. A sharp path on a fluffy sweater makes it look cut out of paper.
7. Garment Shape Checklist
Editing should improve how the garment is presented, not change what the garment is. If the photo shows a different fit or length than the real item, customers notice when it arrives.
Check against the source image and, if possible, the actual sample:
- Shoulder width matches
- Sleeve length matches
- Body shape is unchanged (no slimming or widening)
- Hemline is straight or curved as designed
- Collar keeps its real shape
- Cuffs are the correct size
- Side edges are symmetrical where the design is symmetrical
- Overall proportions look true
- Natural folds that show drape are kept
Small symmetry fixes, like evening out a sleeve that the mannequin pushed slightly off, are normal. Reshaping the waist to look more tailored is misrepresentation.
8. Fabric & Detail Checklist
Over-retouching is one of the easiest ways to make clothing look fake. Heavy smoothing removes the texture customers use to judge quality.
- Fabric texture is visible (knit, weave, denim grain, ribbing)
- Stitching is sharp and not smoothed away
- Seams are intact
- Buttons are clean, with correct color and shine
- Zippers show teeth and pull clearly
- Patterns line up and are not warped
- Prints are sharp and correctly colored
- Logos are complete and not distorted
- Labels are legible if shown
- Small design details (eyelets, rivets, embroidery) are preserved
Retouching should remove temporary flaws like lint, dust, or a loose thread. Anything that is part of the product should stay.
9. Color Accuracy Checklist
The product color in the image should match the real garment as closely as possible. Screens vary, so exact matching on every device is not realistic, but your files should be accurate at the source.
- Garment color compared to the physical sample under neutral light
- White balance corrected (whites look white, not blue or yellow)
- Brightness shows detail without washing out color
- Contrast is natural, not punchy
- Saturation is not boosted to make the product “pop”
- Shadows hold detail in dark fabrics
- Highlights don’t clip on light fabrics
- Same product in the same color looks identical across all angles
- Color variants (e.g. black, charcoal, navy) are clearly different from each other
Review on a calibrated monitor where possible and export in sRGB, which most web browsers expect. Dark colors like black, navy, and forest green are the hardest to get right, so check them twice.
10. Neck Joint Quality Checklist
A good neck joint is invisible. If you notice it, something is wrong.
- Neckline looks natural and rounded
- Proportions match the rest of the garment
- Transition between inner and outer fabric is smooth
- No mannequin visible anywhere inside
- No unnatural stretching of the inner fabric
- No missing fabric or gaps at the shoulder seams
- Collar shape is correct
- Inner garment is placed at the right depth and angle
- No obvious Photoshop artifacts (smudges, repeated clone patterns, blurry patches)
Common neck-joint mistakes include placing the inner section too high so the collar looks flat, using an inner shot with different lighting so the inside looks darker than the outside, and stretching the inner piece to fill a gap, which bends the label or pattern.
11. Shadow Checklist
Shadows help a garment look grounded on the page. Your options:
- Natural shadow. The original shadow from the shoot, kept and cleaned.
- Soft shadow. A light, diffused shadow added in editing.
- Drop shadow. A shadow behind the product that suggests depth.
- Contact shadow. A thin shadow under items that sit on a surface.
- No shadow. Fine when the brand style calls for a flat, clean look.
Check:
- Shadow direction is consistent across the catalog
- Opacity is light enough not to distract
- Softness looks natural, not a hard gray blob
- Position makes physical sense for the product
- Same shadow style used for every product in the collection
Overly dark or sharp shadows look artificial and can make the background appear dirty. When in doubt, go lighter.
12. Cropping & Composition Checklist
Consistent framing makes a catalog look organized, even to shoppers who can’t say why.
- Garment centered in the frame
- Margins consistent on all sides
- Product fills a similar share of the frame across similar items
- Crop follows the agreed aspect ratio
- No garment edges clipped by the frame
- Same vertical position for similar products
- Correct orientation (no accidental rotation or mirroring)
A simple way to check: view a whole category as thumbnails side by side. Anything that sits higher, lower, or larger than the rest will stand out right away.
13. Background & File Checklist
- Background: white, transparent, or a defined brand color, as agreed
- White background is truly even, with no gray patches
- Transparent background exported in a format that supports it (PNG, for example)
- File format matches where the image will be used
- Resolution supports zoom on your store
- Dimensions match your platform or theme settings
- File names follow your system (for example SKU_color_view)
- Folder structure is organized by collection, SKU, or color
A note on platforms: Amazon, Shopify, and other marketplaces set their own image rules for background, size, and file type, and these can change. Check the latest official requirements for each platform you sell on before exporting. Keeping a high-resolution master file makes it easy to create platform-specific versions later.
14. Before-and-After Quality Control Checklist
| Check | Before Editing | After Editing |
|---|---|---|
| Garment shape | Correct source shape | Preserved |
| Background | Suitable for editing | Clean |
| Neckline | Captured clearly | Natural neck joint |
| Color | Accurate source | Accurate final |
| Edges | Visible | Clean |
| Fabric | Detailed | Preserved |
| Mannequin | Visible | Removed |
| Cropping | Consistent | Consistent |
Comparing source and final side by side is the fastest way to catch editing errors. Lay them next to each other at the same size. Changes in shape, missing details, and color shifts become obvious in a way they are not when you view the final image alone.
15. Common Ghost Mannequin Image Mistakes
| # | Mistake | How to Spot It | How to Fix It |
|---|---|---|---|
| 1 | Visible mannequin parts | Zoom into the neck, armholes, and base | Re-mask or use removable mannequin parts at the shoot |
| 2 | Poor neck joint | Collar looks flat or pasted | Reshoot the inner section and rebuild the joint |
| 3 | Missing inner section | Empty or gray area inside the collar | Capture an inner shot for every style |
| 4 | Distorted garment | Compare with the source image | Undo warping, keep only minor symmetry fixes |
| 5 | Incorrect color | Compare with the physical sample | Correct against a reference card |
| 6 | Rough edges | Zoom to 100–200% | Refine the path or mask |
| 7 | White halos | Visible on dark garments | Tighten the selection, defringe edges |
| 8 | Dark outlines | Visible on light garments | Adjust the mask edge inward slightly |
| 9 | Excessive retouching | Fabric looks plastic | Reduce smoothing, retouch only flaws |
| 10 | Lost fabric texture | Knit or weave disappears | Restore from the source layer |
| 11 | Missing stitching | Seams look blank | Reduce blur, sharpen selectively |
| 12 | Uneven cropping | Thumbnails don’t line up | Use a crop template |
| 13 | Inconsistent sizing | Similar items look different sizes | Set a fixed product-to-frame ratio |
| 14 | Artificial shadows | Hard, dark, or misplaced shadows | Soften, lighten, and match direction |
| 15 | Different backgrounds | Off-white vs pure white | Apply one background value to the batch |
16. Ghost Mannequin Image Checklist for Different Apparel Types
Each garment type has its own weak points. Adjust your checks accordingly.
- T-shirts: Crew and V-necks must be symmetrical. Check the ribbed collar texture and sleeve hem.
- Shirts: Collar points should match, the placket should run straight, and all buttons should be aligned.
- Polo shirts: Check the collar roll, placket buttons, and ribbed sleeve bands.
- Dresses: Hemline and waist shape need careful checks. Straps and thin shoulder areas are easy to over-cut.
- Jackets: Lining often shows at the neck and front opening, so check lining color and zipper alignment.
- Blazers: Lapels must be symmetrical, and shoulder structure should not collapse or inflate.
- Hoodies: The hood needs its own shape, drawstrings should hang evenly, and the inner hood may need a separate shot.
- Sweaters: Knit texture is fragile. Use soft masking and avoid smoothing.
- Coats: Long hems need even length on both sides. Heavy fabrics show sagging easily.
- Jeans: Waistband inner shot matters. Check rivets, stitching, and wash color.
- Trousers: Leg length should match, creases stay straight, and the waistband opening needs a clean inner view.
- Sportswear: Mesh panels and reflective prints need careful masking and color control.
- Activewear: Stretch fabrics can distort on the mannequin. Check that the shape reflects the real fit.
- Children’s clothing: Small sizes need a proportional mannequin. Details like snaps and appliqués are tiny, so zoom in.
17. Bulk Ghost Mannequin Image Checklist for Large Ecommerce Catalogs
When you move from twenty images to two thousand, small inconsistencies multiply. One off-white background is a detail. Two hundred of them is a catalog problem.
For large volumes, add these to your process:
- Style guide: written rules for background, margins, shadow, crop ratio, and neck joint style
- File naming: one convention used from shoot to delivery
- Folder organization: by collection, category, or SKU
- Sample approval: approve a small test batch before full production
- Batch processing: group similar garments so editors apply the same settings
- Image consistency: thumbnail review by category
- Color consistency: same product, same color across every angle
- Background consistency: one background value for the entire batch
- Neck-joint consistency: same depth and angle for similar necklines
- QC sampling: review a set percentage of every batch, plus every image with a complex garment
- Revision tracking: log what was sent back, why, and when it was fixed
- Final delivery: confirm file count, formats, and names match the order
The sample approval step saves the most time. It is much easier to correct a style decision on ten images than on a thousand.
18. How to Create a Ghost Mannequin Image Quality-Control Workflow
Source Image Check → Editing → First QC → Client Review → Revisions → Final QC → Delivery
- Source Image Check. Confirm focus, lighting, complete shots (front, back, inner, details), and file names before editing starts.
- Editing. Mannequin removal, neck joint, background, color correction, retouching, shadow, and crop, all following the style guide.
- First QC. The editing team checks each image against the source and the checklist.
- Client Review. The brand reviews a sample or the full batch, focusing on color, shape, and style.
- Revisions. Fixes are made with clear notes on each rejected file.
- Final QC. A second check confirms fixes were made and nothing new broke.
- Delivery. Files delivered in the agreed formats, sizes, and folder structure.
Plenty of brands edit their own images, and for small catalogs that can work well. The core Photoshop tools are:
- Pen Tool for precise clipping paths on hard edges
- Layer Masks for combining the inner and outer shots
- Object Selection for quick first-pass selections
- Background removal tools, which need manual cleanup for good results
- Manual retouching with healing and clone tools for lint and dust
DIY makes sense when you have a small catalog, simple garments, someone on the team with editing skills, and time to learn.
Professional support may be useful when:
- Image volume is large or seasonal
- Garments are complex (knits, sheer fabrics, structured collars)
- Launch deadlines are tight
- You need consistent style across a large catalog
- Internal editing skills are limited
- Repetitive editing takes time away from running the business
Neither option is always better. Many brands edit hero images in-house and outsource the bulk work, or the reverse. The right choice depends on your volume, budget, and how much control you want.
20. How Clipping Area Can Support Apparel Ecommerce Image Editing
Clipping Area is a Post-Production Photo Retouching Agency working with ecommerce brands, fashion labels, photographers, and agencies since 2014.
Relevant services include ghost mannequin photo editing, apparel photo editing, clothing photo editing, ecommerce product photo editing, background removal, clipping path services, product photo retouching, color correction, shadow creation, and bulk image editing.
The workflow is straightforward:
Image Submission → Requirement Review → Sample → Editing → Quality Control → Client Review → Final Delivery
Starting with a small sample batch lets you discuss editing style, image requirements, quality expectations, workflow, and project scope before committing to a full catalog. You can check the results against the same checklist in this guide.
Have an apparel image batch that needs a consistent ghost mannequin style? Send Clipping Area a small sample to discuss your editing requirements and project scope.
21. Frequently Asked Questions
What is a ghost mannequin image?
It is a clothing photo where the mannequin is removed in editing and the inner garment is added back, so the item looks worn by an invisible body.
What should I check before approving a ghost mannequin image?
Check the neck joint, edges, garment shape, color accuracy, fabric detail, cropping, background, and file format. Compare the final image with the source image side by side.
What makes a ghost mannequin image look professional?
A good ghost mannequin image has a natural garment shape, clean edges, accurate color, a realistic neck joint, consistent cropping, and no visible mannequin parts.
What is the most important part of ghost mannequin editing?
The neck joint. It is the most visible sign of quality, and a weak one makes the whole image look edited.
How do I check a ghost mannequin neck joint?
Zoom in and look for a smooth transition between inner and outer fabric, matching lighting and color, correct collar shape, and no leftover mannequin or blurry patches.
How can I check color accuracy?
Compare the image with the physical garment under neutral daylight-balanced light, on a calibrated monitor if possible. Use a color reference card from the shoot as a guide.
What resolution should apparel images have?
High enough to support zoom on your store without blur. Exact dimensions depend on your platform and theme, so check the latest official requirements and keep a high-resolution master file.
What should I check after background removal?
Look for halos, dark outlines, jagged edges, over-cut areas, leftover mannequin pieces, and uneven background color.
Can ghost mannequin images be used for Shopify?
Yes. Shopify stores commonly use them. Match the dimensions and aspect ratio your theme expects and check Shopify’s current image guidance.
Can ghost mannequin images be used for Amazon?
Ghost mannequin images are widely used for apparel on Amazon, but Amazon has specific rules for main images by category. Verify the current official requirements before uploading.
How can brands maintain consistency across hundreds of images?
Use a written style guide, approve a sample batch first, group similar garments, use crop templates, and review thumbnails by category.
Should I outsource ghost mannequin image editing?
It depends on your volume, deadlines, garment complexity, and in-house skills. Outsourcing helps most when volume is high or consistency is hard to maintain internally.



