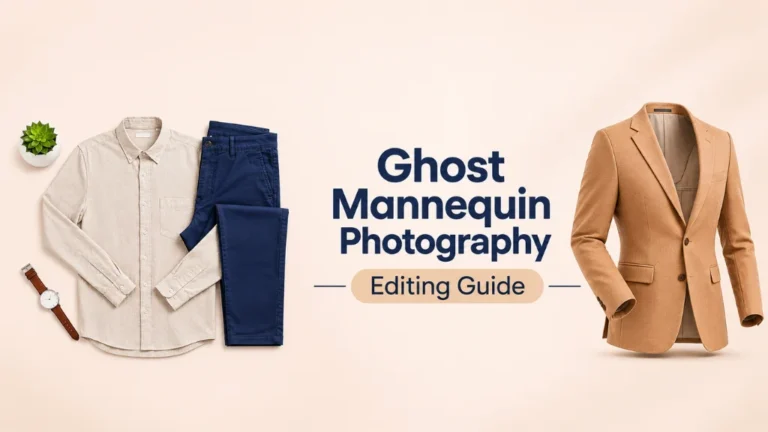
Ghost Mannequin Photography Step by Step Editing Mastering Guide for Ghost Mannequin Effect is the trick behind those clean clothing photos where a shirt looks like someone is wearing it, but no one is there. You see the shape, the fit, the inside of the collar. You just don’t see a model or a dummy.
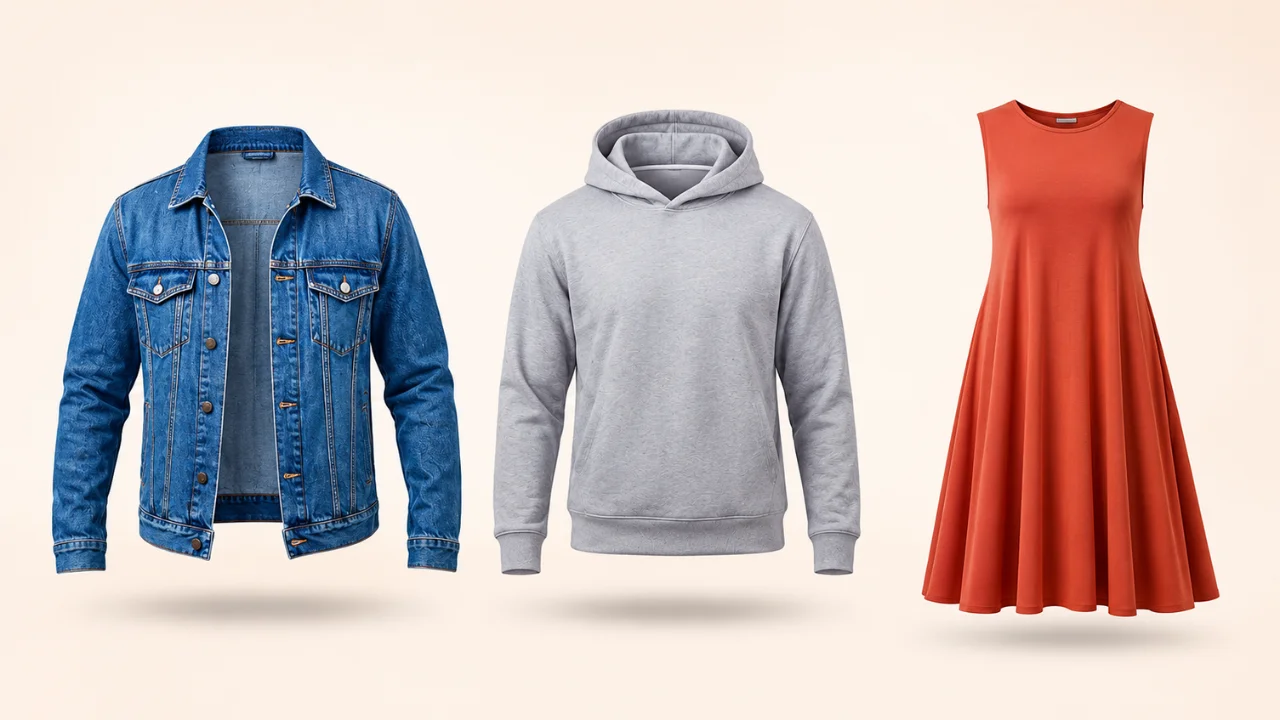
If you sell clothes online, this style can change how buyers see your products. It looks neat, it keeps the focus on the garment, and it works on almost every store, from Shopify to Amazon.
In this guide, we’ll walk you through the full process. You’ll learn how to shoot the photos, how to edit them step by step, and how to avoid the mistakes that make the effect look fake. We have been editing apparel photos at Clipping Area since 2014, so everything here comes from real client work, not theory.
What Is Ghost Mannequin Photography?
Ghost mannequin photography is a product photo method where clothing is shot on a mannequin, and the mannequin is removed in editing. The result is a garment that looks 3D and hollow, as if worn by an invisible body.
People also call it the invisible mannequin effect, hollow man effect, or 3D ghost effect. The idea is simple. You shoot the front of the garment on a mannequin. Then you shoot the inside parts, like the back of the neck and the inner label. In editing, you join these shots together and remove the mannequin. What’s left is a clean product that shows its true shape.
This is different from a flat lay, where clothes lie on a table. It’s also different from a model shot, where a real person wears the item. Ghost mannequin sits right between them. It shows shape like a model photo, but keeps the clean look of a flat lay.
Ghost Mannequin vs Flat Lay vs Model Photos
| Style | Shows fit and shape | Cost | Best for |
|---|---|---|---|
| Ghost mannequin | High | Medium | Ecommerce catalogs, marketplaces |
| Flat lay | Low | Low | Social media, simple items |
| On model | High | High | Lookbooks, brand campaigns |
Why the Ghost Mannequin Effect Matters for Ecommerce
Online shoppers can’t touch your product. They can only look. So your photos have to do the job of a fitting room. The ghost mannequin effect helps in a few clear ways.
- It shows real shape. Buyers see how a jacket falls, how a collar sits, and how a dress flows.
- It keeps the focus on the product. No model face or pose pulls attention away.
- It makes your store look consistent. When every product is shot and edited the same way, your catalog looks clean and trusted.
- It meets marketplace rules. Amazon and many other platforms want plain white backgrounds and no props. Ghost mannequin images fit those rules well.
- It saves money. You don’t need to book models, makeup, or a stylist for every new item.
In our work with fashion brands, we often see that clean, consistent product images help lower return rates. When buyers know what they’re getting, they’re less likely to send it back.
Before You Edit: Shoot It Right
Good editing starts with good photos. If the shoot is messy, editing takes longer and the result looks worse. Here’s what to get right.
1. Use the right mannequin
Pick a mannequin with a removable neck piece, chest plate, and arms if possible. These parts let you open up the neck and armholes, so the inside of the garment is easy to show later.
2. Steam and style the garment
Iron or steam every wrinkle. Use clips or pins at the back to fit the item snugly. Small creases are easy to miss on set but very slow to fix in Photoshop.
3. Lock your camera and lights
Put your camera on a tripod and don’t move it between shots. Use soft, even lighting from both sides. Keep the same settings for the full set, so colors and shadows match across products.
4. Take all the shots you need
For a standard top or shirt, you need:
- Front shot on the mannequin.
- Back shot on the mannequin.
- Inside neck shot. Turn the garment inside out or lay it flat to capture the back of the collar and the inner label.
- Sleeve or detail shots if the arms need to be shown open.
Shoot on a plain background, white or light grey works best. This makes the masking step much faster.
Ghost Mannequin Editing: Step-by-Step Guide
Here’s how to create the ghost mannequin effect in Photoshop. These are the same core steps our editors follow on thousands of apparel images every month.
Step 1: Open and organize your files
Open the front shot and the inside neck shot in Photoshop. Place them in one document as separate layers. Name them clearly, like “Front” and “Neck.” It sounds small, but clear layer names save a lot of time later.
Step 2: Cut out the garment with a clipping path
Use the Pen Tool to draw a path around the garment on the front layer. Leave out the mannequin’s neck, shoulders, and any visible stand. A hand-drawn clipping path gives clean, sharp edges that auto tools often miss.
For soft or fuzzy fabrics, like knitwear or faux fur, add image masking with Select and Mask. This keeps the fine fibers looking natural.
Step 3: Remove the mannequin
Turn your path into a selection and add a layer mask. The mannequin and background disappear. Now you’ll see an empty gap at the neck and maybe at the sleeves. That’s normal.
Step 4: Prepare the inside neck part
Go to the neck layer. Cut out only the inner collar area, the part that will show through the opening. Mask out everything else.
Step 5: Join the neck (neck joint editing)
Move the neck layer below the front layer. Use Free Transform (Ctrl or Cmd + T) to scale and rotate it until it fits the opening. Use the Warp tool to match the curve of the collar. The goal is for the inner neck to sit naturally, as if a person’s neck had just stepped out.
This step is the heart of ghost mannequin editing. Take your time here.
Step 6: Blend the joint
Check the edges where the two layers meet. Use a soft brush on the layer mask to smooth any hard lines. If the colors don’t match, add a Curves or Hue/Saturation layer clipped to the neck layer.
Step 7: Add natural shadows
A hollow garment needs shade inside. Create a new layer under the front layer and paint soft dark shadows inside the neck and sleeve openings. Keep opacity low, around 20 to 40 percent. This gives the 3D depth that makes the effect believable.
Step 8: Fix the shape and symmetry
Zoom out and look at the whole item. Are the shoulders even? Do the sides hang straight? Use Liquify gently to fix small bumps from pins or clips.
Step 9: Clean, retouch, and correct color
Remove dust, lint, loose threads, and small wrinkles with the Spot Healing Brush and Clone Stamp. Then do color correction so the photo matches the real product. Wrong color is one of the top reasons for returns.
Step 10: Set the background and export
Place the garment on a pure white background (#FFFFFF) or a transparent one, based on where you’ll use it. Center the product and leave even space around it. Export as JPEG for web, PNG for transparency, and keep a PSD with layers for later changes.
Common Ghost Mannequin Mistakes (and How to Fix Them)
| Mistake | Why it happens | Quick fix |
|---|---|---|
| Flat, lifeless garment | No inner shadows | Paint soft shadows inside openings |
| Neck looks pasted on | Wrong angle or scale | Use Warp to match the collar curve |
| Rough or jagged edges | Auto selection tools | Use a manual Pen Tool clipping path |
| Uneven shoulders | Garment shifted on set | Fix with Liquify, then check symmetry |
| Colors look off | Mixed lighting | Shoot with one light setup, then color correct |
| Mannequin parts still visible | Rushed masking | Zoom to 200% and check every edge |
Pro tips from our editors
- Shoot more than you think you need. An extra back neck shot costs seconds on set but can save an hour in editing.
- Keep a style guide. Write down your crop, margins, shadow style, and background color. Share it with your editor so every batch looks the same.
- Check at 100% zoom before export. Small errors hide at small sizes, but buyers zoom in.
- Don’t overdo Liquify. Too much pushing makes fabric look fake.
- Batch similar items. Edit all T-shirts together, then all jackets. Your speed and consistency both go up.
Clipping Area: Your Premium Post-Production Partner
Ghost mannequin editing takes skill and time. One product can take 15 to 45 minutes to edit well. If you have hundreds of SKUs every week, doing it in-house can slow down your whole launch.
That’s where Clipping Area comes in. Clipping Area is a premium post-production photo retouching agency based in Dhaka, Bangladesh, serving brands worldwide since 2014. We are a complete image editing solution provider for ecommerce brands, fashion labels, photographers, real estate agencies, and marketing agencies.
Our services
- Clipping Path: Hand-drawn paths for sharp, clean cutouts.
- Background Removal: Pure white, transparent, or custom backgrounds.
- Image Masking: For hair, fur, lace, and other fine details.
- Ghost Mannequin: Neck joint, sleeve joint, and full 3D invisible mannequin effects.
- Ecommerce Image Editing: Marketplace-ready photos for Amazon, Shopify, eBay, and more.
- Real Estate Photo Editing: HDR blending, sky replacement, and virtual staging.
- Jewelry Retouching: Clean metal, sparkling stones, and dust-free shine.
- Product Retouching: Spot, scratch, and wrinkle removal with natural results.
- Color Correction: True-to-life color that matches your real product.
- Shadow Creation, Photo Restoration, Video Editing, 3D Rendering, and AI creative services.
Why brands choose Clipping Area
- 10+ years of hands-on apparel and product editing
- Skilled in-house team, not random freelancers
- Fast turnaround, with rush delivery for urgent batches
- Manual quality checks on every image
- Bulk pricing for large catalogs
- Free trial so you can see the quality first
Want to see how your products look with a clean ghost mannequin effect? Send a few images for a free trial and judge the results yourself.
Frequently Asked Questions
What is the ghost mannequin effect?
The ghost mannequin effect is an editing technique that removes the mannequin from a clothing photo and adds the inside neck or sleeve area, so the garment looks 3D and hollow.
How do you create a ghost mannequin effect in Photoshop?
Shoot the front and inside neck of the garment, cut out both with the Pen Tool, remove the mannequin, place the neck layer behind the front, then blend edges and add soft shadows.
Which clothes work best for ghost mannequin photography?
Shirts, T-shirts, jackets, hoodies, dresses, sweaters, and pants all work well. Items with collars or open necklines show the effect best.
How long does ghost mannequin editing take?
A simple T-shirt can take around 15 minutes. A complex jacket with sleeves, hood, and lining can take 45 minutes or more.
Is it better to outsource ghost mannequin editing?
If you have large or regular batches, yes. A skilled editing team gives faster turnaround, consistent results, and frees your team to focus on shooting and selling.
What background is best for ghost mannequin images?
Pure white (#FFFFFF) is the safest choice for marketplaces like Amazon. A transparent PNG is useful for websites and ads with custom layouts.
Final Thoughts
Ghost mannequin photography gives your clothing a clean, 3D look that helps buyers understand fit and shape at a glance. The secret is simple: shoot carefully, take every angle you need, and edit with patience, especially at the neck joint and shadows.
You can learn and do it yourself with the steps above. But if your catalog is growing and time is short, let the experts handle it. Clipping Area has helped brands around the world turn plain mannequin shots into store-ready product images for more than a decade. Get your free trial today and see the difference on your own products.