In today’s competitive real estate market, buyers make decisions in seconds — often before reading a single word of a listing description. What stops their scroll isn’t the price or location first.
It’s the photos.
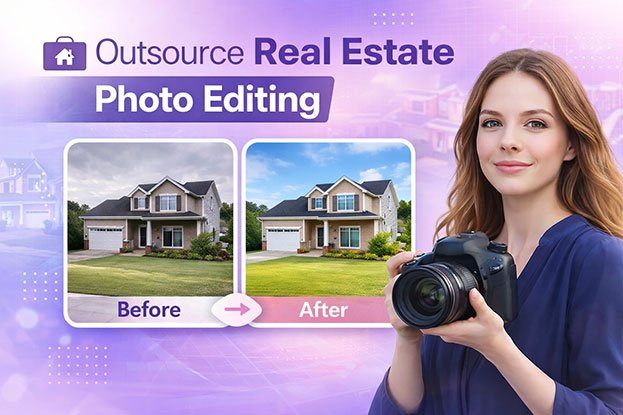
If your listing images look dark, dull, cluttered, or unbalanced, buyers move on — even if the property itself is excellent. That’s why understanding and applying the right real estate photo editing tips is no longer optional. It’s essential.
At Clipping Area, we provide professional real estate photo editing services that transform ordinary property images into high-impact visuals that attract buyers and help properties sell faster. In this guide, we’ll share the top 10 proven real estate photo editing tips used by professionals to improve listing performance and close deals quicker.
📸 Why Real Estate Photo Editing Is Critical
Before diving into the tips, let’s understand why real estate photo editing matters so much.
-
Homes with high-quality photos sell up to 32% faster
-
Professionally edited listings receive more clicks, saves, and inquiries
-
Enhanced images often help properties command higher perceived value
Buyers form emotional judgments instantly. Poor lighting, crooked lines, or cluttered scenes signal low quality and reduce trust — even when the home is perfect in real life. This is why professional HDR photo editing play a crucial role in modern property marketing.
✅ 1. Enhance Brightness and Contrast for a Welcoming Feel
Raw camera images often appear flat or underexposed. Proper brightness and contrast adjustment is the foundation of great real estate photo editing.
What to do:
-
Increase exposure slightly to brighten shadow areas
-
Adjust contrast to add depth and clarity
-
Protect window highlights from overexposure
Why it works:
Bright, well-lit images make rooms feel larger, cleaner, and more inviting. Dark photos subconsciously reduce buyer interest.
✅ 2. Perform Sky Replacement to Boost Curb Appeal
A gray or overcast sky can ruin an exterior shot — even for beautiful properties.
What to do:
-
Replace dull skies with realistic blue or lightly clouded skies
-
Match sky lighting with the home’s natural light direction
-
Avoid over-saturated or unrealistic skies
Why it works:
Sky replacement instantly improves first impressions and emotional appeal, increasing clicks on listing thumbnails.
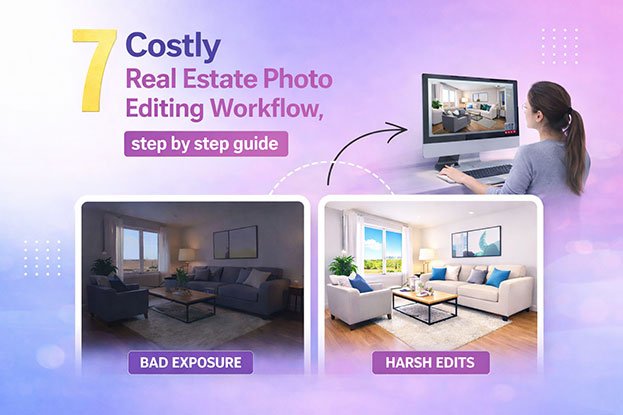
✅ 3. Use HDR Blending for Balanced Exposure
Interior photos often struggle with bright windows and dark rooms in the same shot.
Solution: HDR (High Dynamic Range) blending.
What to do:
-
Capture 3–5 bracketed exposures
-
Blend them to balance highlights and shadows
-
Maintain a natural, MLS-compliant look
Why it works:
HDR blending produces evenly lit images that reflect how spaces actually look to the human eye.
✅ 4. Remove Unwanted Objects and Visual Distractions
Clutter pulls attention away from the space itself.
What to remove:
-
Power cords, trash bins, cars, reflections
-
Wall stains, dust spots, glare
-
Temporary or personal items
Why it works:
Clean, distraction-free images help buyers focus on the property — not the mess.
✅ 5. Correct Perspective for a Professional Look
Wide-angle lenses can distort walls, furniture, and doorframes.
What to do:
-
Straighten vertical and horizontal lines
-
Correct lens distortion
-
Align walls, counters, and windows
Why it works:
Perspective correction improves realism and professionalism, building buyer trust instantly.
✅ 6. Add Virtual Staging to Empty Rooms
Empty rooms feel cold and make it hard for buyers to imagine living there.
What to do:
-
Add realistic furniture, décor, and rugs
-
Match the style to the target buyer
-
Use natural shadows for realism
Why it works:
According to industry data, 82% of buyers say staging helps them visualize a home, increasing emotional connection.
✅ 7. Convert Day Photos to Twilight (Day to Dusk)
Twilight photos create warmth, luxury, and mood.
What to do:
-
Replace daytime skies with dusk tones
-
Add warm interior lighting glow
-
Balance exterior shadows naturally
Why it works:
Twilight images generate higher engagement, especially on Zillow, Airbnb, and premium listings.
✅ 8. Adjust White Balance for Accurate Colors
Mixed lighting often causes yellow, blue, or green color casts.
What to do:
-
Neutralize lighting for true wall and furniture colors
-
Balance highlights and shadows
-
Avoid overly warm or cool tones
Why it works:
Accurate colors improve buyer trust and prevent disappointment during in-person viewings.
✅ 9. Sharpen Images for Web and Mobile Viewing
Most listings are viewed on smartphones.
What to do:
-
Apply subtle sharpening to edges and textures
-
Avoid over-sharpening or halos
-
Optimize for both desktop and mobile screens
Why it works:
Crisp images stand out on small screens and increase engagement.
✅ 10. Optimize Image Size for Speed and SEO
Large image files slow down websites and hurt SEO.
What to do:
-
Resize images to platform standards (e.g., 1200×800 px)
-
Compress images without losing quality
-
Use SEO-friendly filenames and ALT text
Why it works:
Fast-loading images improve Google rankings, user experience, and conversion rates.
🏡 Real-Life Case Studies: How Professional Photo Editing Helped Properties Sell Faster
At Clipping Area, we’ve worked with real estate professionals across different markets and property types. Below are detailed real-world case studies showing how strategic real estate photo editing directly improved listing performance.
📊 Case Study #1: Virtual Staging Increased Listing Views by 47% (USA)
Client Type: Residential real estate agent
Location: California, USA
Property Type: Vacant 3-bedroom single-family home
The Challenge
The property was vacant, clean, and competitively priced—but online engagement was low. Buyers struggled to visualize how the space could be used. Empty rooms looked cold and uninviting, especially in listing thumbnails.
Despite good location and pricing, the listing received:
-
Low click-through rates
-
Few saves on Zillow
-
Limited showing requests
The Solution
The agent partnered with Clipping Area’s real estate photo editing service and requested virtual staging for key rooms:
-
Living room
-
Master bedroom
-
Dining area
We added realistic furniture, décor, and natural shadows while maintaining MLS compliance and accurate room proportions.
The Results
Within 14 days of updating the listing photos:
-
📈 47% increase in listing views
-
❤️ Noticeable rise in saves and shares
-
📅 More showing requests compared to the previous two weeks
Key Insight:
Virtual staging helped buyers emotionally connect with the property, even before visiting in person.
🌆 Case Study #2: Twilight Editing Doubled Inquiries for a Rental Listing (Australia)
Client Type: Short-term rental owner
Location: Sydney, Australia
Property Type: Luxury apartment
The Challenge
The apartment had excellent interiors, but exterior photos were shot during the daytime under flat lighting. The listing blended in with competitors and failed to stand out on Airbnb and Booking.com.
The Solution
The client used our day-to-dusk (twilight) photo editing service:
-
Replaced the daytime sky with a natural twilight tone
-
Added warm interior lighting glow
-
Balanced shadows and highlights for a premium look
The Results
After updating the listing images:
-
📩 2× increase in inquiries
-
⭐ Higher engagement on listing platforms
-
💬 Guests mentioned the “luxury feel” of the property
Key Insight:
Twilight photos created emotion and exclusivity, making the property stand out in crowded rental searches.
🇬🇧 Case Study #3: Sky Replacement & Object Removal Helped Sell a Property 3 Weeks Faster (UK)
Client Type: Property broker
Location: London, UK
Property Type: Townhouse
The Challenge
Exterior photos were taken on an overcast day. The sky was gray, and several distracting elements (cars, bins, street clutter) reduced curb appeal.
The broker felt the listing didn’t reflect the property’s true value.
The Solution
We applied:
-
Sky replacement with a realistic blue sky
-
Object removal to clean up the exterior
-
Light contrast and color enhancement
No structural changes were made—only accurate real estate image enhancement.
The Results
-
⏱ Property sold 3 weeks faster than similar homes in the area
-
👀 More exterior photo engagement
Key Insight:
First impressions matter. Clean, bright exterior images increase buyer confidence immediately.
🏢 Case Study #4: Perspective Correction Improved Buyer Trust (Canada)
Client Type: Real estate photographer
Location: Toronto, Canada
Property Type: Condo listing
The Challenge
Wide-angle lens distortion made walls appear slanted and rooms look unrealistic. Buyers questioned room dimensions during viewings.
The Solution
We performed:
-
Vertical and horizontal perspective correction
-
Lens distortion fixes
-
Subtle sharpening and clarity enhancement
The Results
-
📸 Cleaner, more realistic images
-
💬 Fewer buyer objections during showings
-
🤝 Photographer secured repeat contracts with the agent
Key Insight:
Accurate visuals build trust and prevent disappointment during in-person visits.
📌 What These Case Studies Prove
Across different countries and property types, professional HDR photo editing consistently deliver:
-
Higher listing visibility
-
Stronger emotional connection
-
Increased inquiries and showings
-
Faster sales or bookings
Most importantly, the property itself never changed — only the photos did.
🔗 How These Tips Help Grow Your Real Estate Business
-
Photographers: Deliver premium-quality images that win repeat clients
-
Realtors: Close deals faster with scroll-stopping visuals
-
Developers: Attract investors with polished project images
-
Short-Term Rentals: Increase bookings on Airbnb & Booking.com
Applying these real estate photo editing tips consistently gives you a powerful competitive edge.
🚀 Get Started with Professional Real Estate Photo Editing
You don’t need to master Photoshop to get professional results.
Let Clipping Area handle your real estate photo editing service, so you can focus on marketing and closing deals.
When Professional Editing Makes Sense
✅ 24/7 turnaround available
✅ 100% hand-edited by experts
✅ Free trial available
✅ Secure & confidential workflow
✅ Bulk discounts for agencies & photographers
👉 Try Our Real Estate Photo Editing Service
👉 Contact Us for a Free Quote
✍️ Final Thoughts
In real estate, photos are your first impression — and often your only chance to win attention.
By applying the right real estate photo editing tips, you can:
-
Increase listing engagement
-
Build buyer trust
-
Sell properties faster
-
Maximize commissions
Whether you’re a photographer, agent, or property owner, investing in professional real estate photo editing is one of the smartest decisions you can make in today’s visual-first market.