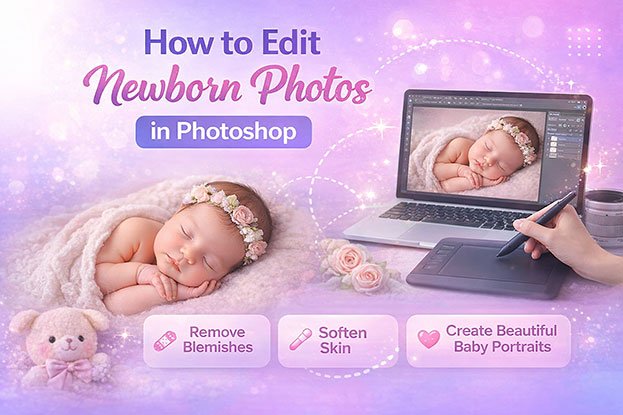
Editing newborn images requires a soft, careful approach. In this guide, you’ll learn how to edit newborn photos in Photoshop step by step to create clean, natural, and professional-looking baby portraits.
From removing blemishes to smoothing skin and balancing tones, these techniques will help you enhance your images while preserving the baby’s natural beauty.
Opening Newborn Photos in Photoshop
Your journey starts with a single click – Starting by importing your image into Photoshop where the magic begins. This initial step is crucial in creating a safe environment for the photograph from which you’ll craft the final masterpiece.
Step-By-Step Guide to Opening a Newborn Photo
✔ Choose the Right Photo
Select an image with soft, natural lighting and minimal harsh shadows. A well-exposed photo makes editing much easier and more effective.
✔ Duplicate the Layer
After opening your image in Photoshop, duplicate the background layer.
This ensures:
Non-destructive editing
Easy before-and-after comparison
Full control over adjustments
Learn More: How To Edit Wedding Photos In Photoshop Like A Pro
Removing the Blemishes
Newborn skin can sometimes feature blemishes that, though temporary, detract from the overall charm of the photo. The Clone Stamp Tool in Photoshop is your best ally in achieving a flawless complexion for these innocent subjects.
Mastering the Clone Stamp Tool
Definition and Purpose
The Clone Stamp Tool is used for pixel-based duplication, which makes it ideal for restoring, repairing, and touching up images. This tool is very powerful in removing blemishes while maintaining as much of the original skin as possible.
Utilizing Soft and Hard Edges
The tool’s softness or hardness can be adjusted to specify how soft or firm the edges of the cloned area should be. In the case of newborn photos, a softer edge is generally more favorable for blending skin tones effectively.
Blemish Removal Best Practices
- Adjust the brush size to be slightly larger than the blemish you wish to remove.
- Sample an area of clean, similar skin by holding down the ‘Alt’ key while clicking.
- Begin painting over the blemish, ensuring you follow the contours of the face for a natural blend.
- Step backward on your action if you feel the edited area is starting to look ‘cloned’ rather than ‘blended’.
Learn More: How To Edit Headshots In Photoshop
Reducing the Redness of Babies’ Complexion
It’s not uncommon for newborns to have a reddish hue to their skin. While this can be charming in person, it often translates as an unwanted feature in photography. Reducing this redness improves the overall aesthetic appeal of the image by providing a more calm and natural skin tone.
Using Adjustment Layers for Redness Reduction
Adjustment layers allow you to make changes to your image without permanently changing the pixels. Applying the ‘Hue/Saturation’ adjustment layer is a non-destructive way to reduce redness.
Reducing Red Saturation
Select the reds within the ‘Hue/Saturation’ adjustment layer by using the drop-down menu. Reduce the saturation level to a point where the redness becomes muted but not completely desaturated. You want to maintain the richness of the skin tone while eliminating overbearing redness.
Reducing the Saturation Level
In continuing to create a soft and natural look, reducing the overall saturation level is crucial. This step protects the delicate nature of newborn skin, preventing it from appearing overly shiny or unnatural in the final image.
The Importance of Subtle Saturation Adjustments
Enhancing the Softness
By gently desaturating the image, you diminish the risk of making the skin tone or environment appear too vibrant or harsh. Over-saturation is a common pitfall in editing newborn photos, leading to images that lack the tranquility expected of baby portraits.
Protecting the Original Tones
When desaturating, be mindful of which colors are being affected. Avoid desaturating skin tones too much, as this could strip them of the natural warmth that characterizes a baby’s complexion.
Learn More: How To Add Drop Shadow To Text In Photoshop
Duplicating the Layer
Right before continuing with any major edits, duplicating the layer ensures that you always have a point of reference back to the unaltered image. This is an essential practice that safeguards you from unintentional image degradation.
Always Work with Safety Nets
Even if you’ve completed previous steps without duplicate layers, it’s not too late to start. Developing a habit of duplicating your layers before substantial changes will serve you well in your photographic journey.
Naming Conventions
When you have many layers, especially duplicate layers, naming them appropriately lets you quickly identify the purpose and sequence of each layer. This organization makes the editing process much more manageable and efficient.
Adding Gaussian Blur Layer to Smoothen Skin
For editing infant photography, using a Gaussian Blur layer strategically softens the baby’s skin, creating an adorable, almost porcelain-like effect. But it’s not about erasing features; it’s about enhancing the natural softness and minimally sharpening focus.
Applying Gaussian Blur While Preserving Detail
Layer and Filter Application
Create a new layer and navigate to ‘Filter’ > ‘Blur’ > ‘Gaussian Blur.’ Increasing the radius to a point just before the skin starts to lose its texture is the sweet spot.
Masking the Effect
To ensure the smoothness is appropriately applied only to the skin, use the Paintbrush Tool with a soft black brush to hide the Gaussian Blur effect from areas you don’t want to be affected, like the eyes or lips.
Adjusting Radius Percentage
The effectiveness of the blurring effect is highly dependent on the radius percentage you choose. Understanding how to adjust this percentage allows for a personalized touch in crafting the final look.
Defining the ‘Just Right’ Blur
Subtle Adjustments
Tweaking the radius percentage by a small amount can dramatically change the outcome. Be prepared to experiment, considering factors such as the resolution and quality of the original image.
Natural Skin Textures
Keep an eye on the skin’s natural textures as you refine the blur. You want the effect to be noticeable for its softness but not to the extent that it masks the intricacies of the newborn’s skin.
🧪 Case Study: How to Edit Newborn Photos in Photoshop (Real Example)
📸 The Challenge
A professional photographer captured a beautiful newborn session, but the raw image had a few common issues:
Slight redness on the baby’s skin
Small blemishes and flaky skin
Uneven lighting on the face
Lack of that soft, dreamy newborn feel
The client wanted a natural, clean, and soft finish without making the baby look overly edited.
🛠️ The Editing Process
To achieve the desired result, the following Photoshop workflow was applied:
1. Non-Destructive Setup
The image was opened in Photoshop
A duplicate layer was created to preserve the original
2. Blemish Removal
The Clone Stamp Tool was used carefully
Soft brush applied to remove flakes and minor spots
Skin texture was preserved to avoid plastic look
3. Redness Reduction
A Hue/Saturation adjustment layer was used
Reds were selectively reduced
Maintained natural warmth of baby skin
4. Skin Softening
Applied Gaussian Blur on a separate layer
Used a mask to keep eyes, lips, and details sharp
Focus only on skin areas
5. Final Touches
Slight exposure adjustment for brightness
Minor desaturation for a calm tone
Subtle color grading for a soft pastel look
✨ The Result
After editing, the final image achieved:
Smooth and natural baby skin
Balanced and soft skin tone
Clean, distraction-free appearance
A warm, dreamy, professional finish
The parents were extremely happy, and the image was used for:
Photo albums
Social media
Print framing
🏁 Final Thoughts
Learning how to edit newborn photos in Photoshop takes time and practice, but mastering these techniques will help you create stunning and timeless images.
Focus on subtle edits, maintain natural beauty, and always work using non-destructive methods for the best results.
FAQs
❓ How do you edit newborn photos in Photoshop step by step?
To edit newborn photos in Photoshop, duplicate the layer, remove blemishes using the Clone Stamp Tool, reduce redness with Hue/Saturation, smooth skin with Gaussian Blur, and adjust exposure and colors for a soft, natural finish.
❓ What is the best way to smooth baby skin in Photoshop?
The best method is using Gaussian Blur on a separate layer with a mask, applying it only to the skin while keeping details like eyes and lips sharp.
❓ How can I remove redness from newborn photos?
Use a Hue/Saturation adjustment layer, select the red tones, and reduce saturation slightly to achieve a natural and balanced skin tone.
❓ What are common mistakes in newborn photo editing?
Common mistakes include over-smoothing skin, removing natural texture, and applying heavy edits that make the image look unrealistic.
❓ What tools are used for newborn photo editing in Photoshop?
The most useful tools include Clone Stamp Tool, Healing Brush, Gaussian Blur, and adjustment layers like Hue/Saturation and Levels.
💰 Need Professional Help?
Need help editing newborn photos like this?
We provide high-quality newborn photo editing services with fast turnaround, consistent quality, and natural results that your clients will love.