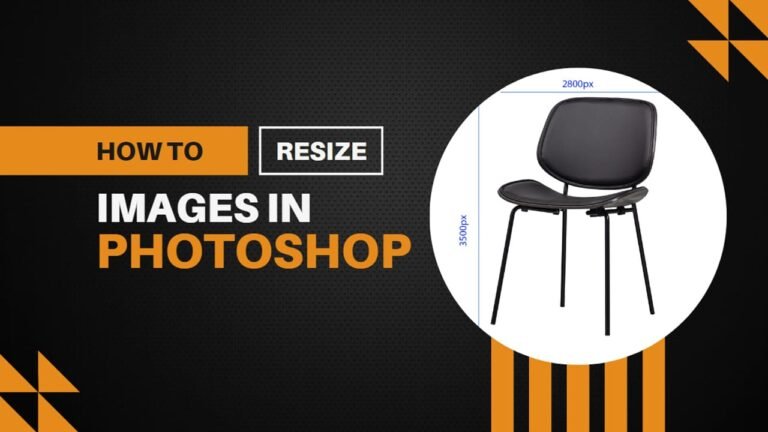
Adobe Photoshop remains the go-to software for digital artists and photographers for editing and enhancing images. Whether you’re a blogger looking to size photos perfectly for your site, a photographer aiming to adjust images for print, or just someone wanting to make household images fit for a new digital frame, knowing how to resize an image in Photoshop is a fundamental skill. This comprehensive guide will walk you through the basics of image dimensions and resolution, provide a step-by-step tutorial on resizing images, and share tips on enlarging photos without losing quality. By the time you complete this tutorial, you’ll not only learn how to resize an image using Photoshop but also understand how to maintain its original quality and aspect ratio.
Understanding the Basics of Image Size and Resolution in Photoshop
What is the Difference Between DPI and PPI?
DPI (Dots Per Inch) and PPI (Pixels Per Inch) are both measurements that describe the resolution of an image. However, DPI refers to the density of ink dots on a printed image, while PPI refers to the density of pixels in a digital image displayed on screens. Understanding this distinction is crucial when preparing to resize images in Photoshop, as altering PPI affects the quality of your image on digital platforms without influencing its physical print size.
How Do Image Size and Resolution Affect File Size?
The image size, when discussed in terms of pixel dimensions, directly impacts the file size of your image. Higher resolution images, with more pixels crammed per inch, result in larger file sizes. This is important when you’re working with Adobe Photoshop, as larger file sizes can slow down your editing process. Knowing how to manipulate the size of an image without unnecessarily inflating the file size is a valuable skill for efficient editing.
Introduction to Resampling: What It Means and When to Use It
Resampling in Photoshop is the process of changing the amount of image data as you resize the image. When you resample, Photoshop adjusts the pixel dimensions of the image, either adding pixels to enlarge an image (upsampling) or removing pixels to reduce an image’s size (downsampling). Deciding when to resample depends on your end goal for the resized image, and whether quality or file size takes precedence.
Step-by-Step Guide to Resize Image in Photoshop
Choosing the Right Measurement for Your Needs
Before resizing your image in Adobe Photoshop, identify the unit of measurement that best fits your needs. Photoshop offers multiple units, including pixels for digital platforms, inches or centimeters for printing, and even percentages for proportional scaling. Use the Image Size dialog box to switch between different measurements effortlessly.
Adjusting the Width and Height: How to Maintain Aspect Ratio
When you adjust the width and height of an image, maintaining the aspect ratio is crucial to avoid distorting the image. The aspect ratio locks the relationship between the width and height of an image. To maintain this proportion in Photoshop, you can simply check the “Constrain Proportions” option in the Image Size dialog box before you start to resize the image. This ensures that your resized image retains the original dimensions’ balance.
Resizing Without Losing Quality: Tips and Tricks
To resize an image in Photoshop without losing quality, start by inspecting the original size and resolution of your image. Resizing images to a smaller dimension is straightforward and typically does not affect quality. However, enlarging an image demands caution. Use the “Resample” option with settings like “Preserve Details” for enlargement to help maintain image quality. Also, adjust the resolution as necessary, keeping in mind the intended use of your resized image (e.g., print vs. web).
How to Enlarge Images in Photoshop Without Compromising on Quality
Understanding the Limits of Enlarging Images
It’s important to understand the natural limits when you want to resize an image, especially for enlargement in Adobe Photoshop. Enlarging an image too much can result in a loss of quality, as the software interpolates pixels, adding new ones based on surrounding color values. This often leads to images appearing blurry or pixelated.
Using Smart Resampling to Preserve Image Quality
The newer versions of Photoshop include advanced resampling algorithms designed to preserve as much quality as possible when you resize an image. “Preserve Details 2.0” is one such technique that utilizes artificial intelligence to intelligently upscale images, aiming to keep the enlargement smooth and the edges defined.
Practical Tips for Enlarging Photos in Adobe Photoshop
When attempting to enlarge a photo in Photoshop, start with the highest resolution version of the original image to ensure the best possible outcome. Incrementally adjust the size of your image, increasing by small percentages and assessing the quality. Continuously preview the changes to ensure the resized image remains clear and detailed. This gradual process helps in preventing the image from becoming overly pixelated.
Advanced Techniques for Resizing: Exploring Photoshop’s Features
How to Use Photoshop’s Advanced Resizing Tool for Precise Adjustments
Photoshop’s advanced features offer precise control over the resizing process. The “Content-Aware Scale” option, for instance, allows you to resize specific portions of your image with minimal quality loss. This tool is particularly useful for complex compositions where standard scaling may compromise important details.
Constrain Proportions: Ensuring Your Image Remains Balanced
As previously mentioned, maintaining your image’s aspect ratio is vital to ensuring it remains balanced and proportionate. The “Constrain Proportions” feature in Photoshop is a safeguard against accidentally stretching or squashing your images, which could distort important features or subjects within the photo.
The Role of Photoshop Actions in Streamlining the Resizing Process
For those who frequently resize images in Photoshop, Actions can be a significant time-saver. Actions allow you to record a sequence of steps — like resizing an image to a specific width and height — and replay them with just a click. This automation not only streamlines your workflow but ensures consistency across multiple images.
Following a Tutorial: Common Mistakes and How to Avoid Them
Resizing vs. Resampling: Are You Doing It Right?
One common mistake when resizing images in Photoshop is confusing resizing with resampling. Remember, resizing changes the size of the image without altering its pixel dimensions, ideal for changing print dimensions. In contrast, resampling adjusts the pixel dimensions and can affect the image file’s quality. Ensure you have chosen the correct option according to your project’s needs.
Why Your Resized Images May Look Blurry and How to Fix This
If your resized images appear blurry, it could be due to excessive upscaling or a mismatch in resolution for the intended use. Always aim to resize in small increments and use the appropriate resampling method. Additionally, check if “Preserve Details” is selected during upscaling, as this feature is designed to maintain sharpness.
Avoiding Pixilation: Best Practices for Resizing Images in Adobe Photoshop
To avoid pixilation, start with the highest quality original image possible and understand the limitations of how much you can safely enlarge it. Utilize the smart resampling options available in Photoshop and consider the final output resolution. Incremental adjustments and constant previews are your best practices to ensure your image remains clear and retains its intended quality.
Q: How do I properly resize an image in Photoshop?
A: To properly resize an image in Photoshop, start by opening the image file you want to adjust. Then, navigate to the “Image” menu and select “Image Size.” This brings up the image size command dialog box where you can change the image width, height, resolution, or document size to the size you want. Remember to keep the link icon between the width and height boxes clicked to maintain the aspect ratio of the image, ensuring the image stays intact without changing its appearance.
Q: What is the best way to maintain the aspect ratio of the image when resizing?
A: The best way to maintain the aspect ratio of the image when resizing is to make sure the link icon to the right of the width and height boxes in the image size command dialog is activated. This automatically adjusts the height when you change the width or vice versa, keeping the same aspect ratio and preventing the image from distorting.
Q: Can I change the resolution of an image without changing its physical size?
A: Yes, you can change the resolution of an image without altering its physical size. In the Image Size dialog, uncheck the “Resample” box to disable the number of pixels in the image from changing. Then, you can change the resolution—the number of pixels per inch (PPI)—which alters the print size (document size) but keeps the total pixel count (and thus the file size) the same, allowing the image resolutions to adjust without affecting the physical dimensions of the image onscreen.
Q: What is the best interpolation method to use when enlarging an image?
A: When enlarging an image, the best interpolation method to use is “Preserve Details 2.0” if available, or “Bicubic Smoother.” These methods provide a more precise method for adjusting the scale of an image by examining and interpolating the surrounding pixels, resulting in a smoother and more detailed enlargement.
Q: How do I reduce the size of an image file for web without losing quality?
A: To reduce the size of an image file for the web without significant loss of quality, first resize the image to the desired size using the Image Size command. Choose “Bicubic Sharper” from the “Resample” drop-down menu, which is best for reducing the size but keeping the details sharp. Then, adjust the number of pixels to make the file size smaller. Finally, use the “Save for Web” option in the “File” menu, which allows further optimization and adjustment of the file size while maintaining image quality.
Q: How do I scale an image to a specific size, like 8×10?
A: To scale an image to a specific size like 8×10, open the Image Size dialog and enter 10 into the width or height box, depending on the orientation of your image. Make sure the link icon is checked to maintain aspect ratio. If the resulting dimensions do not match the other dimension you desire, you may need to crop your image using the Crop Tool to get the exact dimensions without changing the aspect ratio.
Q: Is there a way to resize multiple images at once in Photoshop?
A: Yes, you can resize multiple images at once in Photoshop using the Batch processing feature or Image Processor script. Add all the images you want to resize in a single folder, navigate to File > Scripts > Image Processor, select the folder, then specify the desired image size, resolution, and file type. Photoshop will process all the images according to your settings, saving time when working with a large number of files.
Q: What should I do if I want to change the dimensions of an image without cropping it?
A: If you wish to change the dimensions of an image without cropping, you can adjust the canvas size instead of the image size. Go to Image > Canvas Size, enter the new width or height, and choose how you want the existing image to fit into the new dimensions. This technique adds or removes canvas space around the image, effectively changing its dimensions without altering the original image file’s content.