Clothing is one of the hardest things to sell online. Shoppers can’t touch the fabric. They can’t try it on. They can’t check how the collar sits or whether the color looks the same in daylight. The only thing they have is your photos.
That’s why ecommerce clothing photography does more work than almost any other part of your store. Good apparel photos answer questions before the shopper asks them. Poor ones create doubt, and doubt kills sales (or brings the item back as a return two weeks later).
At Clipping Area, we’ve edited clothing images for fashion brands, boutiques, Amazon sellers, and apparel manufacturers since 2014. We see the raw files before they become polished product photos. So we know exactly where most clothing shoots go wrong, and what small changes make the biggest difference.
This guide covers all of it. Gear, setup, styling, lighting, shot lists, platform rules, and editing. Practical advice you can use on your next shoot.
What Makes a Clothing Product Photo Sell?
Before we get into cameras and lights, let’s be clear about the goal.
A clothing photo that sells does five things:
- Shows the true color. Wrong color is one of the top reasons fashion items get returned.
- Shows the fit and shape. Shoppers want to know how the garment hangs on a body.
- Shows the fabric. Texture tells people whether something is soft, structured, stretchy, or heavy.
- Shows the details. Buttons, zippers, stitching, labels, pockets, and prints.
- Looks consistent with the rest of the store. A clean, uniform catalog builds trust. A messy one looks like a side hustle.
Every tip below supports one or more of these five goals. If a shot doesn’t help the shopper understand the product, it doesn’t belong on the product page.
Choose the Right Presentation Style: Model, Mannequin, or Flat Lay
This is the first big decision in any clothing shoot. Each style has a place. The right choice depends on your product, budget, brand, and sales channel.
On-Model Photography
Photographing clothes on a real person shows fit, movement, and scale better than anything else. It also helps shoppers picture themselves wearing the item.
Best for: Fashion brands, premium apparel, dresses, activewear, swimwear, and anything where fit is the main selling point.
Downsides: It’s the most expensive option. You pay for models, hair and makeup, and longer shoot days. It’s also harder to keep consistent across hundreds of SKUs.
Tip: Always list the model’s height and the size they’re wearing in the product description. It’s free, and it answers one of the most common customer questions.
Ghost Mannequin (Invisible Mannequin)
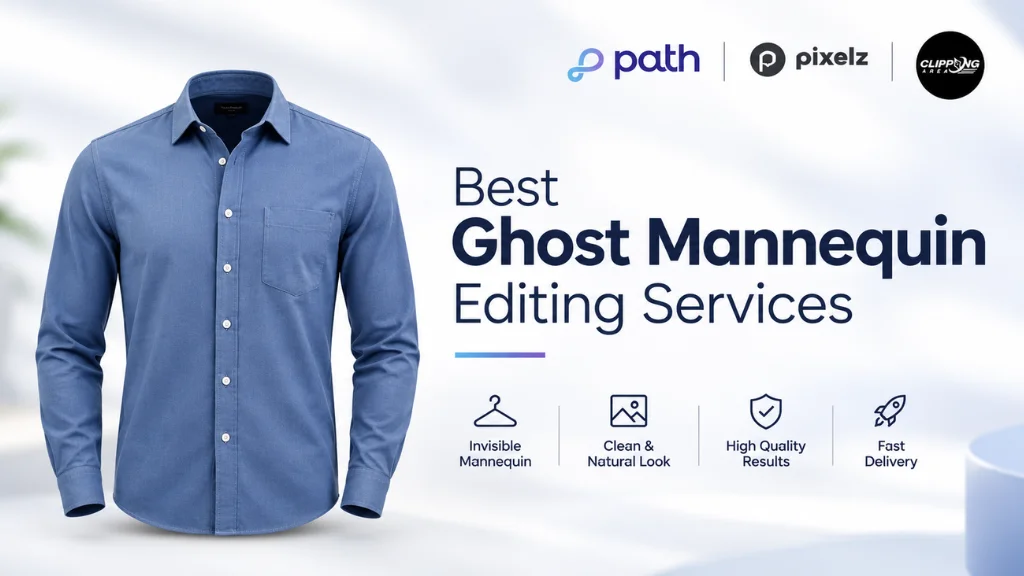
Here, the garment is photographed on a mannequin, and the mannequin is removed in editing. The result looks like the clothing is being worn by an invisible person. You see the shape, the neckline, and the inside back of the collar, without any distraction.
Best for: Shirts, jackets, hoodies, t-shirts, knitwear, and brands that want a clean, uniform catalog at scale.
Downsides: It needs careful shooting (usually a front shot plus an inside neck shot) and skilled post-production to blend the images.
Ghost mannequin is also a smart choice for Amazon. Amazon’s main image rules for apparel don’t allow a visible mannequin, so the invisible mannequin effect gives you shape without breaking the rules.
Flat Lay Photography
The garment is laid flat on a surface and photographed from directly above.
Best for: Kids’ and baby clothing, t-shirts, accessories, socks, and small brands starting on a tight budget. Amazon actually requires children’s and baby clothing to be shown flat, off-model, in main images.
Downsides: Flat lays don’t show fit or drape very well. They can look lifeless if the garment isn’t styled carefully.
Tip: Don’t lay the garment perfectly flat like it’s been ironed onto the floor. Tuck the sides slightly to suggest a body shape, and fold sleeves naturally. Small touches make a big difference.
Hanging Shots
Clothes on a hanger against a wall or backdrop. Quick and cheap, but they often look unprofessional because of creasing and a floppy shape. Use them for social content or casual lifestyle shots, not as main product images.
Which One Should You Choose?
Many successful stores mix styles. A common setup that works well:
- Main image: Ghost mannequin or flat lay on a white background.
- Secondary images: On-model front, side, and back.
- Detail shots: Close-ups of fabric and features.
- Lifestyle shot: The garment in a real setting.
This gives shoppers a clean, consistent first impression plus the context they need to buy.
What Camera Is Best for Clothing Photography?
You don’t need an expensive camera to create great apparel photos. You need a camera that gives you control and consistency.
What to look for:
- Mirrorless body with 24 megapixels or more. That’s more than enough for Shopify, Amazon, and zoom-enabled product pages. Go higher (around 40MP) if you crop often or shoot print catalogs.
- RAW shooting. RAW files hold far more color and detail information than JPEGs, which makes accurate color correction much easier later.
- Tethered shooting support. Connecting the camera to a laptop lets you check color, wrinkles, and fit on a big screen as you shoot.
- Articulating screen. Very helpful for overhead flat lays.
APS-C or full-frame both work well for studio clothing photography. When you control the lighting, sensor size matters much less than good technique.
Can you use a smartphone? For social media and very small stores just starting out, a recent phone with good lighting can work. But phones tend to over-process color and texture, and their wide lenses distort garment shapes. If you’re building a serious clothing brand, a dedicated camera is worth it.
What Lens Should You Use for Apparel Photography?
The lens often matters more than the camera.
- 24-70mm zoom: The most flexible choice for clothing. Wide enough for full-length model shots in smaller studios, long enough for half-body and detail work.
- 50mm prime: Sharp, affordable, and great for ghost mannequin and flat lay work.
- 85mm prime: Excellent for on-model shots. It keeps body proportions natural and flattering.
- Macro lens (60mm to 100mm): For fabric texture, embroidery, stitching, and label close-ups.
Avoid shooting clothing with a wide angle up close. Wide lenses stretch the parts of the garment nearest to the camera. A shirt can look boxy at the bottom or oversized at the shoulders. Step back and zoom in instead.
Lighting for Clothing Photography
Lighting decides whether fabric looks rich and textured or flat and cheap.
Use Soft, Even Light
For most ecommerce clothing photography, you want soft light. Soft light wraps around the garment and creates gentle shadows. Hard light (like direct sun or a bare bulb) creates harsh shadows and hides detail.
A simple setup that works for most brands:
- Two lights with large softboxes, one on each side of the garment, angled at about 45 degrees.
- One light on the background if you want a clean white backdrop straight out of camera.
- A reflector or white foam board to fill in any dark areas.
Strobes or Continuous Lights?
Strobes (flash) are more powerful and freeze any movement, which is useful for on-model shots.
Continuous LED lights show you exactly what you’ll get in real time and are easier for beginners. They’re also better if you shoot product video.
Both work. What matters most is using the same setup every time.
Watch Out for These Lighting Problems
- Dark fabrics swallowing detail. Black clothing needs more light and sometimes a side light to show texture.
- White fabrics blowing out. White garments on white backgrounds need careful exposure so you keep the fabric texture.
- Shiny fabrics showing hot spots. Satin, leather, and sequins reflect light. Move lights further back or use bigger diffusion.
- Mixed light sources. Don’t mix window light with studio lights. Different light colors make accurate color correction much harder.
Get the Color Right (This Is Where Returns Start)
If a customer orders a “dusty rose” sweater and receives something closer to salmon, they’re sending it back. Color accuracy is not a nice-to-have in clothing photography. It’s a direct cost to your business.
Here’s how to protect color accuracy:
- Set a custom white balance at the start of every shoot using a gray card. White balance is the camera setting that makes whites look white instead of yellow or blue.
- Photograph a color checker card in the first frame under your lighting. Your editor can use it as a reference.
- Keep the actual garment nearby during editing so colors can be checked against the real thing.
- Use a calibrated monitor for editing. An uncalibrated screen can make you “fix” colors that were already right.
- Check color on more than one device. Most shoppers will see your photos on a phone.
When clients send us RAW files with a color reference shot, our color correction is faster and far more accurate. It’s one of the easiest ways to improve your results.
Prepare the Garment Before You Shoot
This is the step most people rush. It’s also the step that saves the most editing time.
Steam Everything
Wrinkles are the most common problem we remove in clothing photo editing. A handheld or standing garment steamer is one of the best investments a clothing brand can make. Steam every item right before it goes in front of the camera.
Remove Lint, Threads, and Tags
Use a lint roller. Trim loose threads. Remove or hide store tags, stickers, and plastic fasteners. These small things are easy to fix before the shoot and annoying to fix after.
Style the Fit
Use clips, pins, and tape behind the garment (out of camera view) to shape it. A shirt that’s slightly too big for the mannequin can be pinned at the back for a sharp, tailored fit. Just make sure the styling is honest. Don’t make a garment look like a different fit than it really is. That leads to returns.
Check the Details
Zip zippers fully. Button every button. Straighten collars and cuffs. Make sure drawstrings are even. Shoppers notice when a hoodie’s strings hang at different lengths.
Keep Your Setup Consistent
When a shopper browses a category page, they see dozens of your products side by side. If one shirt is shot from a higher angle, another is slightly warmer in color, and a third fills less of the frame, the whole page looks disorganized.
Consistency is what makes a small brand look like a big one.
Here’s how to keep it tight:
- Mark your floor. Tape the positions of your tripod, lights, and mannequin or model.
- Lock your camera settings. Use manual mode and keep the same aperture, shutter speed, ISO, and white balance for each product type.
- Keep the same camera height and distance for each shot type.
- Use a written shot list so every product gets the same set of angles.
- Save editing presets for each category (tops, bottoms, outerwear).
For stores with hundreds or thousands of SKUs, consistency across batches is also where a professional editing partner helps most. Matching crop, alignment, margins, and color across an entire catalog is detailed, repetitive work.
The Clothing Product Shot List
Here’s a practical shot list that works for most apparel products. Adjust it for your category.
Essential shots:
- Front view (main image)
- Back view
- Side view (shows fit and silhouette)
- Close-up of fabric texture
- Close-up of key details (buttons, zippers, prints, embroidery, pockets)
- Label or care tag (useful for material information)
Extra shots that increase conversions:
- On-model full-length shot to show fit.
- On-model movement shot (walking, turning, arms raised) to show drape and stretch.
- Lifestyle shot in a real setting.
- Inside view for jackets and items with interesting linings.
- Styling shot showing the item paired with other products (great for cross-selling).
- Size comparison or scale shot for accessories and bags.
More images usually help, as long as each one shows something new. Five angles of the same front view doesn’t help anyone.
Camera Settings for Clothing Photography
You don’t need to be a technical expert. These settings work as a starting point for studio apparel photography:
- Mode: Manual
- Aperture: f/8 to f/11 for ghost mannequin and flat lay. This keeps the whole garment sharp from front to back. Use f/4 to f/5.6 for on-model shots if you want a slightly softer background.
- ISO: 100 to 200 for the cleanest image.
- Shutter speed: 1/125 to 1/200 when using flash. Faster with continuous light if you’re shooting a moving model.
- File format: RAW
- White balance: Custom, set with a gray card.
- Focus: Manual on a tripod for mannequin and flat lay. Autofocus with eye detection for models.
Always use a tripod for mannequin and flat lay work. It’s the simplest way to keep every product aligned.
Backgrounds: White, Gray, or Colored?
Pure white backgrounds are the standard for ecommerce clothing photography. They’re required for Amazon main images, and they make products look clean and easy to compare. Most Shopify stores use them too.
Light gray or off-white backgrounds give a softer, more premium look. They also help white garments stand out better than they do on pure white.
Colored or textured backgrounds work for lifestyle images and brand campaigns, but they can clash with some garments and make catalogs look uneven.
Here’s a practical tip: you don’t need to get a perfect white background in camera. It’s hard, especially with white or light-colored clothing. Shoot on a light, evenly lit backdrop, then use professional background removal in post-production. You get a clean, pure white result without blowing out the edges of light fabrics.
Know the Platform Requirements
Every sales channel has its own rules. Breaking them can get your listing suppressed or rejected.
Amazon Apparel Image Guidelines
- Main image must be on a pure white background.
- The product should fill most of the frame (around 85 percent).
- Adult clothing can be shown on a model or photographed flat.
- Children’s and baby clothing must be shown flat, off-model.
- No visible mannequins in the main image.
- No text, logos, watermarks, or extra props in the main image.
- At least 1,000 pixels on the longest side for zoom to work. 1,600 pixels or more is better.
Rules change from time to time, so check Amazon Seller Central’s current style guide before a big shoot.
Shopify
Shopify is more flexible, but square images around 2,048 x 2,048 pixels work well for most themes. The big rule for Shopify is consistency. Use the same aspect ratio for every product so your collection pages line up neatly.
Social Commerce and Marketplaces
Instagram, TikTok Shop, Etsy, Zalando, and other platforms all have their own preferred sizes and ratios. Shoot with a little extra space around the garment so you can crop for different formats without cutting off part of the product.
Don’t Forget Product Video
In 2026, a short product video is almost expected for fashion items. A 10 to 20 second clip showing a model turning, walking, or moving shows fit and fabric in a way still photos can’t.
You don’t need a big production. A few simple clips work well:
- A slow 360-degree turn on a model.
- A walk toward the camera.
- A close-up of the fabric moving or stretching.
- A styling clip showing the garment worn two ways.
Use the same lighting setup as your stills so colors match across photos and video.
Post-Production: Where Clothing Photos Become Sales Photos
Even a perfect shoot needs editing. That’s not a weakness in your photography. It’s just how professional ecommerce clothing images are made.
Here’s what clothing photo editing typically includes:
- Background removal and clipping path: Cleanly separating the garment from the background for a pure white or custom backdrop.
- Ghost mannequin effect: Removing the mannequin and blending in the inside neck and back for a natural 3D look.
- Wrinkle and crease removal: Smoothing leftover creases while keeping natural fabric folds.
- Dust, lint, and loose thread cleanup.
- Color correction and color matching: Making sure the garment matches its real color and every colorway in a product line is accurate.
- Shape correction: Fixing uneven hems, twisted seams, or asymmetrical sleeves.
- Shadow creation: Adding a natural drop shadow or reflection so the product doesn’t look like it’s floating.
- Model retouching: Light skin cleanup and flyaway hair removal, while keeping it natural.
- Consistent cropping and alignment: Same margins and position across the full catalog.
- Resizing and export: Delivering the right file sizes and formats for each platform.
The key word is natural. Over-edited clothing photos look fake, and customers notice. Good retouching makes the garment look its best while still showing exactly what the buyer will receive.
Common Clothing Photography Mistakes to Avoid
We see these problems every week in the images clients send us:
Skipping the steamer. Wrinkles take seconds to remove with steam and much longer to remove in editing.
Inconsistent white balance. One product looks warm, the next looks cool. The catalog looks messy, and colors are unreliable.
Shooting too close with a wide lens. Garments look distorted and out of proportion.
Showing only the front. Shoppers want to see the back, sides, and details. Missing angles create doubt.
Styling that misrepresents fit. Pinning a garment too tightly makes it look slimmer than it is. That leads to unhappy customers and returns.
Poor lighting on dark fabrics. Black clothing turns into a shapeless dark blob with no texture.
Over-editing. Plastic-looking skin, fabric with no texture, and unrealistic colors all hurt trust.
Shooting JPEG only. You lose a lot of color and detail flexibility for editing.
Should You Outsource Clothing Photo Editing?
If you shoot a handful of products a month, editing them yourself can work fine. But the time adds up fast once your catalog grows.
A ghost mannequin image can take a skilled editor a good amount of time to do properly. Multiply that by hundreds of SKUs and several angles each, and editing becomes a full-time job. That’s time you could spend on marketing, sourcing, or customer service.
Outsourcing makes sense when:
- You have more than 50 to 100 images a month.
- You need fast turnaround for new collections or seasonal drops.
- You want consistent results across large batches.
- You need specialist work like ghost mannequin, color matching, or complex background removal.
At Clipping Area, we help fashion brands, Amazon sellers, Shopify stores, boutiques, and photographers turn raw clothing photos into clean, consistent, marketplace-ready images. Our services include ghost mannequin, clipping path, background removal, color correction, clothing retouching, and product video editing. Pricing starts at $0.29 per image, and you can test our quality with 2 free trial edits before committing to anything.
Frequently Asked Questions
How do you take good clothing product photos for ecommerce?
Steam and prepare the garment, use soft even lighting, set a custom white balance, shoot in RAW on a tripod, follow a consistent shot list, and finish with professional editing for background, color, and cleanup.
What makes a clothing product photo sell?
Accurate color, clear fit, visible fabric texture, sharp details, and a clean, consistent look across your store. The photo should answer the shopper’s questions before they ask.
What camera is best for clothing photography?
A mirrorless camera with 24 megapixels or more, RAW shooting, and tethering support works well for most brands. You don’t need a top-end model.
What lens should I use for apparel photography?
A 24-70mm zoom is the most flexible. An 85mm prime is great for on-model shots, a 50mm works well for mannequin and flat lay, and a macro lens is ideal for fabric details.
Is ghost mannequin better than flat lay?
Ghost mannequin shows shape and fit better and looks more premium. Flat lay is cheaper and faster, and it’s required for kids’ and baby clothing on Amazon. Many brands use both.
Should clothing be photographed on a model?
On-model photos show fit and help shoppers imagine wearing the item. They’re great for secondary images. For main images, ghost mannequin or flat lay often gives a cleaner, more consistent catalog.
What background is best for clothing product photos?
Pure white is the standard for ecommerce and is required for Amazon main images. Light gray works well for white garments and a softer brand look.
How do I make clothing colors look accurate in photos?
Use a gray card for custom white balance, shoot a color checker, keep lighting consistent, edit on a calibrated monitor, and compare edits against the real garment.
How many photos should a clothing product listing have?
Aim for at least five to seven: front, back, side, fabric close-up, detail close-up, and one or two on-model or lifestyle shots.
Do I need professional editing for clothing photos?
For a professional, consistent catalog, yes. Editing handles background removal, wrinkles, color matching, ghost mannequin effects, and alignment that’s hard to get perfect in camera.
Final Thoughts
Great ecommerce clothing photography isn’t about having the most expensive gear. It’s about preparation, consistency, and honesty.
Steam your garments. Light them softly. Get the color right. Show every angle a shopper needs. Keep your setup the same from one product to the next. Then finish every image with clean, natural post-production.
Do that, and your product photos stop being a weak point in your store. They become your best salesperson, working around the clock to build trust, lift conversions, and cut down on returns.